The Independent's journalism is supported by our readers. When you purchase through links on our site, we may earn commission.
How to remove U2 album from iTunes, aka 'Songs of the Severely Jaded'
It might have been the largest album release of all time (after all, iTunes has more than half a billion customers) but that doesn't mean everyone wants it

Apple’s launch of the iPhone 6 and iPhone 6 Plus may not have held many surprises technologically speaking, but it’s safe to say that no-one saw U2 coming.
The Irish pop-rockers took to the stage in California to announce the launch of their new album Songs of Innocence. For free. For every iTunes user. Including the ones that, you know, don’t really like U2.
It might not bother Bono and the lads that some people on Twitter are upset about the move (after all, they’re reportedly receiving a “unspecified fee as a blanket royalty” as well as a marketing campaign “worth up to $100 million” – perfect for shifting more of their money-making back catalogue) but in case you are, here’s how to remove the album from your iTunes.
Firstly, we should point out that the album has been distributed to iTunes users via iCloud – which means it'll show up in your library but unless you've got auto-downloads turned on it won't actually be stored locally on your computer or iPhone.
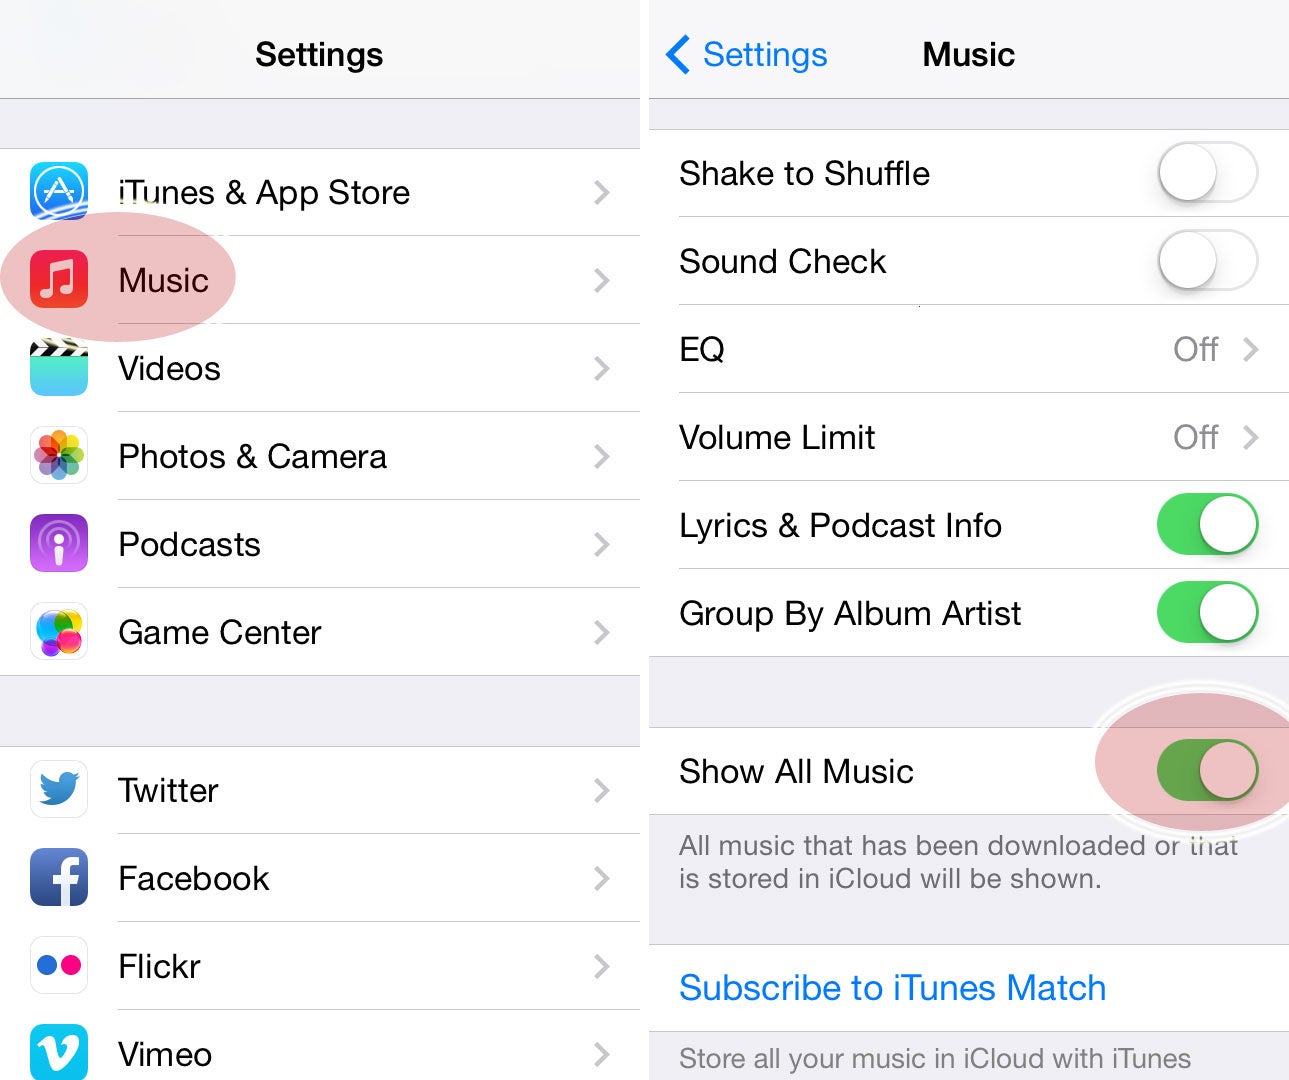
If when you navigate to the album you see little cloud icons with download arrows by every song, then you haven't downloaded it. If those icons aren't there then swipe left on each song and click the big red delete button.
Now, however, you need to hide the album from iTunes (yes, even if you've just deleted it). To do this you need to open up iTunes on a computer, log into your account, find the album, hover over the cover and then click the X in the top-left.
If it keeps on re-appearing then you need to turn off auto-downloads. You can do this from your computer or from your iPhone - just navigate to settings, scroll down to iTunes & App Store, then turn off Automatic Downloads. There - all done.
Join our commenting forum
Join thought-provoking conversations, follow other Independent readers and see their replies
Comments