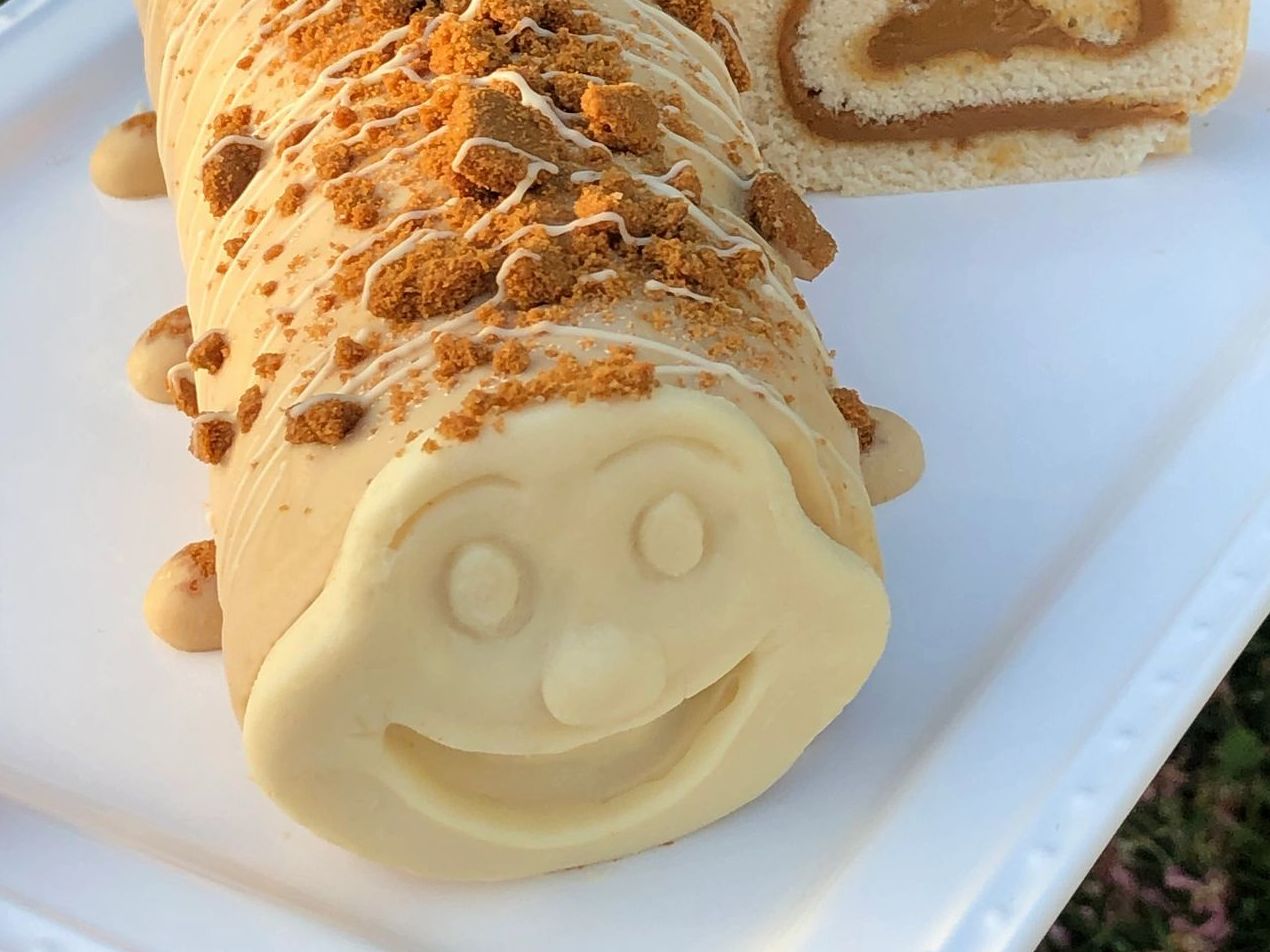
Baker creates vegan recipe for Biscoff version of Colin the Caterpillar cake
‘A marriage of two greats!’ baker describes the cake

Throughout lockdown, budding cooks have been exploring their creativity in the kitchen, making recipes ranging from traditional Victoria sponge cake to Wagamama’s katsu curry.
A baker who specialises in vegan recipes has gone one step further, putting a unique spin on one of the nation’s most recognisable cakes.
The Biscoff Charlie Caterpillar Cake, as it is named, is the brainchild of vegan baker Beth, who goes by Vecreation on Instagram and on her baking blog.
Beth created the recipe as part of Vegan Food UK’s veganised recipe of the week Instagram challenge, fulfilling the dreams of Biscoff lovers everywhere.
Made from a combination of vegan white chocolate, Biscoff spread and biscuits, the final product surely rivals the much-beloved Colin the Caterpillar cake from which it takes inspiration.
Here is everything you need to make your very own Biscoff Charlie Caterpillar Cake.
Ingredients
For the sponge
- Aquafaba (straight from a supermarket can of chickpeas)
- 38g vegan white chocolate (Sainsbury’s own)
- 100g granulated sugar
- ½ – 1tsp vanilla
- 170g plain flour
- 1¼tsp baking powder
- Pinch of salt
For decoration and filling:
- 200g vegan white chocolate (Sainsbury’s own)
- 200g Biscoff spread (for the chocolate)
- 6tbs Biscoff spread (for the filling)
- 2 Biscoff biscuits
Method
- Preheat your oven to 180C (with fan).
- Line your baking tray with baking paper, leaving longer pieces at each end. You will need a baking tray or a Swiss roll tray that measures at 33cm x 23cm.
- Pour the flour and baking powder into a bowl and mix.
- Pour the aquafaba, sugar, vanilla and 38g chocolate into a saucepan. Place onto a medium heat and stir until just melted.
- Once melted, add the mixture to the bowl containing the flour and baking powder. Mix until you have a thick, smooth batter.
- Pour the batter into the baking tray, making sure the mixture spreads to all the edges. If you need to, shake the tray to ensure the batter is evenly spread and level.
- Cook in the oven for seven minutes.
- Once you have removed the sponge from the oven, transfer the cake from the baking paper onto a cooling rack and leave it to cool completely.
- Spoon the 6tbs of Biscoff spread onto the cooled sponge and spread evenly.
- Using the baking paper to help you, gently roll the sponge. Once you have achieved a cylinder shape wrapped in greaseproof paper, place in the fridge for 30 minutes, keeping the seam side down.
- Next, crush the two Biscoff biscuits.
- After the 30 minutes in the fridge is up, take out your cake, gently unwrap it from the baking paper and place it on a cooling rack, making sure you place something underneath to catch excess chocolate.
- On a low heat, melt the 200g of white chocolate together with the 20g of Biscoff spread.
- Once this combination is melted, pour it all over the cake.
- Sprinkle your biscuits on top of the cake, before placing it back into the fridge until the chocolate has set.
- Keep the excess chocolate on hand for extra drizzle, which you can place on the cake once the chocolate has set.
Extra tips
- Use a piping bag to pipe the chocolate onto the cake. This will help you to spread the chocolate more evenly.
- Once you have poured your chocolate onto the cake, gently “bash” the cooling rack on your counter. This will help the chocolate spread more evenly.
- To make the cake look neater, use a knife to remove any drips of chocolate coming off the side of the cake. This will also stop the cake sticking to the cooling rack.
- If you have a face to add to the cake, you can do this later once the chocolate has set. Use melted chocolate as an adhesive to stick the face to the cake.
Subscribe to Independent Premium to bookmark this article
Want to bookmark your favourite articles and stories to read or reference later? Start your Independent Premium subscription today.

Join our commenting forum
Join thought-provoking conversations, follow other Independent readers and see their replies