Tomato tart, sweetcorn pasta and other summery suppers to try this week
From seasonal veggie tarts to an upgraded cheese toastie, Hannah Twiggs goes in search of minimum-effort, maximum-flavour recipes to enjoy when the weather is hot

Sign up to IndyEat's free newsletter for weekly recipes, foodie features and cookbook releases
Get our food and drink newsletter for free
There’s nothing better – or easier – to throw together when it’s a scorcher outside than a seasonal veggie tart. And ’tis the season for tomatoes.
A visit to the farmers market or your local deli to pick up a punnet of your favourite varieties is worth it for our tomato tart recipe below. The weirder the shape, the better. Also pick up a roll of puff pastry, mustard and a local brie, and you’ve got a minimum-effort, maximum-flavour summer supper.
Seasonal veg plus gooey cheese is also a winning formula in our sweetcorn and ricotta pasta, a light but indulgent dish that’s perfect in the summer months. It’s best to make when sweetcorn is at its best, but frozen, tinned or leftover BBQ corn on the cob work just as well.
It’s hard to beat a classic grilled cheese sandwich but our kimchi cheese toastie might have you never looking back. Upgrade it even further by frying it in sesame oil or adding crispy bacon. Sandwiches for dinner? Who’s judging?
As pleasing to the eye as it is to the palate, our miso salmon noodle bowl is ideal for summer nights when you don’t want to spend too much time slaving away over a hot oven.
Lastly, hasslebacking your chicken not only injects it with tons of flavour, it also makes it look like you spent hours fussing in the kitchen. For a low-key, high-impact dinner party dish, our Greek stuffed chicken ticks all the boxes.
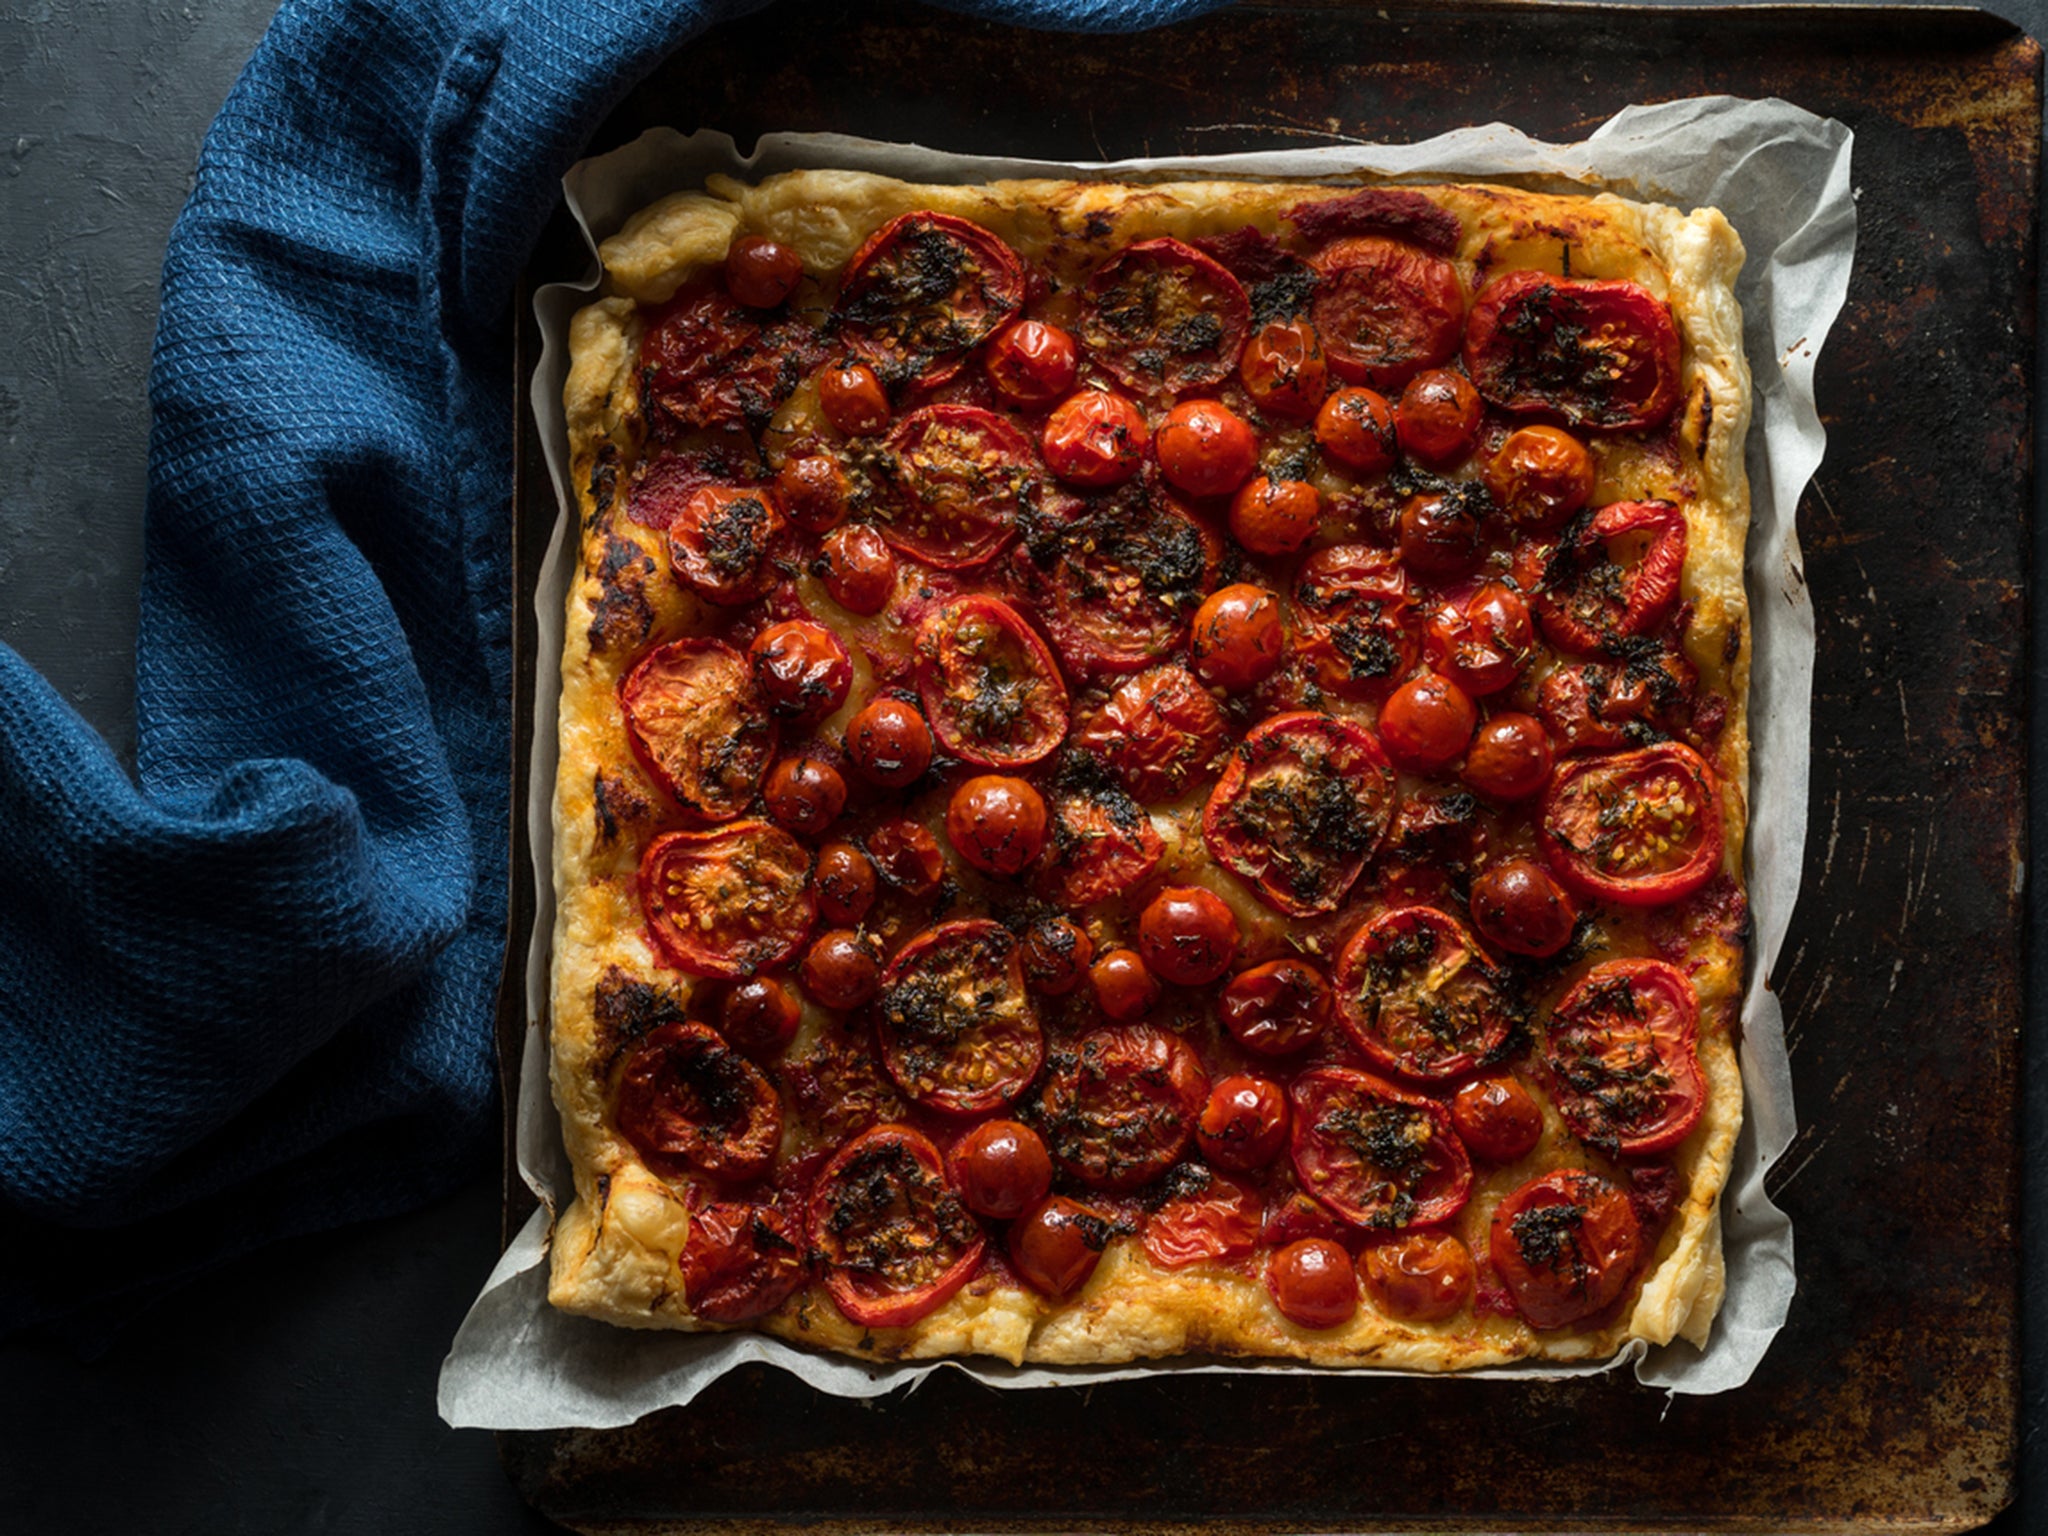
Tomato and brie tart
A medley of in-season tomato varieties, tangy mustard, creamy brie and briny capers come together in a flaky pastry crust. Serve it alongside fresh salad greens for a perfect warm-weather meal.
Serves: 6
Prep time: 20 minutes | Cooking time: 30 minutes
Ingredients:
For the tart:
1 sheet of shop-bought puff pastry, thawed
2 large ripe tomatoes, mixed varieties (such as heirloom or beefsteak)
170g brie cheese, sliced
2 tbsp Dijon mustard
1 tbsp capers, drained and chopped
1 tbsp fresh thyme leaves
Salt and black pepper, to taste
1 egg, beaten (for egg wash)
Olive oil, for drizzling
For the salad:
Mixed salad greens (lettuce, rocket, spinach, etc)
Balsamic vinaigrette dressing (shop-bought or homemade)
Method:
1. Preheat your oven to 200C (400F).
2. Unroll the thawed puff pastry sheet on a parchment-lined baking tray. Use a fork to prick the pastry all over, leaving a border of about 1½cm around the edges. This will prevent excessive rising of the centre.
3. Evenly spread the Dijon mustard over the center of the puff pastry, staying within the border.
4. Arrange the sliced brie cheese on top of the mustard.
5. Slice the tomatoes into medium-thin rounds and arrange them over the brie in a single layer, slightly overlapping. Sprinkle the chopped capers and fresh thyme leaves over the tomatoes. Season with salt and black pepper.
6. Gently fold the edges of the puff pastry over the filling, creating a border around the tart.
7. Brush the folded edges of the pastry with the beaten egg. This will give the tart a beautiful golden-brown colour as it bakes.
8. Place the baking tray in the preheated oven and bake for about 25-30 minutes, or until the pastry is golden and crisp, and the tomatoes are tender.
9. Once baked, remove the tart from the oven and drizzle a little olive oil over the tomatoes. Allow the tart to cool slightly before slicing and serving.
10. While the tart is baking, prepare the salad greens by washing and drying them. Toss the greens with balsamic vinaigrette dressing.
11. Serve slices of the tomato and brie tart alongside the dressed salad greens for a balanced and flavourful meal.
Sweetcorn and ricotta pasta
The sweetness of corn, the creamy richness of ricotta and the aromatic touch of basil come together to create a delightful dish.
Serves: 4
Prep time: 15 minutes | Cooking time: 20 minutes
Ingredients:
300g dried pasta (such as penne or fusilli)
200g sweetcorn kernels (fresh, frozen or tinned)
250g ricotta cheese
2 tbsp olive oil
1 small onion, finely chopped
2 cloves garlic, minced
1 tsp dried oregano
1 tsp dried thyme
Salt and black pepper, to taste
Zest of 1 lemon
5g fresh basil leaves, torn
Grated parmesan cheese, for serving
Method:
1. Bring a large pot of salted water to a boil. Add the pasta and cook according to the package instructions until al dente. Reserve about ½ cup of pasta cooking water, then drain the pasta and set aside.
2. In a large frying pan, heat the olive oil over medium heat. Add the chopped onion and sauté until translucent, about 3-4 minutes. Stir in the minced garlic and cook for an additional 1 minute until fragrant.
3. Add the sweetcorn kernels to the pan and sauté for about 3-4 minutes until they are heated through. Sprinkle in the dried oregano and thyme, and season with salt and black pepper to taste. Stir to combine.
4. Add the cooked pasta to the pan with the sweetcorn mixture. Toss to combine and coat the pasta with the flavours.
5. Gently fold in the ricotta cheese, creating a creamy sauce that coats the pasta. If the mixture seems too dry, add a bit of the reserved pasta cooking water to reach your desired consistency. Grate the lemon zest over the pasta for a burst of freshness.
6. Just before serving, stir in the torn basil leaves, reserving a few leaves for garnish.
7. Portion the sweetcorn and ricotta pasta into bowls. Garnish with the reserved basil leaves and a sprinkle of grated parmesan cheese.
Kimchi cheese toastie
Elevate the classic grilled cheese sandwich with an exciting twist. This kimchi cheese toastie combines the gooey comfort of melted cheese with the spicy tanginess of kimchi. A perfect balance of flavours that will satisfy your cravings.
Serves: 2
Prep time: 10 minutes | Cooking time: 10 minutes
Ingredients:
4 slices of thick-cut bread (white, whole wheat, or sourdough)
100g grated cheddar cheese
100g kimchi, drained and chopped
1 tbsp butter, softened
1 tsp sesame oil
½ tsp gochugaru (Korean red pepper flakes), optional
Freshly ground black pepper, to taste
Chopped fresh chives or green onions, for garnish
Method:
1. If using a sandwich press, preheat it according to the manufacturer’s instructions. If using a pan, place it over medium heat.
2. In a bowl, combine the chopped kimchi, sesame oil, and gochugaru (if using). Mix well to evenly distribute the flavours.
3. Take two slices of bread and spread a thin layer of softened butter on one side of each slice. This will be the outer side of the sandwich.
4. Place the buttered side of the bread slices facing down. On two of the slices, evenly distribute half of the grated cheddar cheese. Top the cheese with the kimchi mixture, spreading it out evenly. Sprinkle black pepper to taste. Finish with the remaining cheddar cheese and cover with the remaining slices of bread, buttered side facing up.
5. Place the assembled sandwiches on the preheated sandwich press or in the heated pan. If using a pan, you can place another heavy pan or a weighted lid on top to press the sandwiches down. Cook for about 3-4 minutes on each side, or until the bread is golden brown and the cheese has melted.
6. Once the sandwiches are cooked and the cheese is gooey and melted, remove them from the press or pan. Allow them to cool for a minute before slicing. Sprinkle chopped chives or green onions on top for an extra burst of flavor.
Miso salmon noodle bowl
Tender miso-glazed salmon, combined with vibrant edamame, creamy avocado, crunchy grated carrots and refreshing cucumbers, all served over a bed of noodles. A nourishing and satisfying meal that’s as pleasing to the eyes as it is to the palate.
Serves: 2
Prep time: 20 minutes | Cooking time: 15 minutes
Ingredients:
For the miso-glazed salmon:
2 salmon fillets (about 150g each)
2 tbsp white miso paste
1 tbsp maple syrup or honey
1 tbsp soy sauce
1 tsp grated ginger
1 clove garlic, minced
1 tbsp olive oil
Black pepper, to taste
For the noodle bowl:
150g noodles of your choice (soba, udon, or rice noodles)
100g edamame beans, cooked and shelled
1 ripe avocado, sliced
1 small carrot, grated
1 small cucumber, julienned
Sesame seeds, for garnish
Fresh coriander or parsley, chopped, for garnish
Lime wedges, for serving
Method:
1. In a bowl, whisk together the white miso paste, maple syrup (or honey), soy sauce, grated ginger, minced garlic, and olive oil to make the marinade.
2. Place the salmon fillets in a shallow dish and coat them with the marinade. Allow the salmon to marinate for at least 15 minutes.
3. Preheat the grill or oven to medium-high heat. If grilling, lightly oil the grill grates to prevent sticking.
4. Place the marinated salmon fillets on the grill or in the oven. Cook for about 4-5 minutes on each side, or until the salmon is cooked through and flakes easily with a fork. Baste with any remaining marinade while cooking. Remove from heat and set aside.
5. Cook the noodles according to the package instructions. Drain and rinse under cold water to stop the cooking process. Set aside.
6. Divide the cooked noodles between two bowls.
7. Top the noodles with cooked and shelled edamame, sliced avocado, grated carrot, and julienned cucumber.
8. Gently flake the cooked miso-glazed salmon with a fork into bite-sized pieces.
9. Distribute the flaked salmon over the prepared noodle bowls.
10. Sprinkle sesame seeds and chopped cilantro or parsley over the bowls.
11. Serve the miso salmon noodle bowls with lime wedges on the side for an extra burst of freshness.
Greek stuffed hassleback chicken
Transport your taste buds to the Mediterranean with this Greek-inspired stuffed chicken recipe. Succulent chicken breast fillets are hasslebacked and filled with a delightful combination of courgette, tomatoes, red onion and lemons. Topped with crumbled feta cheese and fragrant dill and parsley, this dish is baked to perfection for a burst of vibrant flavours.
Serves: 4
Prep time: 20 minutes | Cooking time: 30 minutes
Ingredients:
4 chicken breast fillets
1 medium courgette, thinly sliced
2 medium tomatoes, thinly sliced
1 small red onion, thinly sliced
1 lemon, thinly sliced
150g feta cheese, crumbled
2 tbsp olive oil
Salt and black pepper, to taste
Fresh dill and parsley, chopped, for garnish
Method:
1. Preheat your oven to 200C.
2. Place one chicken fillet on a cutting board. Using a sharp knife, make a series of parallel cuts about 1cm apart along the length of the fillet, taking care not to cut all the way through.
3. Repeat the process for the remaining fillets.
4. Gently open the cuts of each fillet and stuff with alternating slices of courgette, tomato, red onion, and lemon. This will create a colourful and flavourful stuffing.
5. Place the stuffed chicken fillets in a baking dish. Drizzle olive oil over the fillets and season with salt and black pepper to taste.
6. Bake the stuffed chicken fillets in the preheated oven for about 25-30 minutes or until the chicken is cooked through and no longer pink in the centre.
7. Remove the baking dish from the oven and sprinkle the crumbled feta cheese over the stuffed fillets.
8. Return the dish to the oven and bake for an additional 5-7 minutes, or until the cheese is melted and slightly golden.
9. Once the chicken is cooked and the feta is golden, remove the dish from the oven. Sprinkle freshly chopped dill and parsley over the stuffed chicken.
10. Serve alongside your favourite Mediterranean sides, such as rice, roasted potatoes or a fresh Greek salad.
Subscribe to Independent Premium to bookmark this article
Want to bookmark your favourite articles and stories to read or reference later? Start your Independent Premium subscription today.
Join our commenting forum
Join thought-provoking conversations, follow other Independent readers and see their replies