Leiths’ guide to making perfect shortcrust pastry
How do you make fresh pastry from scratch? All is revealed in the latest instalment of our collaboration with Leiths School of Food and Wine
What makes this subject so fascinating is that all pastries use the same basic ingredients: flour, fat, salt and liquid. It is the different proportions of these ingredients and the techniques employed that create such an impressive array of pastries for use in so many different ways, both savoury and sweet. Inexperienced cooks often shy away from pastry-making, opting for ready-made products instead, but the skills required are not that difficult to master. A basic knowledge of the techniques and an understanding of the simple rules will give you the confidence to make excellent pastry
Pastry quantities: For ease, the recipes below call for a quantity (or half-quantity) of the specific pastry. If you are using a smaller flan ring, you will need less pastry. Don’t throw away excess pastry as it freezes well. Trimmings come in handy for patching and repairing pastry cases after baking blind. Pastry weights tend to refer to the flour quantity rather than the total weight of the pastry. So if a recipe calls for 250g shortcrust pastry, it means pastry made using 250g flour. However, if you are buying ready-made pastry, the weight of pastry stated on the packet is the total weight, not just the amount of flour.
Gluten: Wheat flour, which is most commonly used for pastry, contains gluten, which begins to develop as soon as flour comes into contact with liquid. When making shortcrust pastry you need to restrict the development of gluten, in order to keep the pastry short and tender. This is in contrast to making bread, where the aim is to develop the gluten to create an elastic texture and tough crust, achieved by adding plenty of water and vigorous kneading. Layered pastry requires some gluten development to strengthen the layers.
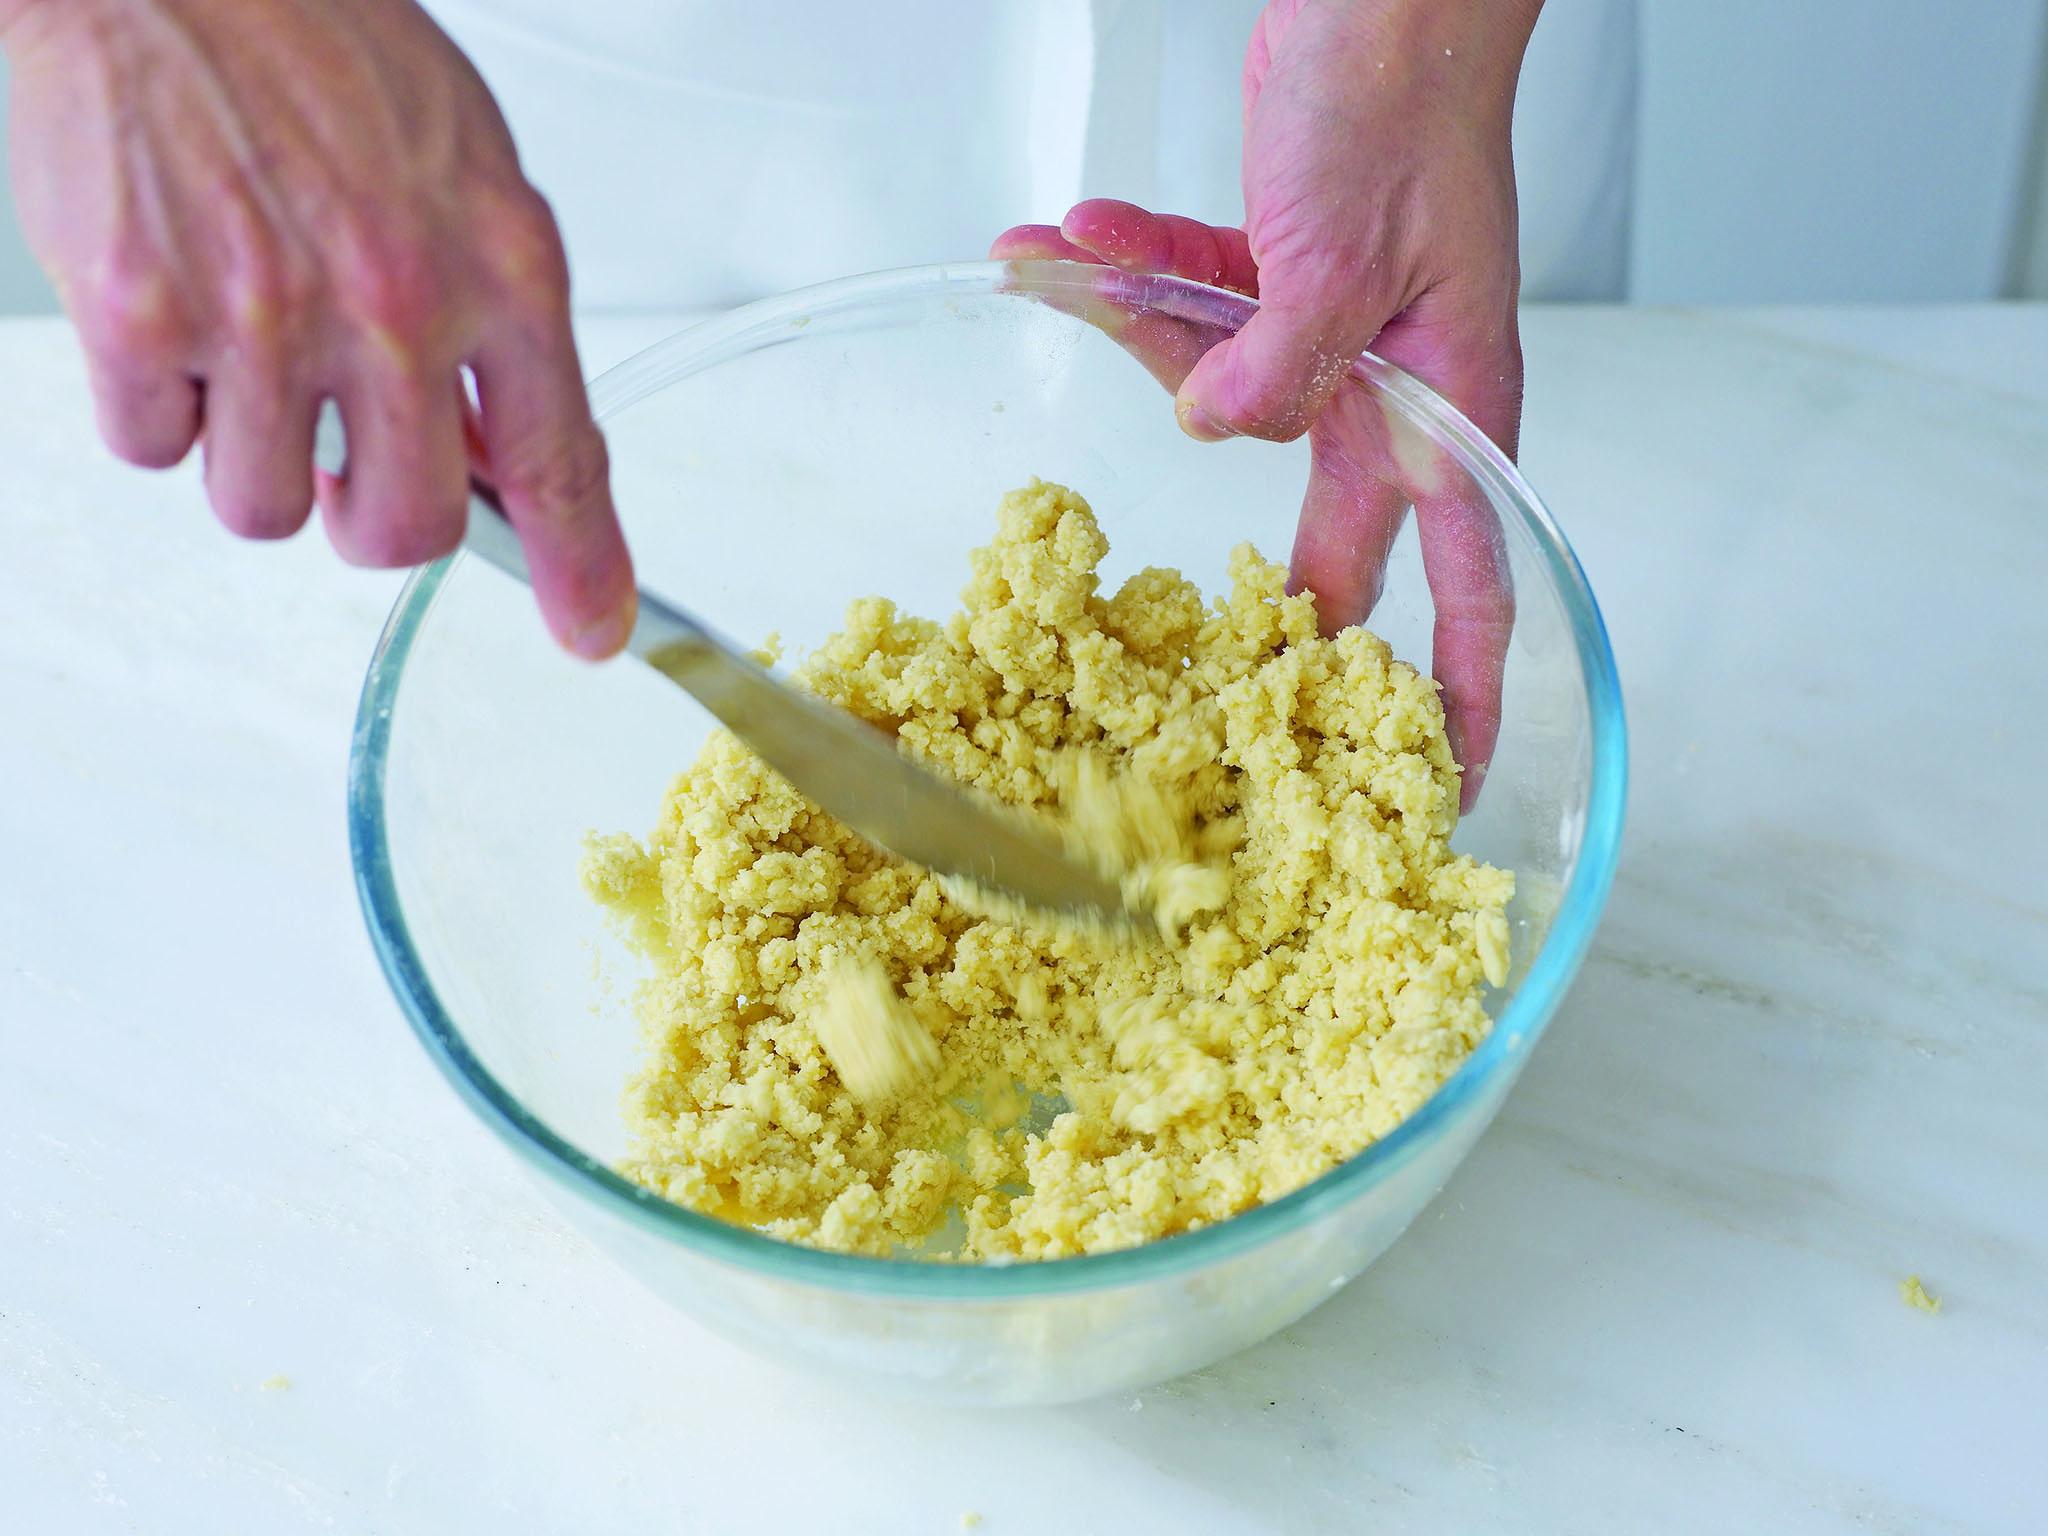
There will always be some gluten development in pastry, just by adding liquid to flour but the extent can be controlled if you have an understanding of the process. Use the correct pastry-making technique and remember to rest the pastry to prevent shrinkage. The most important point to remember about gluten and pastry-making is that overworking (or kneading) the pastry will continue to develop the gluten and result in tough pastry, as will adding too much liquid.
Fat: Although there are some types of pastry that are made using oil, the fat used in traditional pastry is one that is solid at room temperature. These include lard – an excellent fat for creating shortness, such a prized quality in pastry. However, it is relatively tasteless, so a combination of lard and butter is often used in shortcrust pastry. White vegetable shortening is a suitable vegetarian substitute for lard.
Butter is the perfect fat as it provides both shortness and flavour. Many chefs prefer unsalted butter, as it has a fresher, purer flavour, but salted butter can be used in all recipes. You will need to adjust the amount of salt added to the pastry according to the type of butter used.
Margarine: This will produce a short pastry. However, it softens very quickly and doesn’t provide the same rich flavour that butter does.
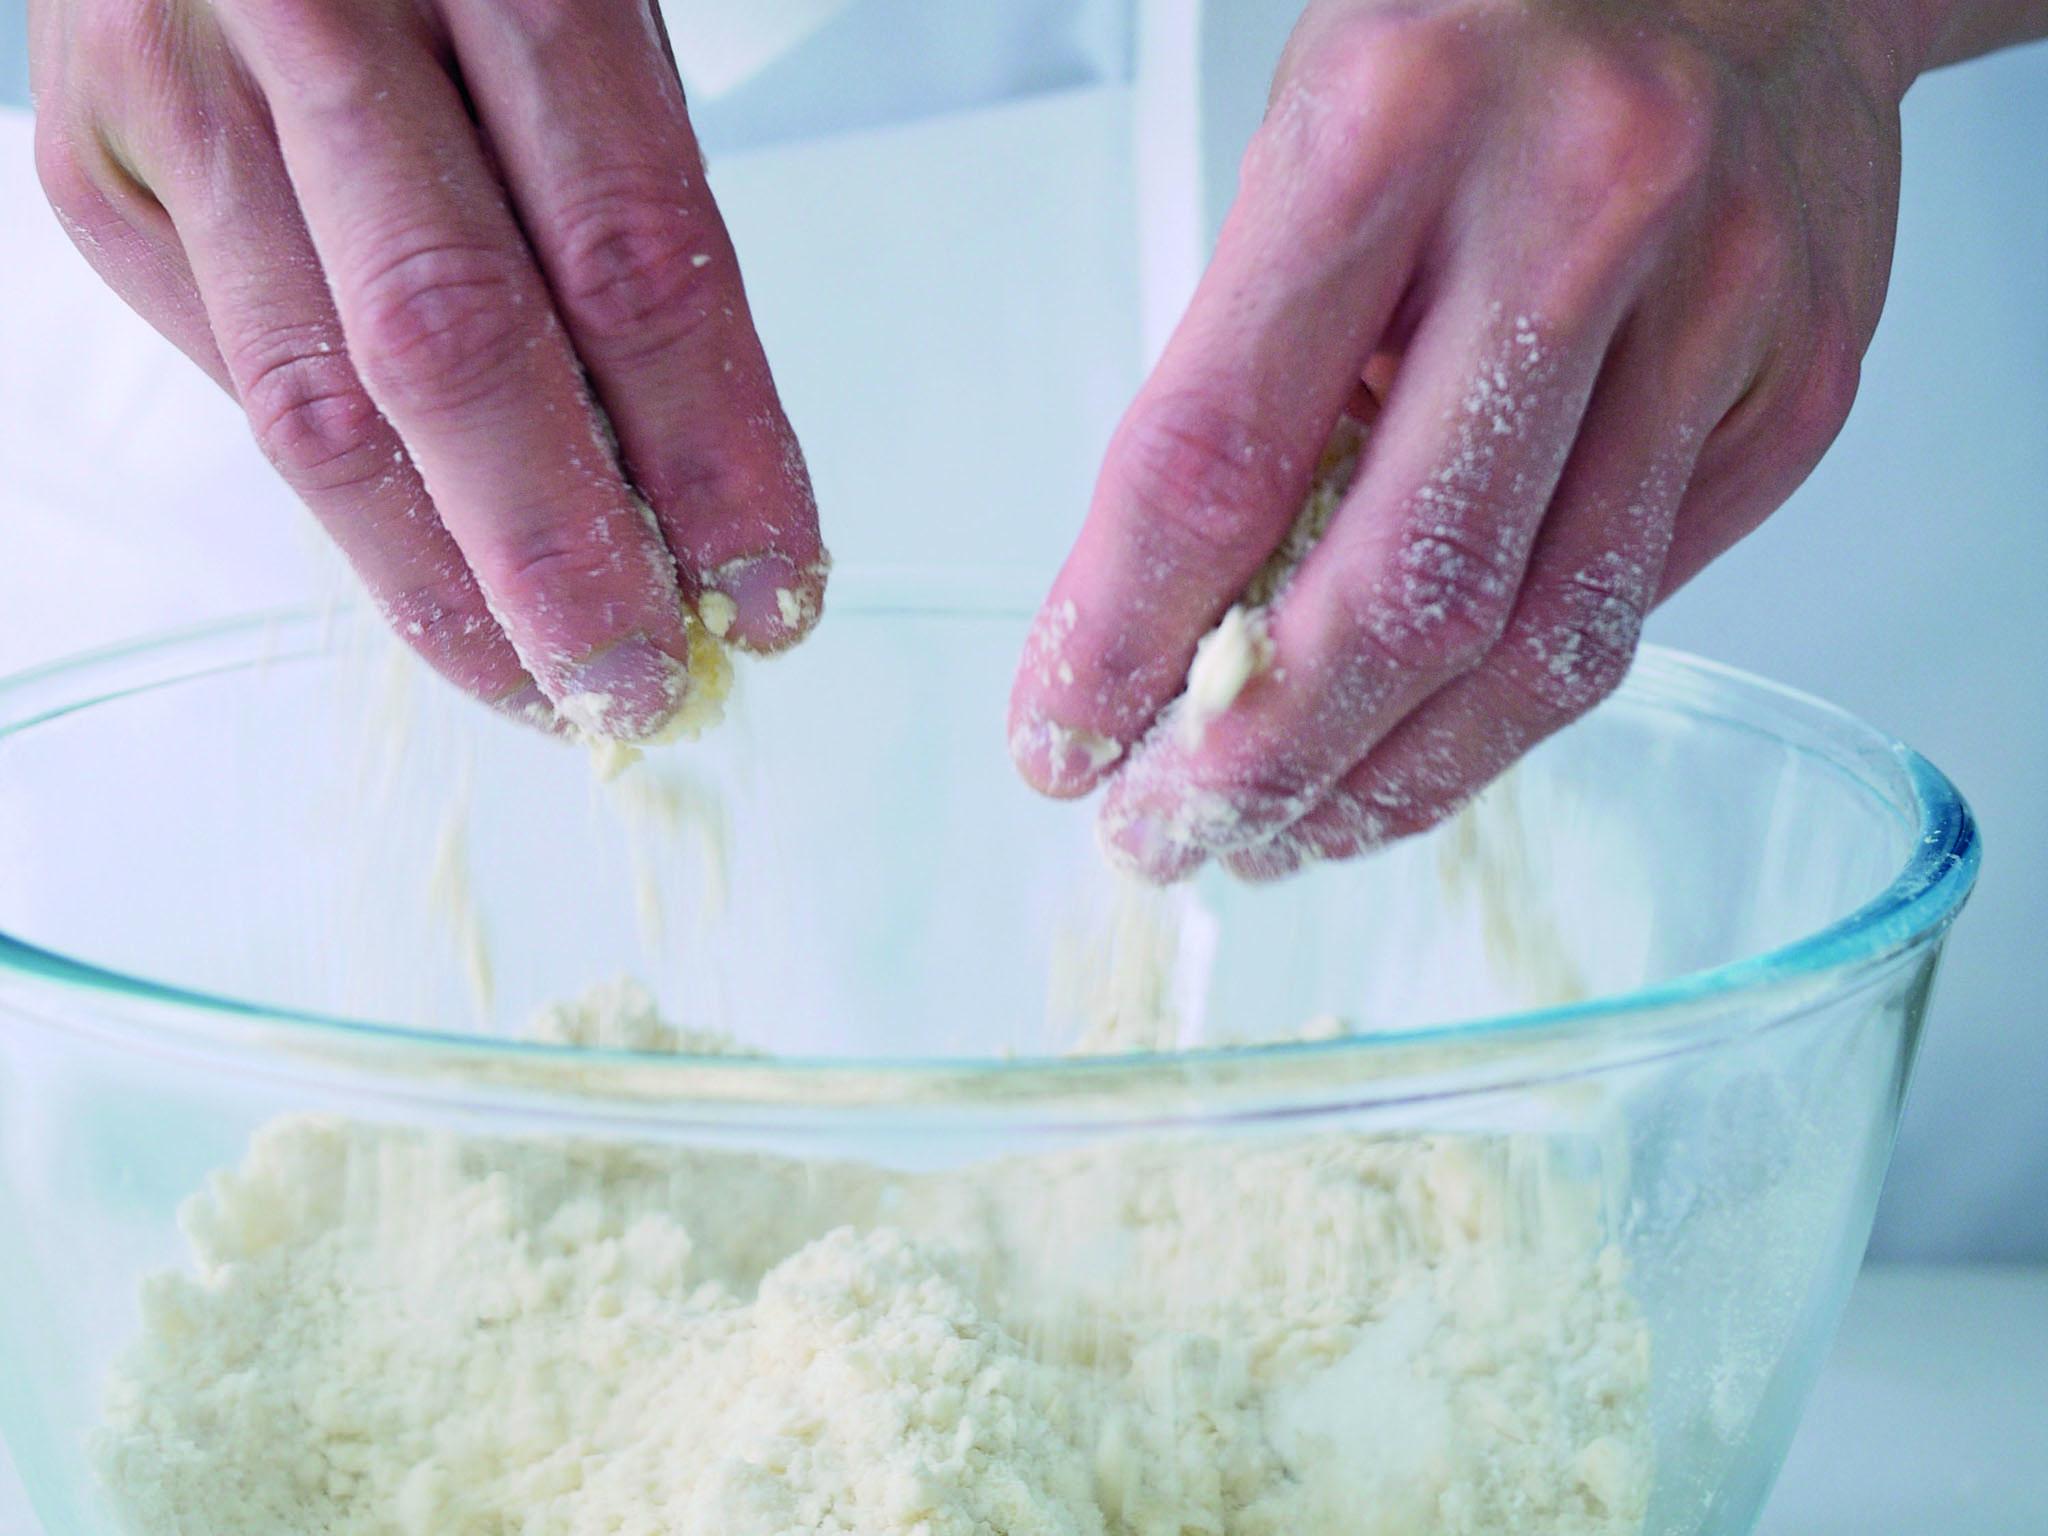
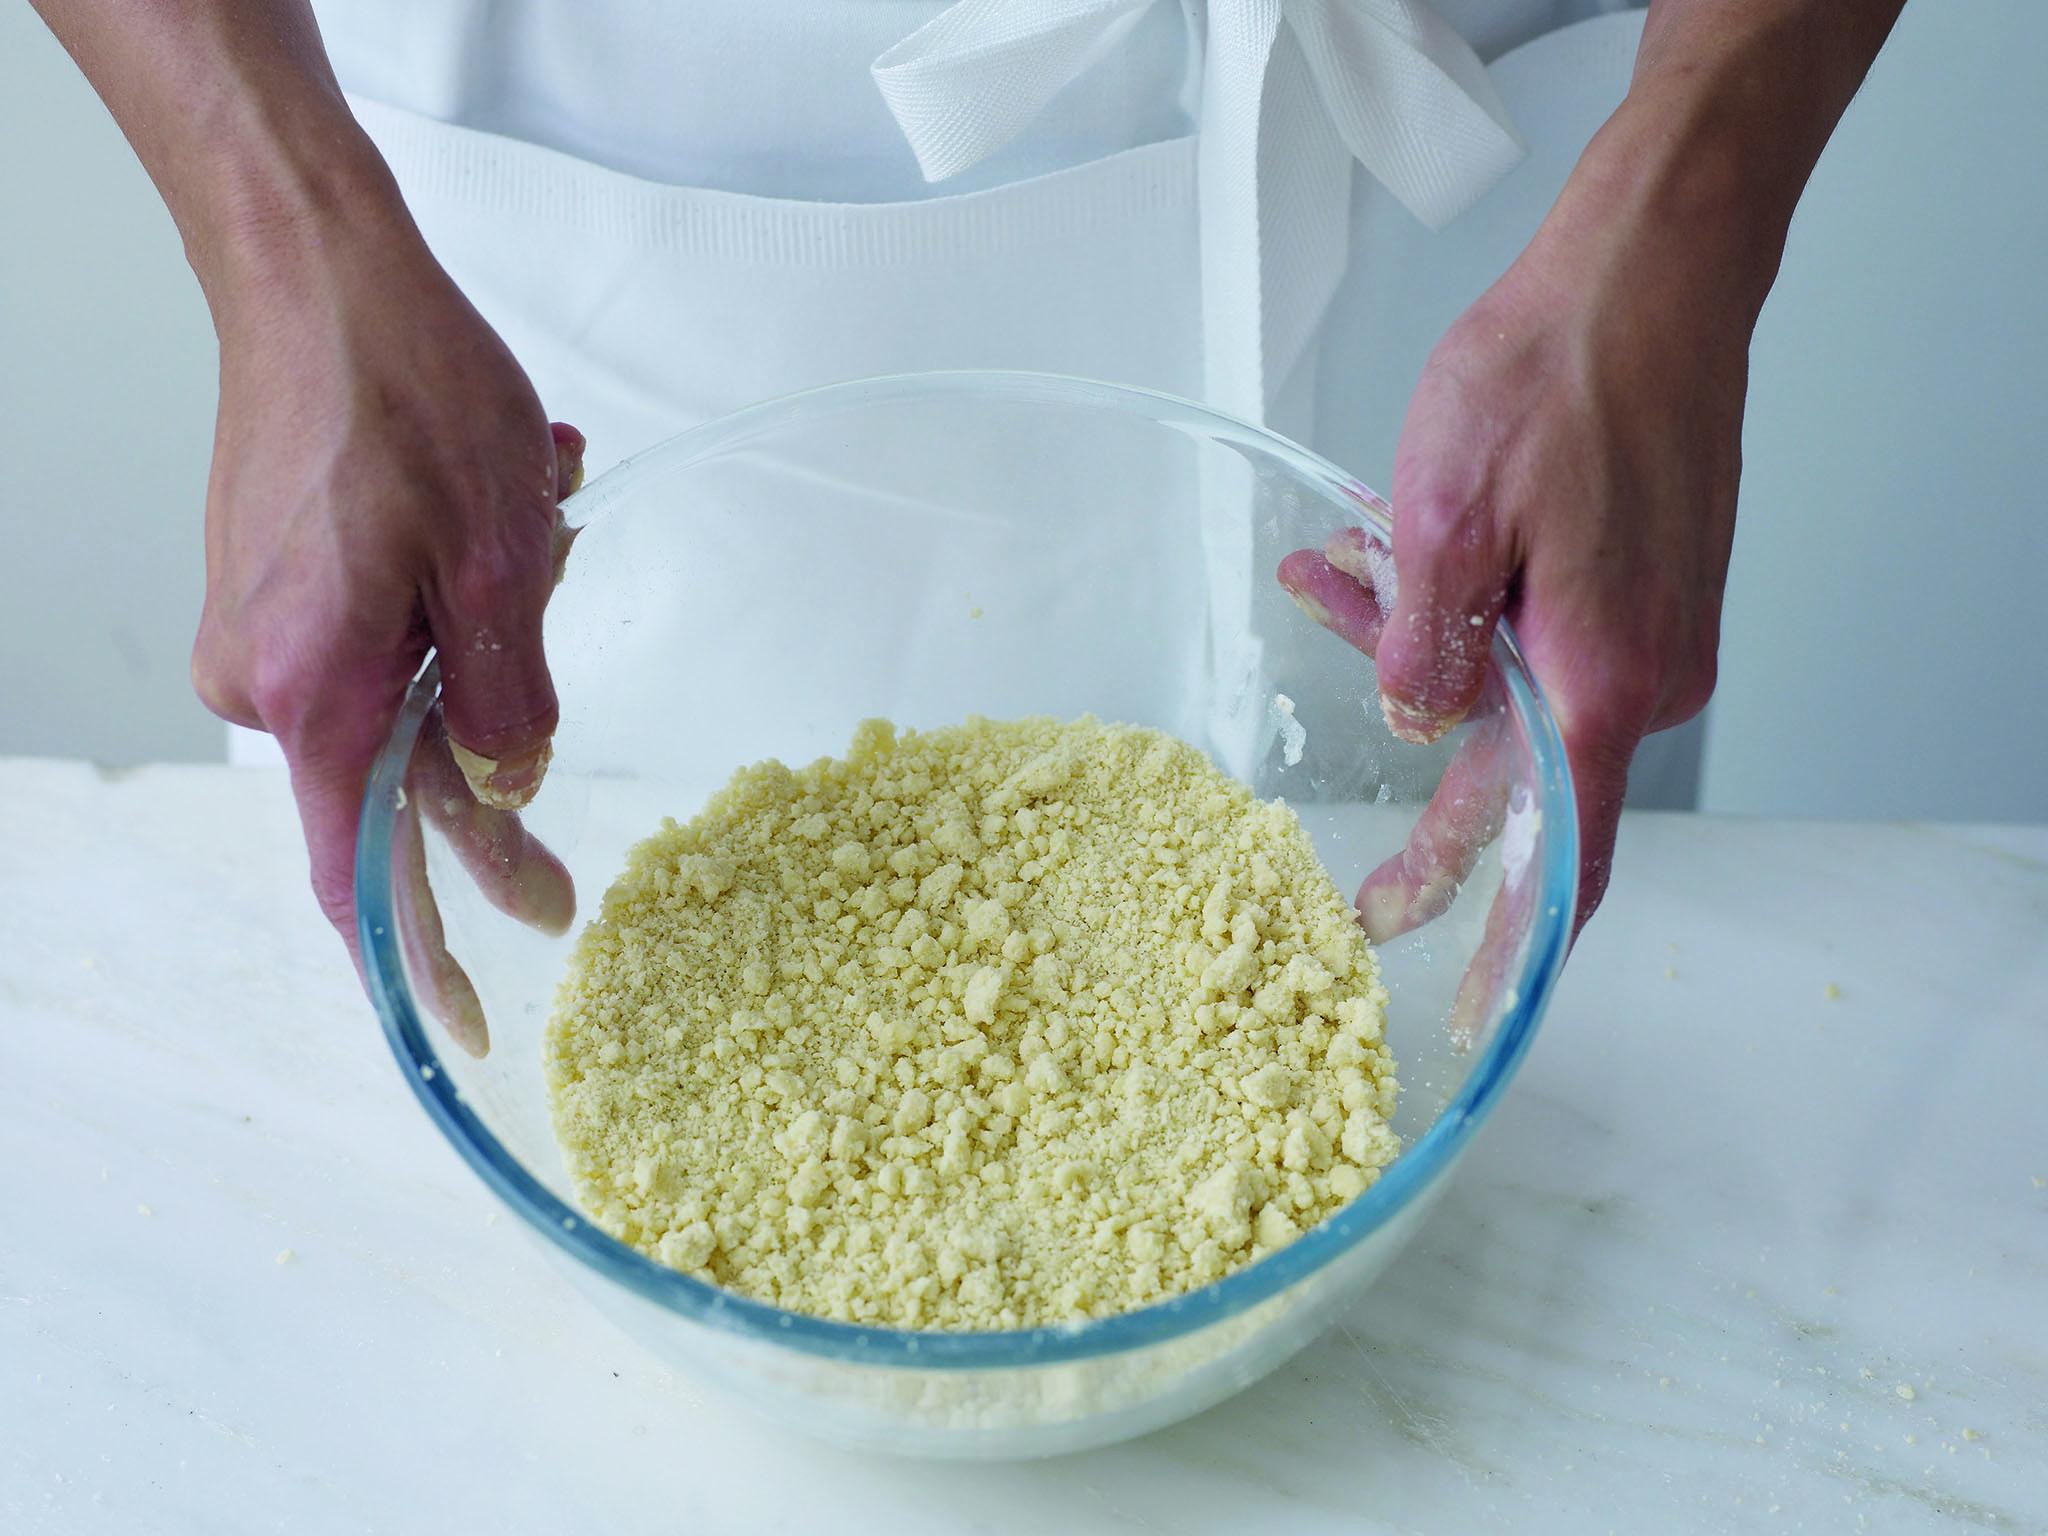
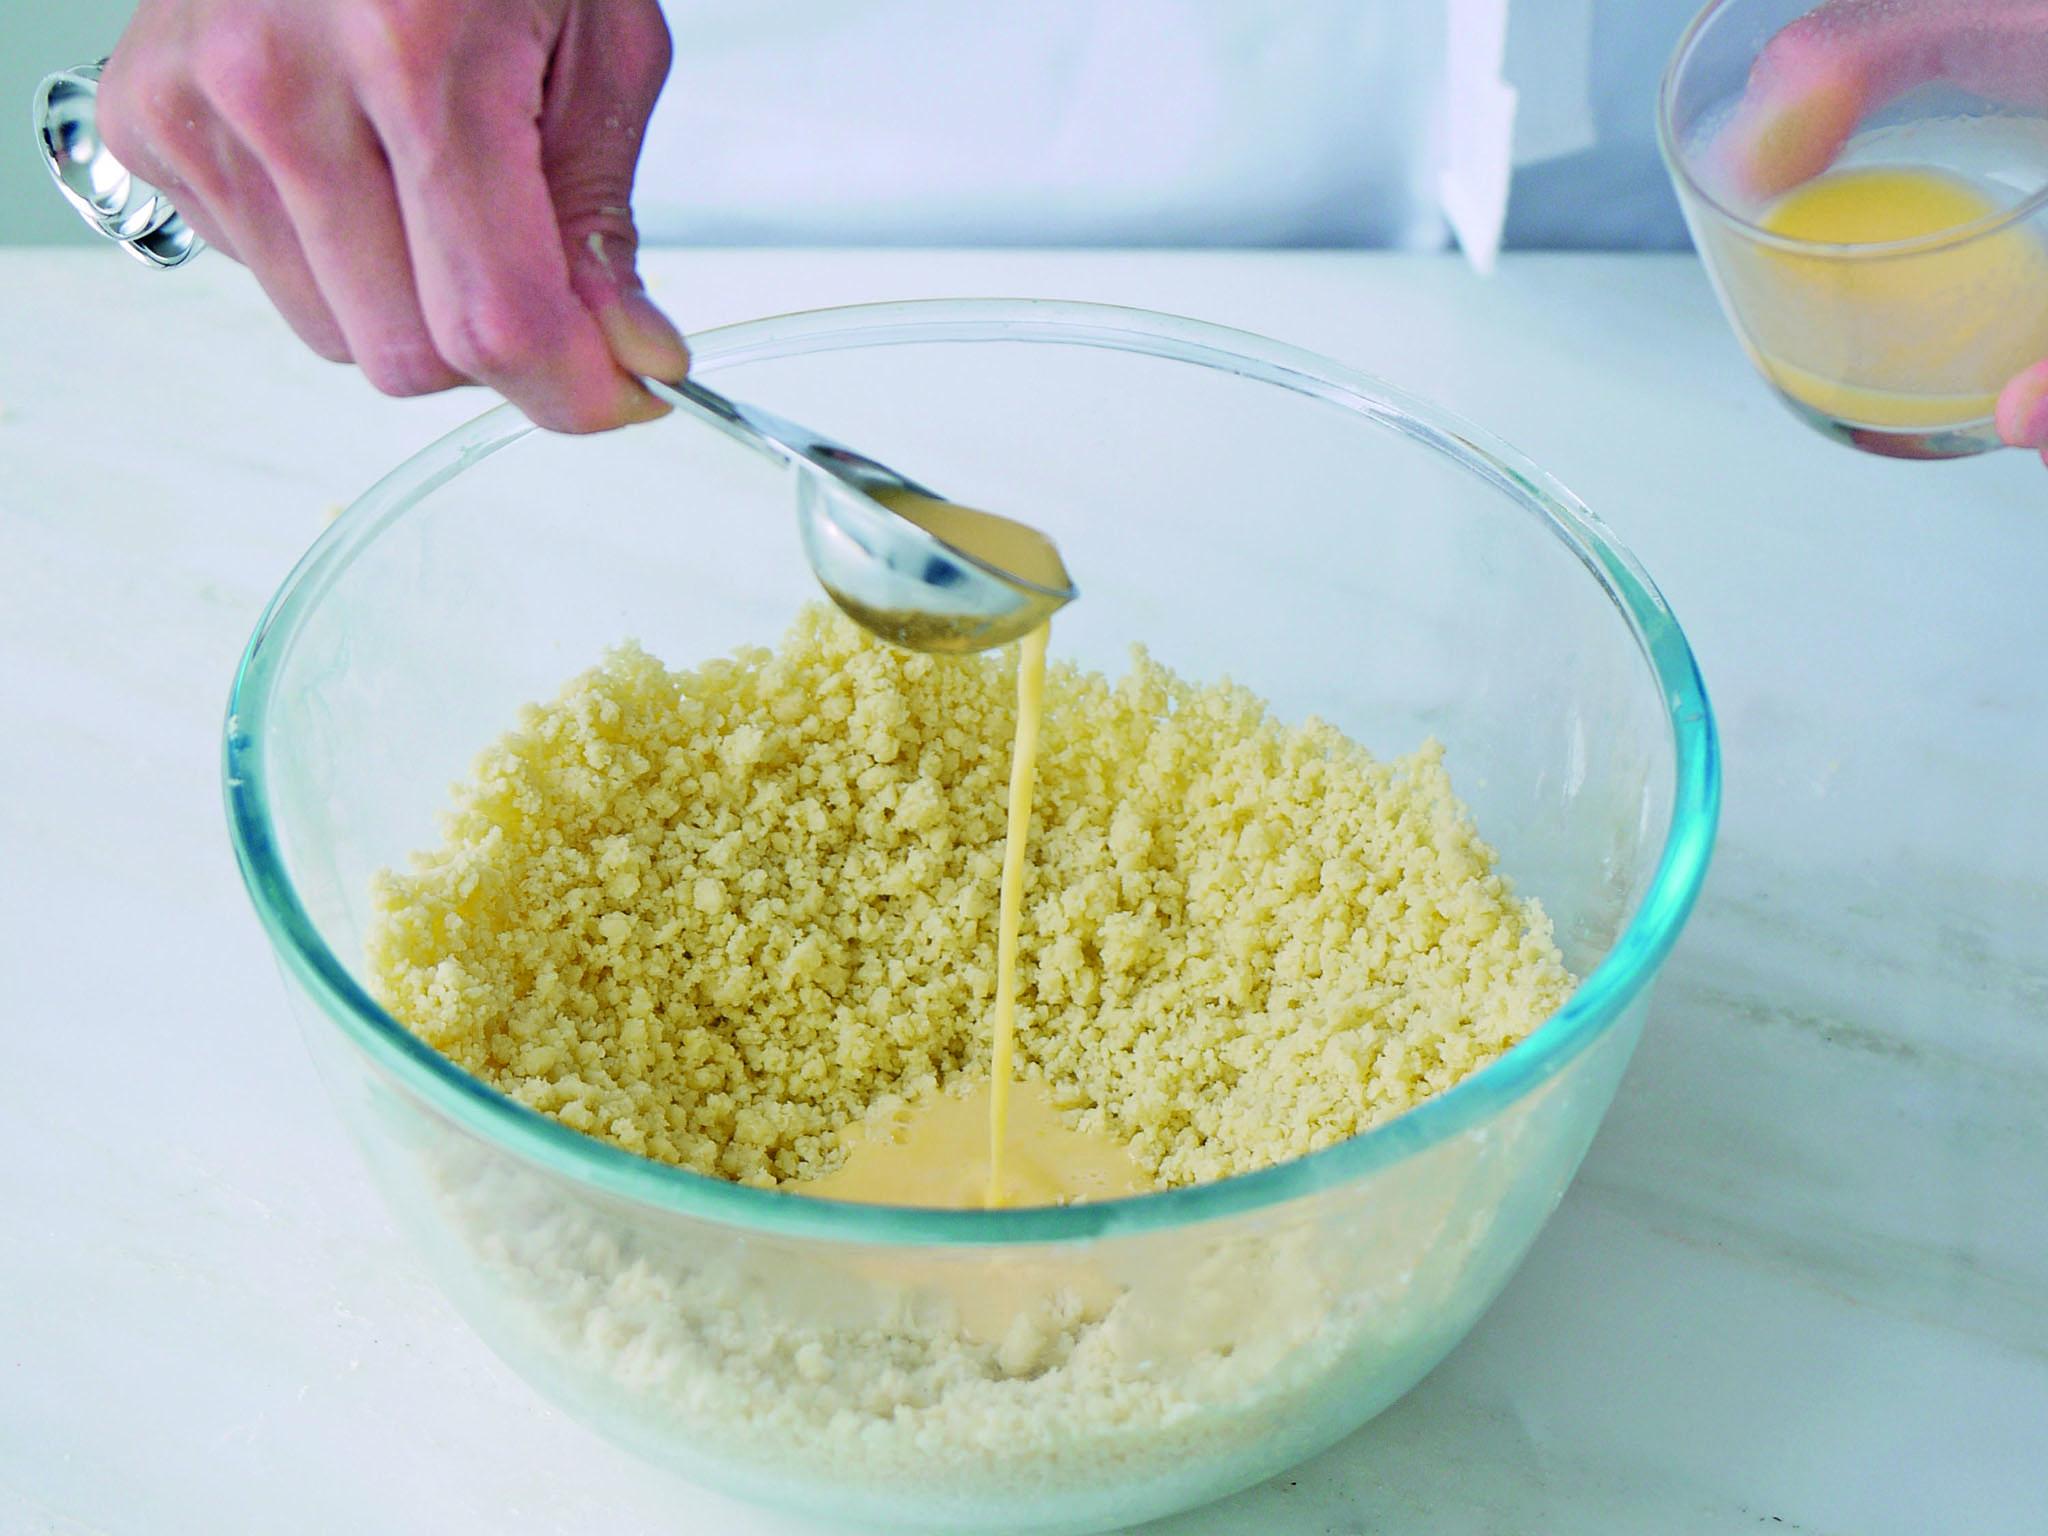
Making pastry in a food processor: The rubbing in can be done in the large bowl of a food processor. It is important to make sure the butter is fully rubbed in, so look for a uniform coloured crumb with no lumps of butter within the flour. It is best to then transfer the crumb to a bowl and add the liquid by hand, to avoid overworking and adding too much liquid.
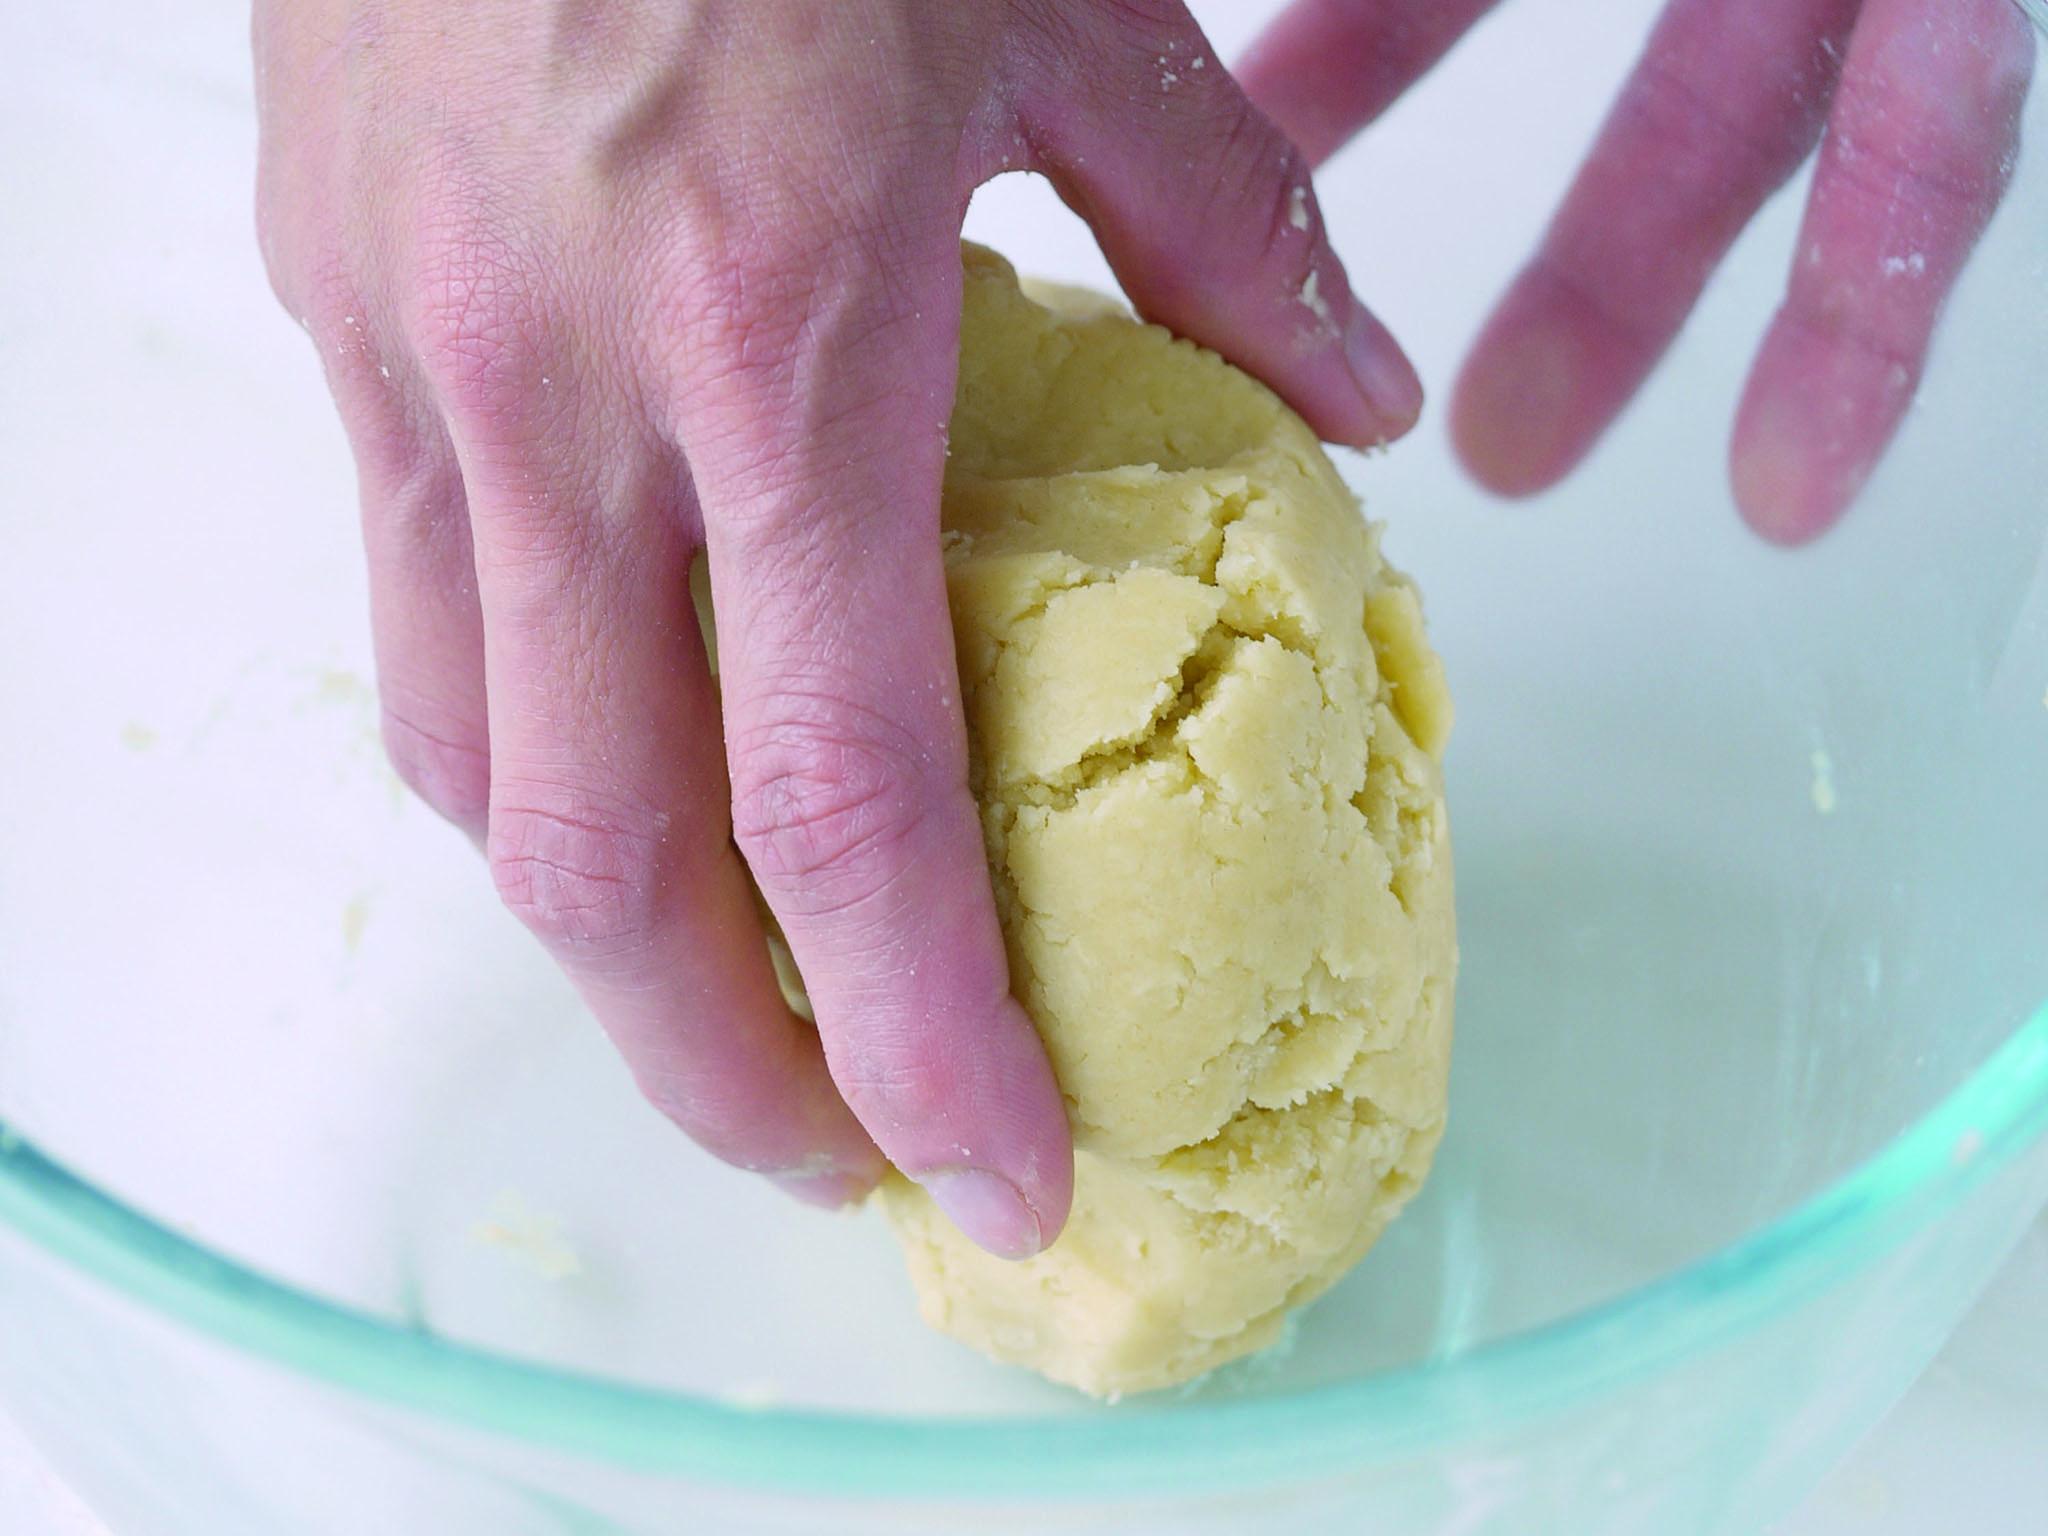
Chilling pastry: Fat softens as it is incorporated into flour, so pastry needs to be chilled to let the butter firm up and prevent the pastry from becoming greasy. Chilling also relaxes the gluten, slowing continued gluten development that can make pastry tough. For layered pastry, the fat must be kept cool to avoid it melting into the layering dough, which would seal the layers together and prevent the pastry from rising. For hot water crust pastry, which use melted fats, the chilling is essential in order to be able to mould the pastry into shape.
However, the most important time to chill pastry is once it is shaped and before it is baked. This firming of the butter sets the pastry case into the desired shape so that when it is baked, the butter melds with the flour immediately to create a bond. If not sufficiently chilled, the butter will melt and the result will be greasy, misshapen pastry.
To chill pastry, wrap closely in cling film or a plastic bag to prevent the surface from drying out. Most pastries need at least 30 minutes in the fridge to chill until firm to the touch. Some, such as pâte sucrée and hot-water crust, that use soft or melted butter, will need to chill for longer. If you are short of time, you can chill pastry in the freezer.
Shortcrust pastry
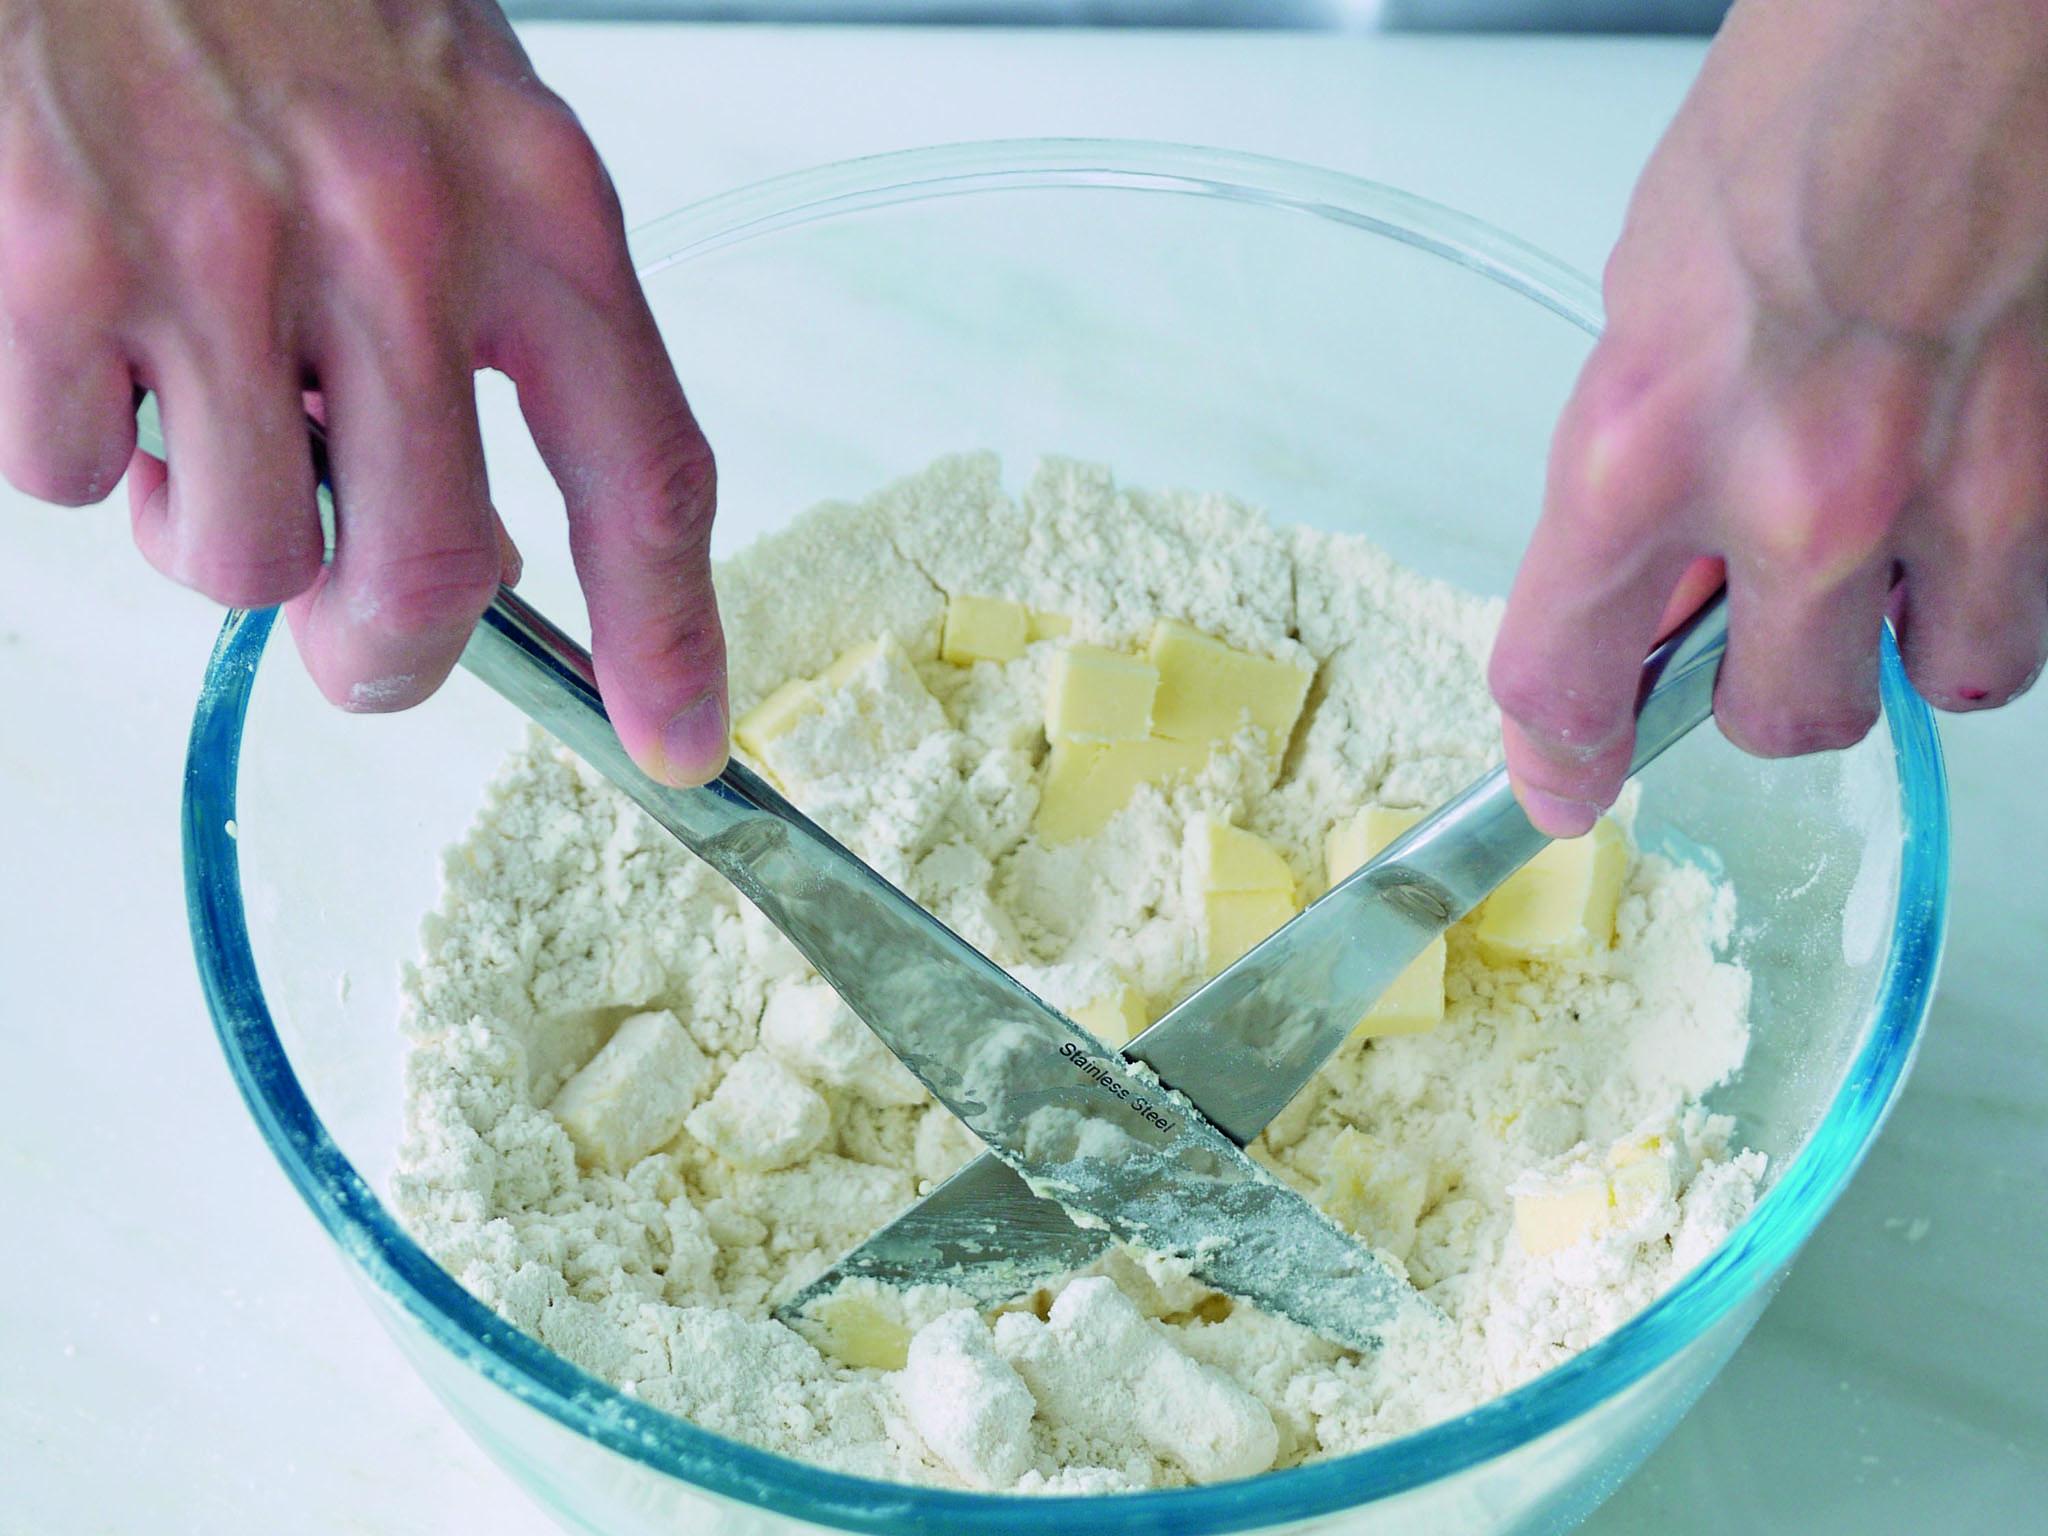
As the name implies, shortcrust has a short, tender crumb, and it is used in sweet and savoury recipes. The most important element of the technique is rubbing the fat into the flour, which coats the flour with fat and creates a fine crumb. The fat acts as a protector around the grains of flour and hinders the development of gluten, which would make the pastry tough. You should need only a small amount of liquid to bring the crumb together and make the pastry manageable. Using as little liquid as possible to bind the dough also helps to achieve a tender crumb.
Rich shortcrust pastry
Makes enough to line a 24cm flan ring
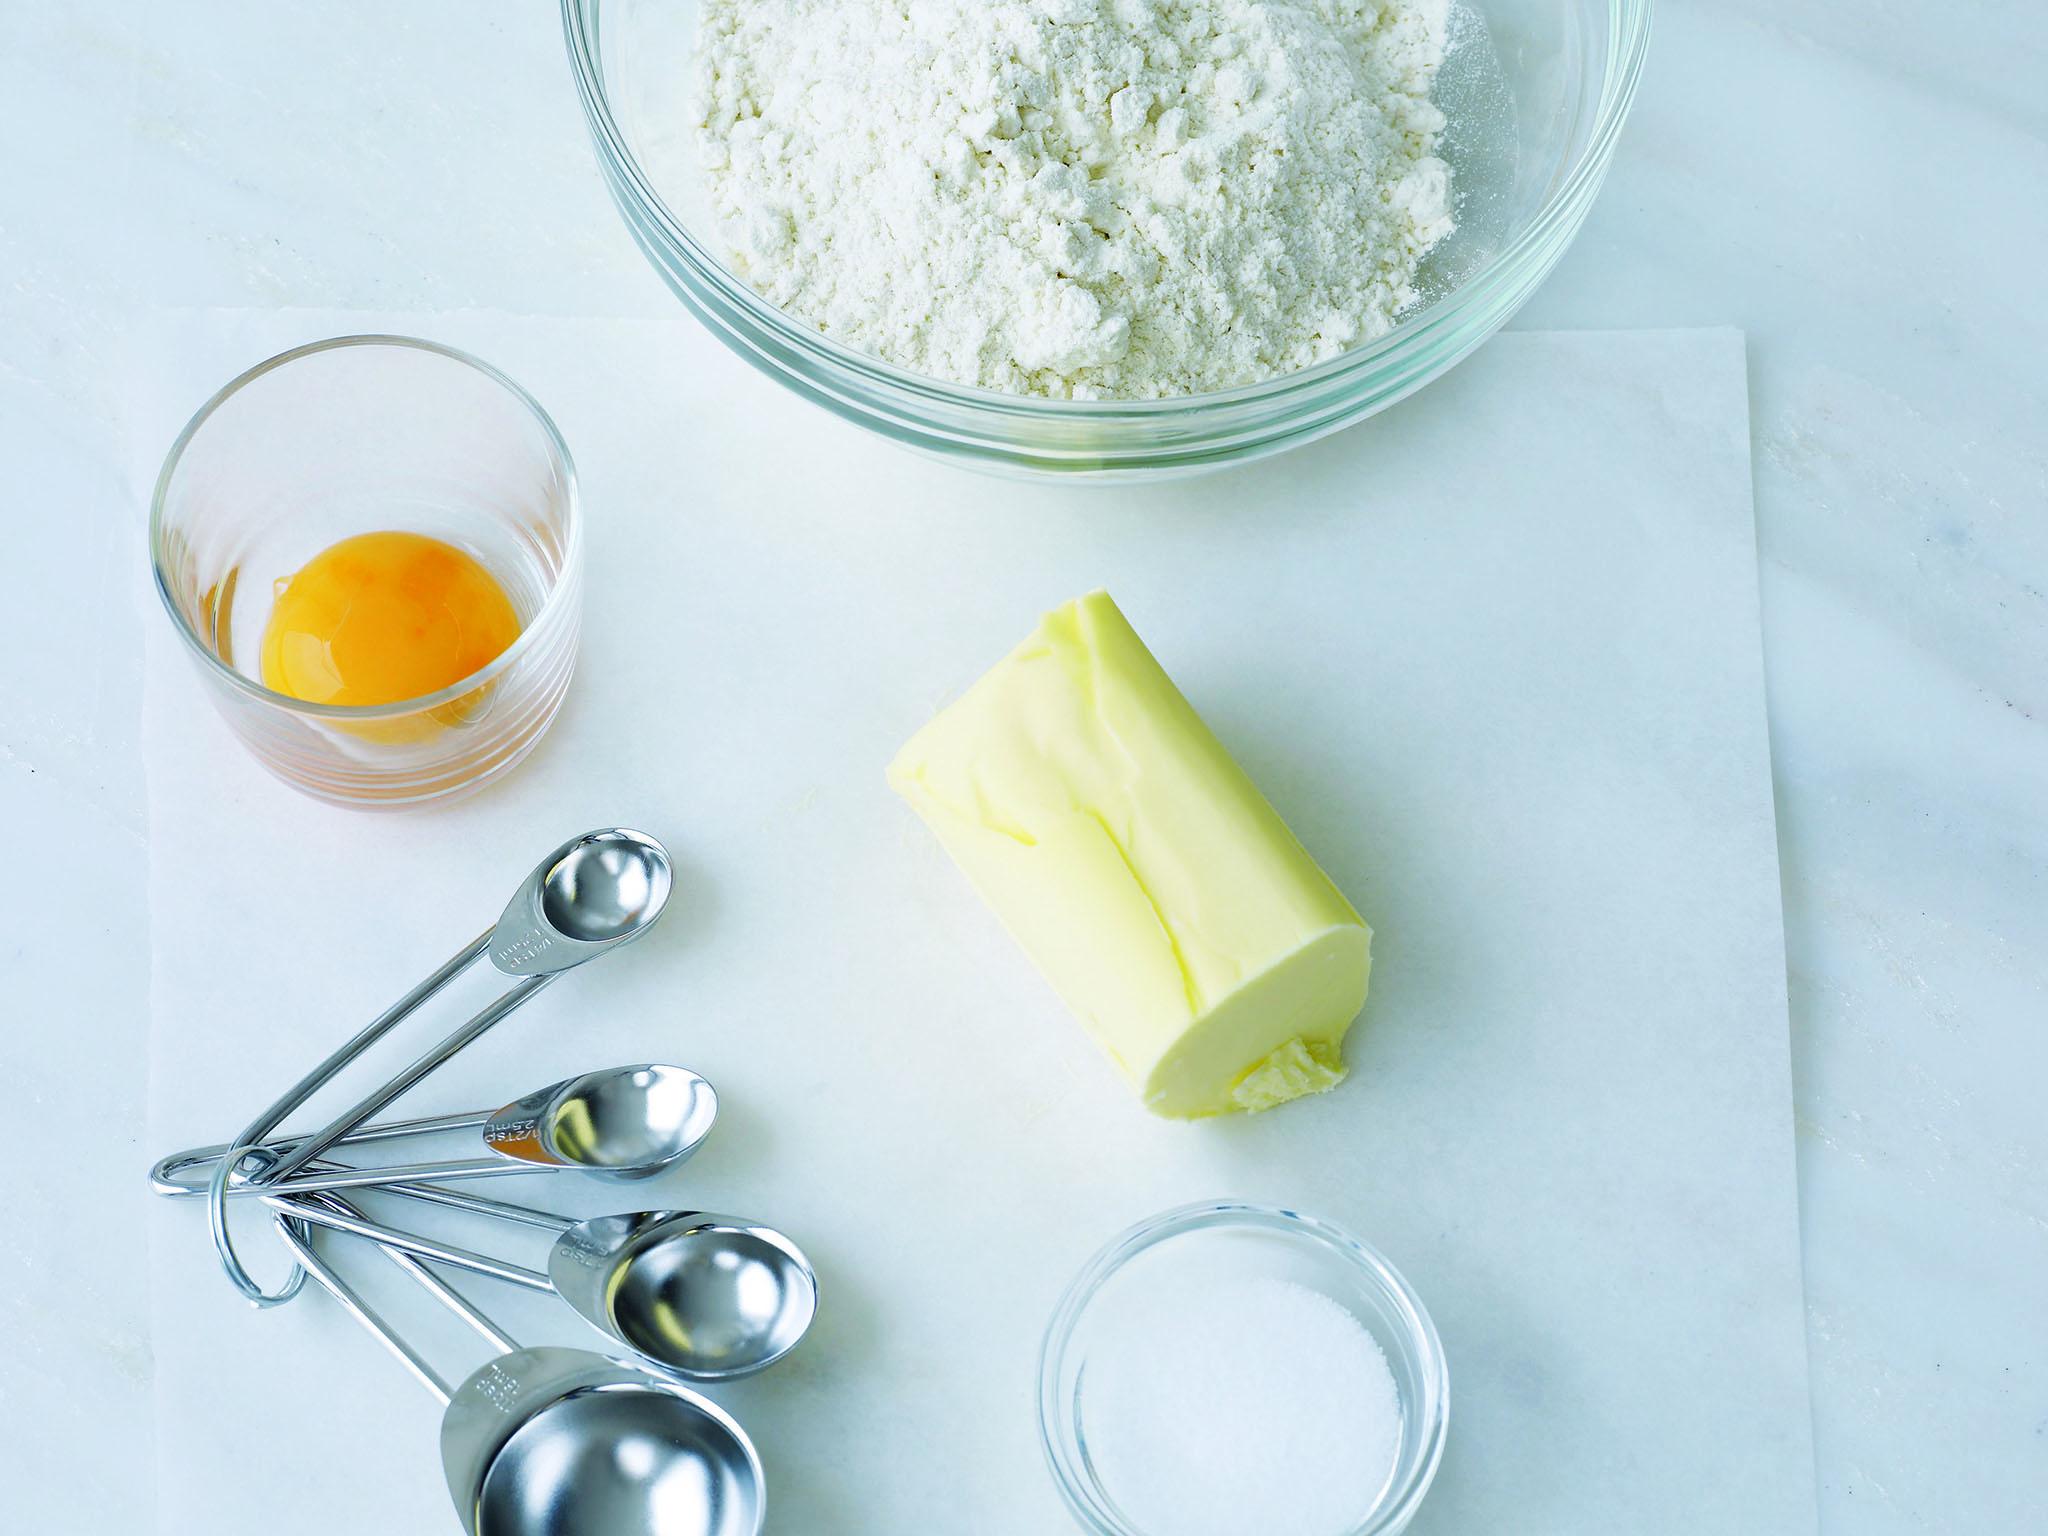
250g plain flour
Pinch of salt
140g chilled butter
2 egg yolks
3-4 tbsp chilled water
Shortcrust is traditionally made with a combination of lard and butter. Lard lends a superior shortness but lacks the flavour of butter, so we generally use all butter.


Variations
Herb rich shortcrust pastry: Add ½ to 1 tbsp chopped herbs such as thyme, rosemary, oregano or sage to the crumb mixture before the liquid.
Cheese rich shortcrust pastry: Reduce the butter to 110g and add 30g finely grated hard cheese, such as cheddar or parmesan, before the liquid.
Wholemeal shortcrust pastry: Use wholemeal flour in place of plain, omit the egg yolk and use 80g butter and 45g lard. You will need a little extra water too. Plain shortcrust pastry For a less rich pastry, use 80g butter and 45g lard and omit the egg yolks. It may be necessary to add up to 1 tbsp extra water.
Sweet rich shortcrust pastry: Add 2-3 tsp caster sugar before the liquid.
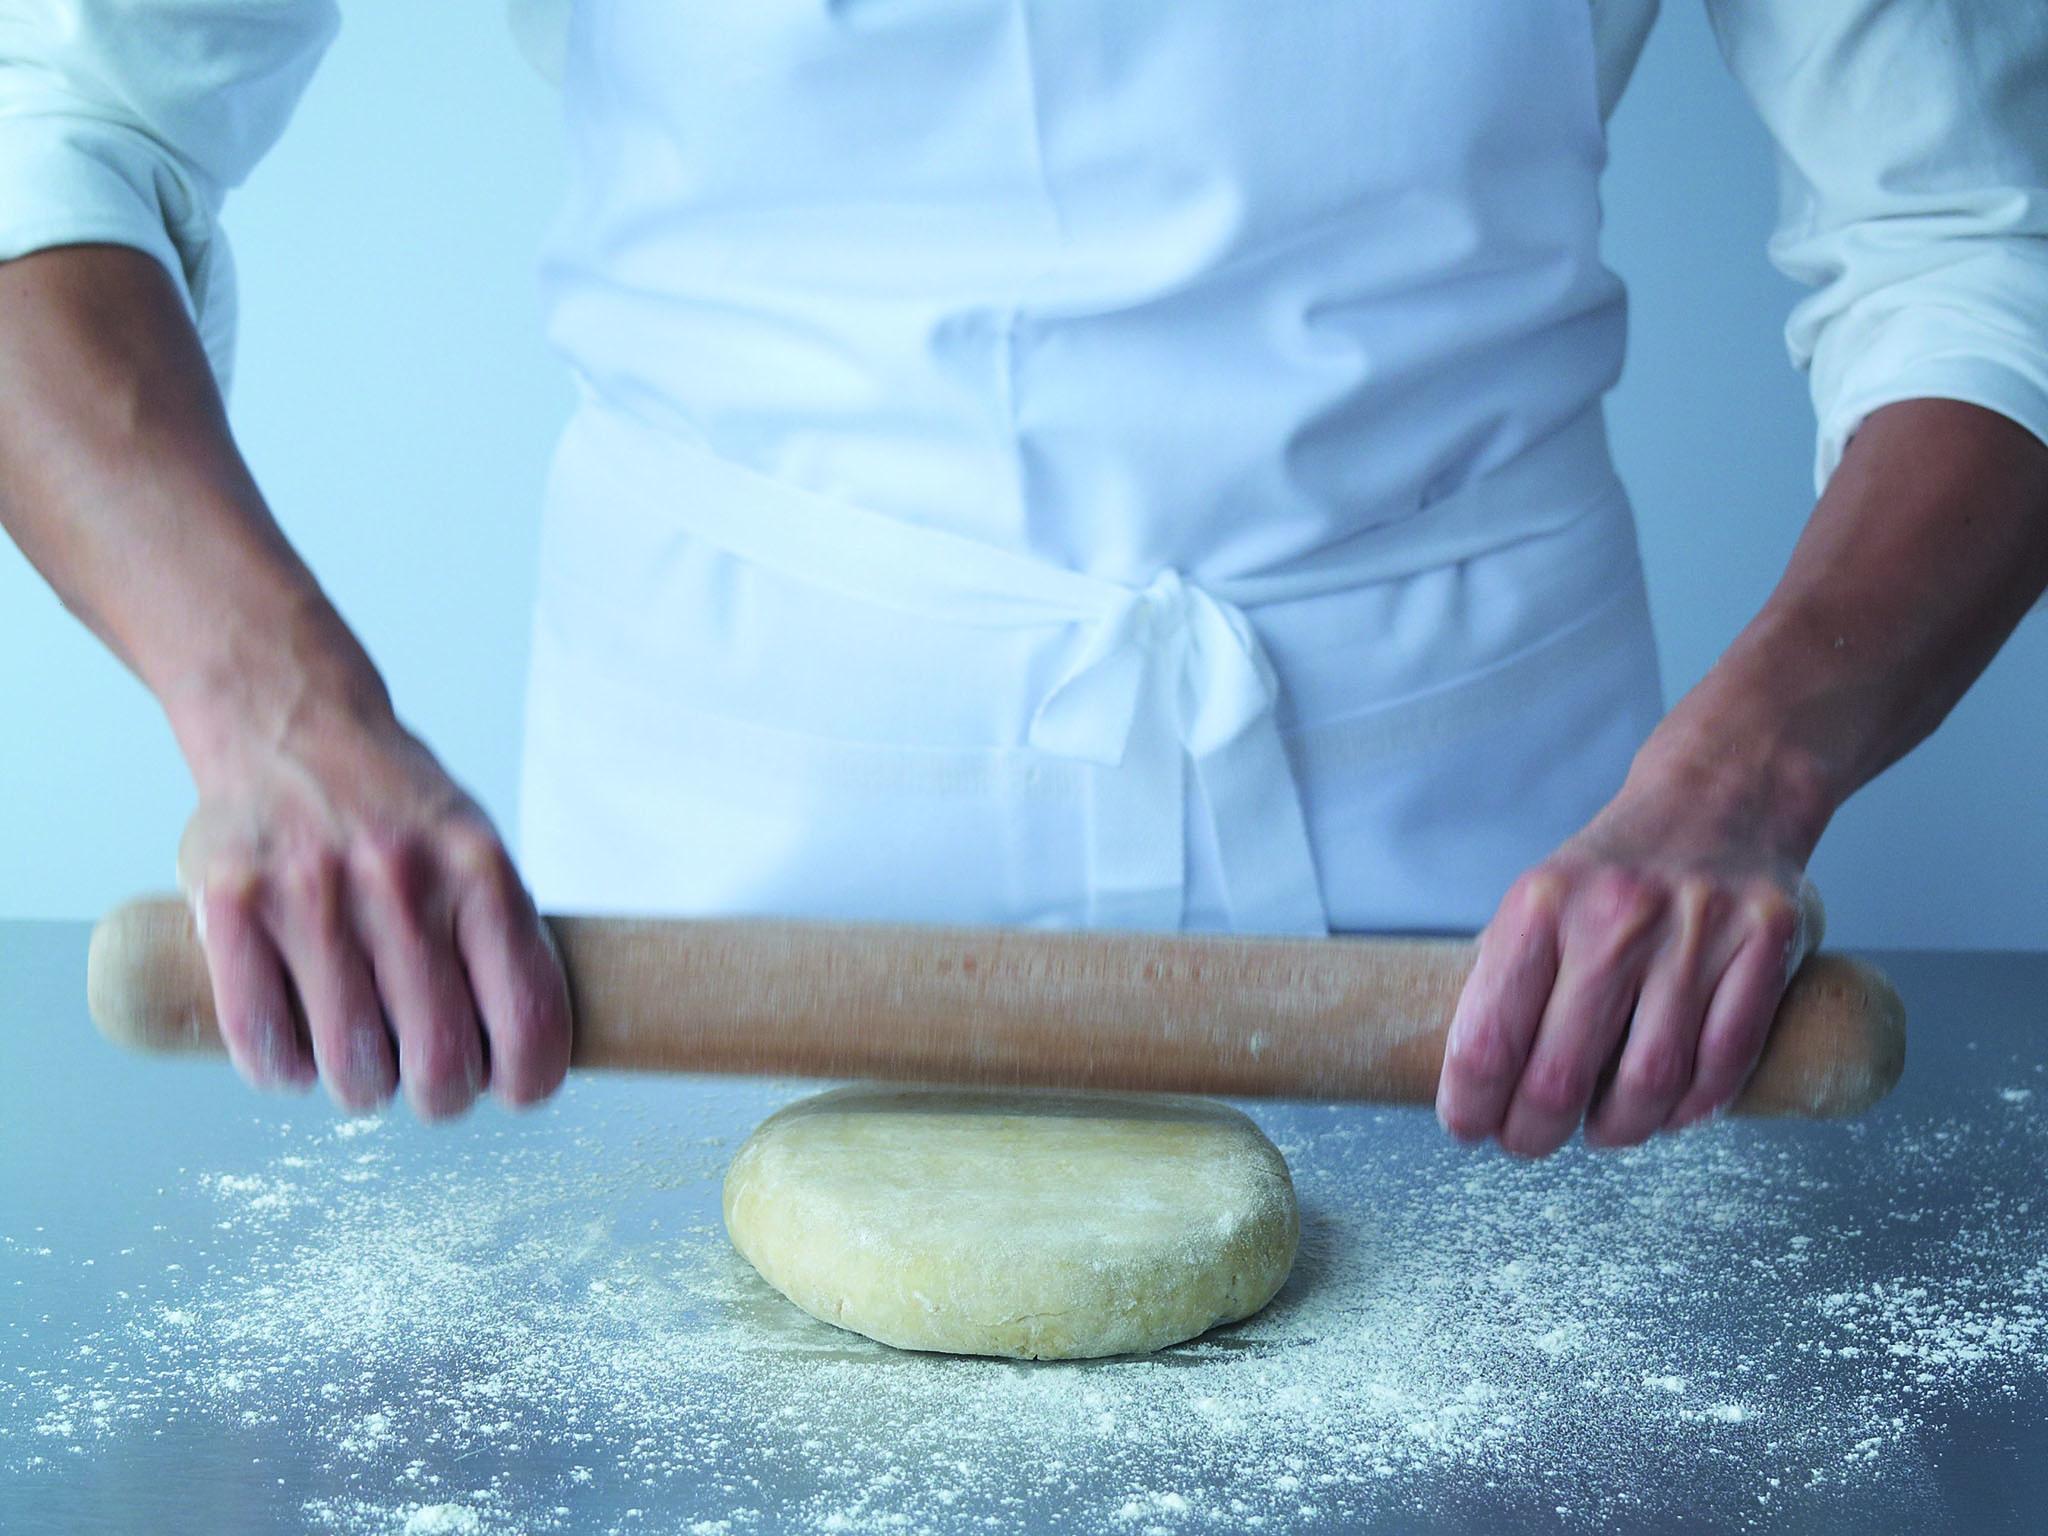
Rolling pastry
An efficient rolling technique helps to ensure pastry is not stretched or overworked (which can cause excessive shrinkage during baking). It also helps to prevent the pastry from warming up during the shaping and lining process, which makes it difficult to handle and can result in greasy pastry.
After chilling the pastry in the fridge, remove it when it is cold and firm to the touch, not completely hard or it will crack when rolled; it should be just pliable. If it has been chilled for more than 2-3 hours, remove from the fridge and leave at room temperature for 5 minutes before rolling, to soften it slightly.
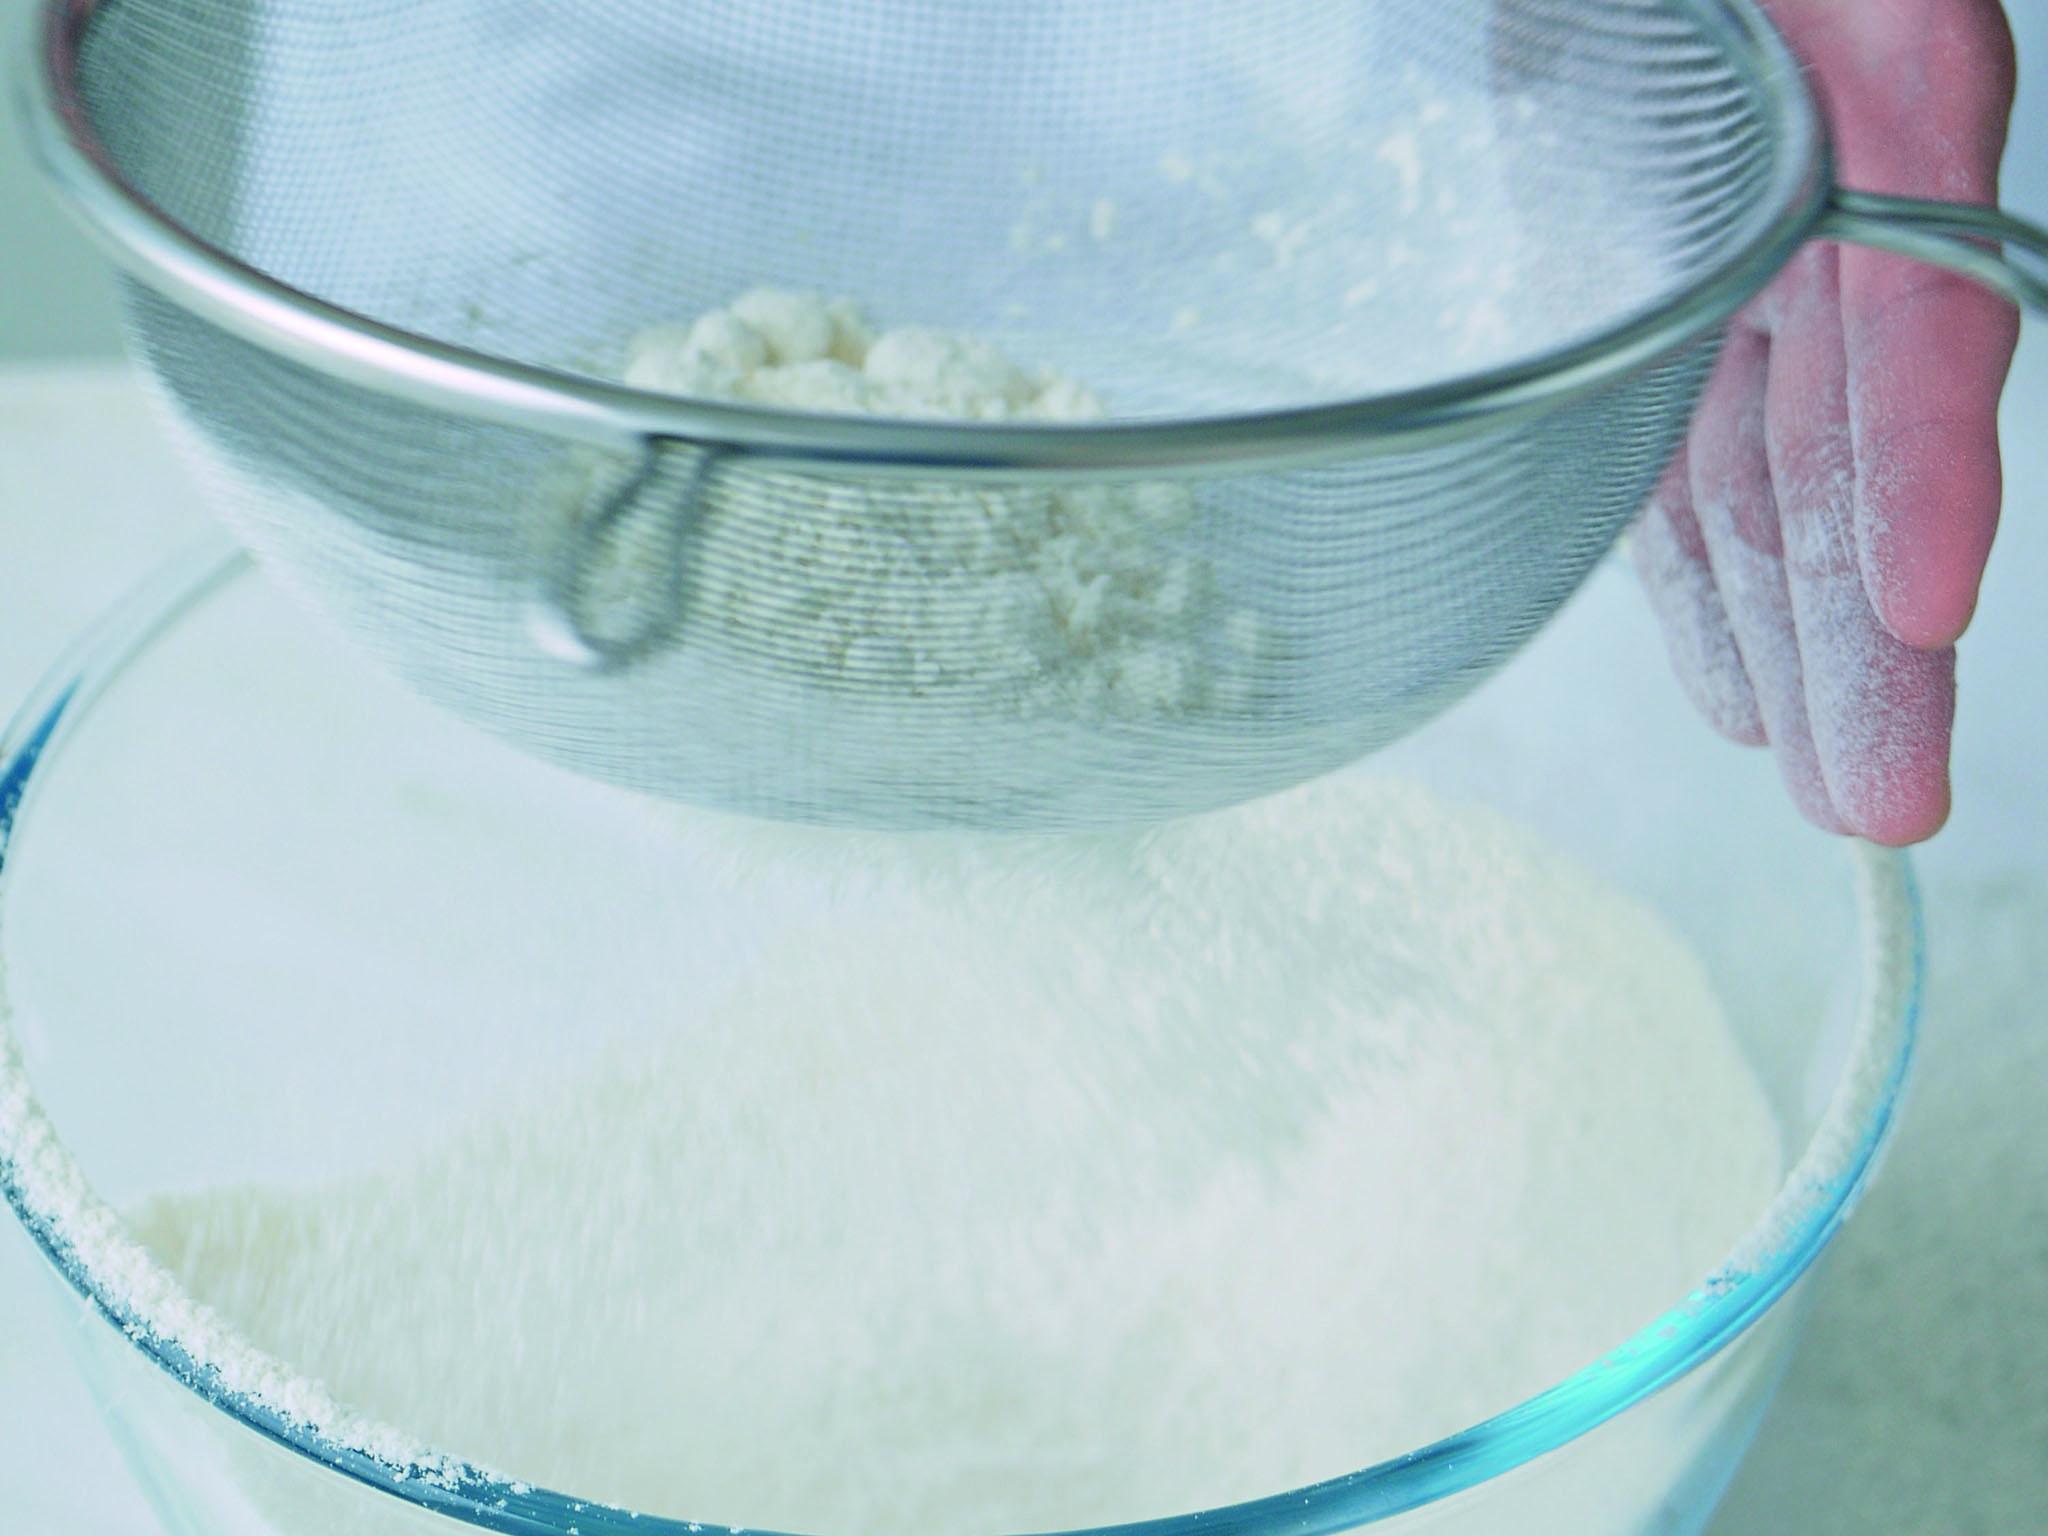
Use only as much flour on the work surface as you need to prevent the pastry from sticking, and no more (although a little more is useful when rolling out layered pastries). Flour the rolling pin too, but avoid sprinkling flour over the pastry itself, or it can result in grey, floury patches.

A note on ridging…
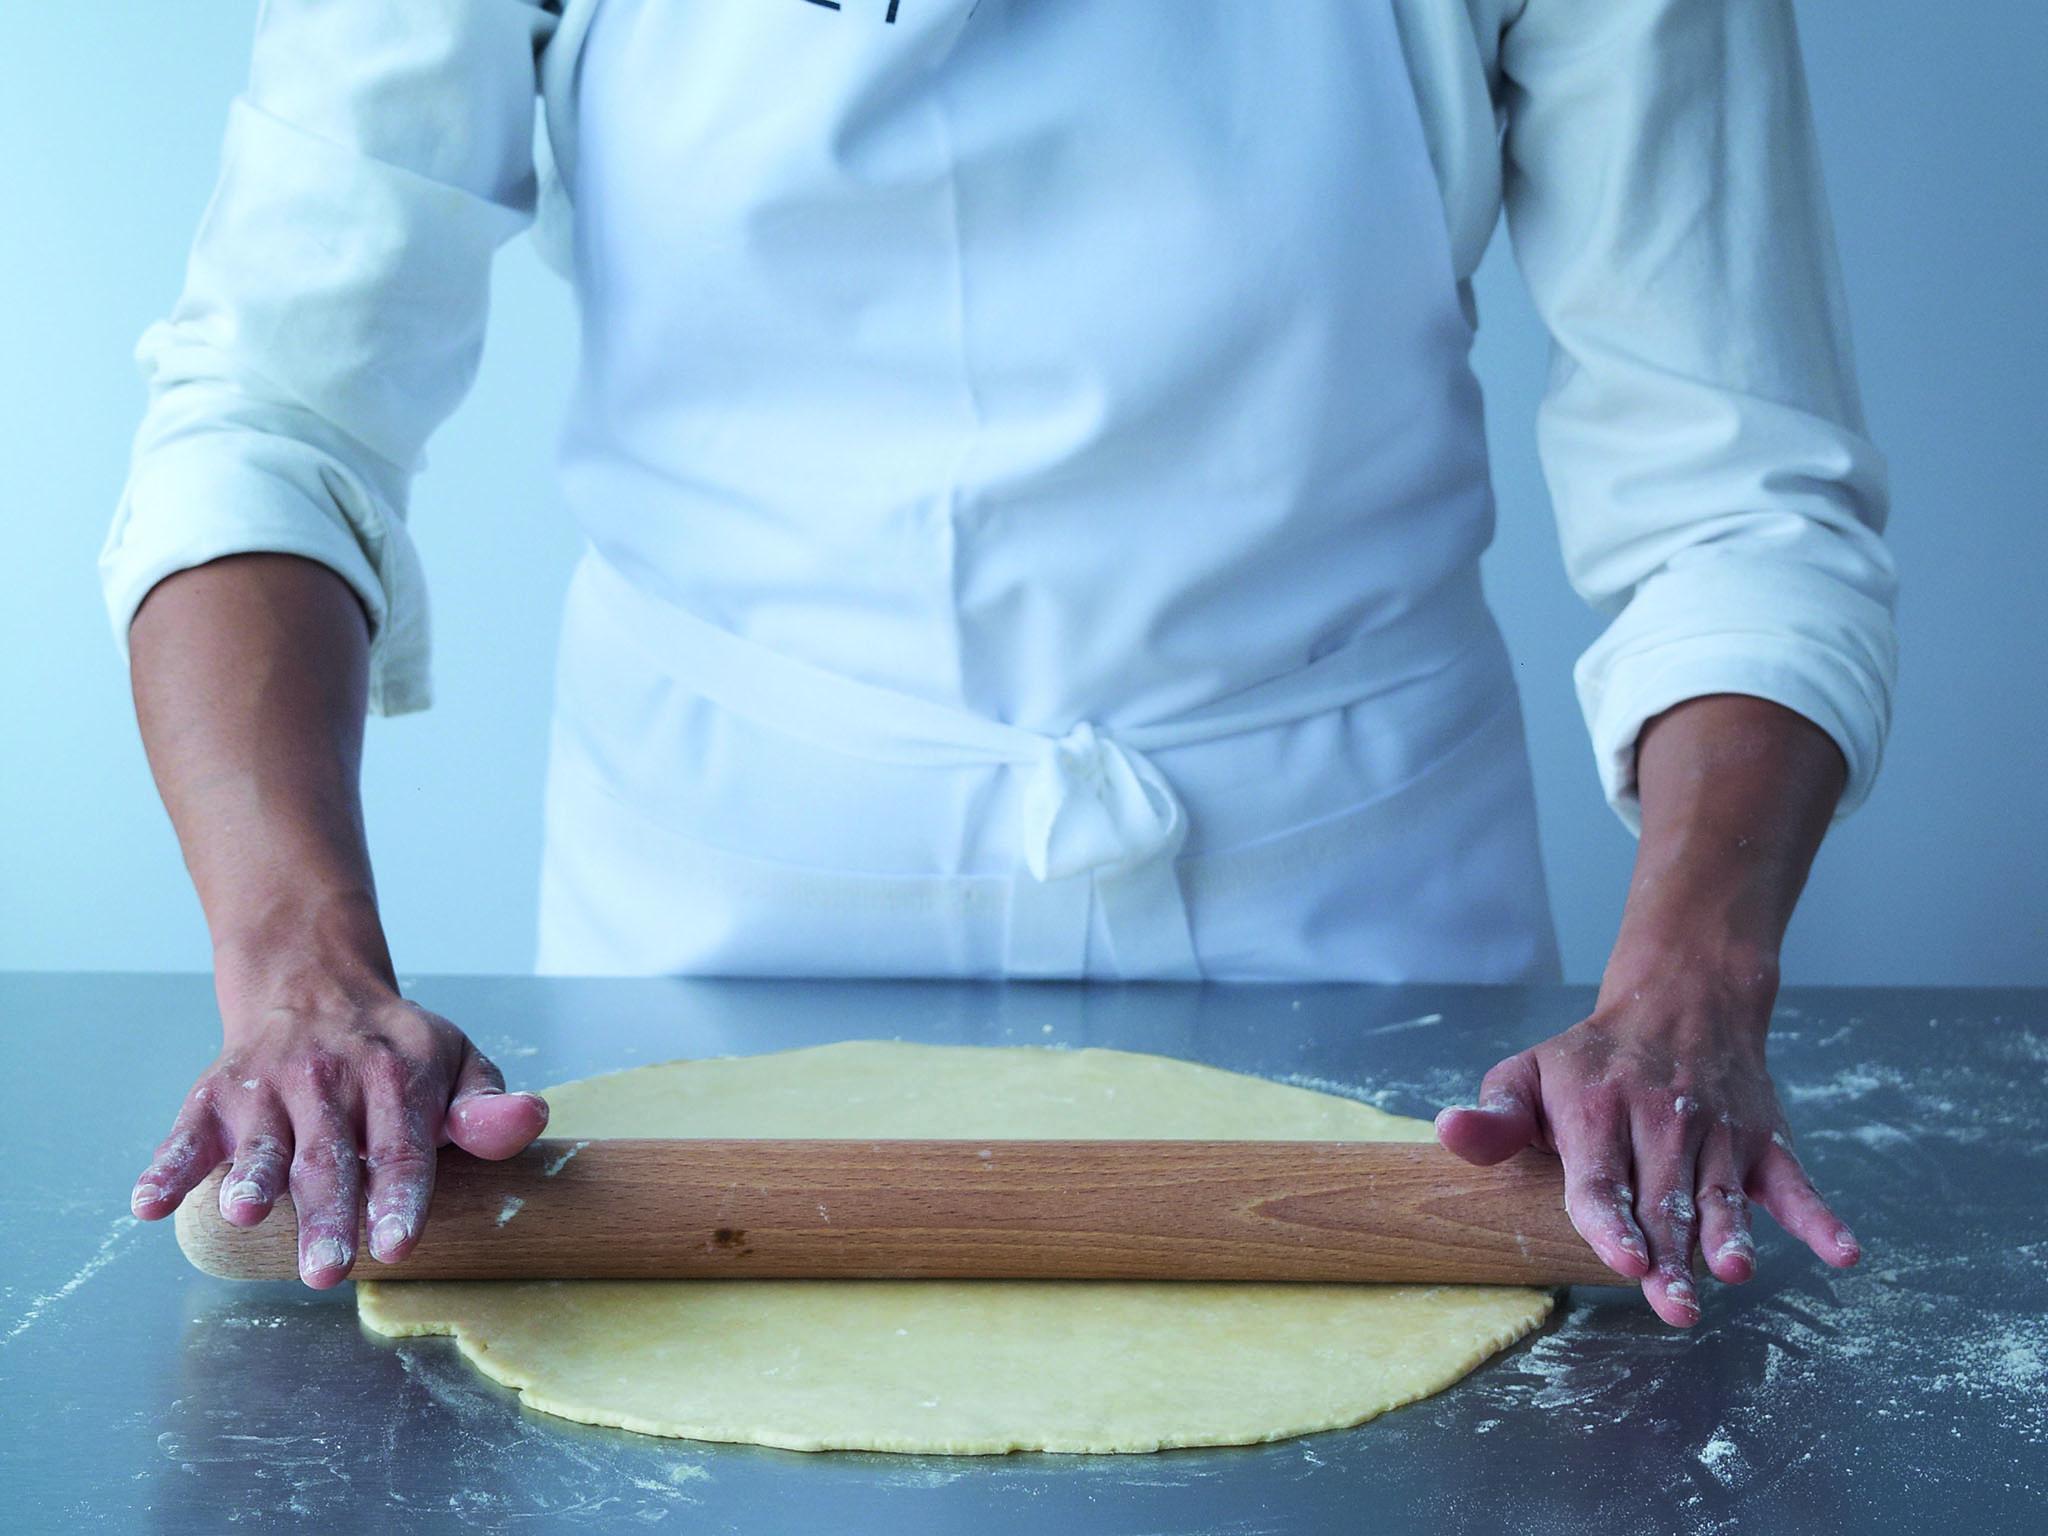
Ridging is much gentler on the pastry than rolling, so try to continue as long as possible before starting to roll. Ridging layered pastry helps to preserve the layers, and is also a useful technique when you are trying to roll out fridge-cold pastry. More often than not pastry has to be rolled into a disc, so turning the pastry 90 degrees every few ridges and rolls will help to keep the pastry in a circle. Avoid twisting and turning the rolling pin as this will stretch the pastry unevenly. If the pastry starts to crack a little at the edges, stop ridging and seal the crack with your fingertips.
A note on rolling…
Always turn the pastry rather than the rolling pin. Use a loose grip on the rolling pin and avoid applying too much pressure when the rolling pin comes into contact with the pastry; you just need a light pressure to encourage the pastry gently to expand, not stretch. Also be aware that your dominant hand will be stronger and may push down a little more firmly than your other hand; even pressure is important for the end result.
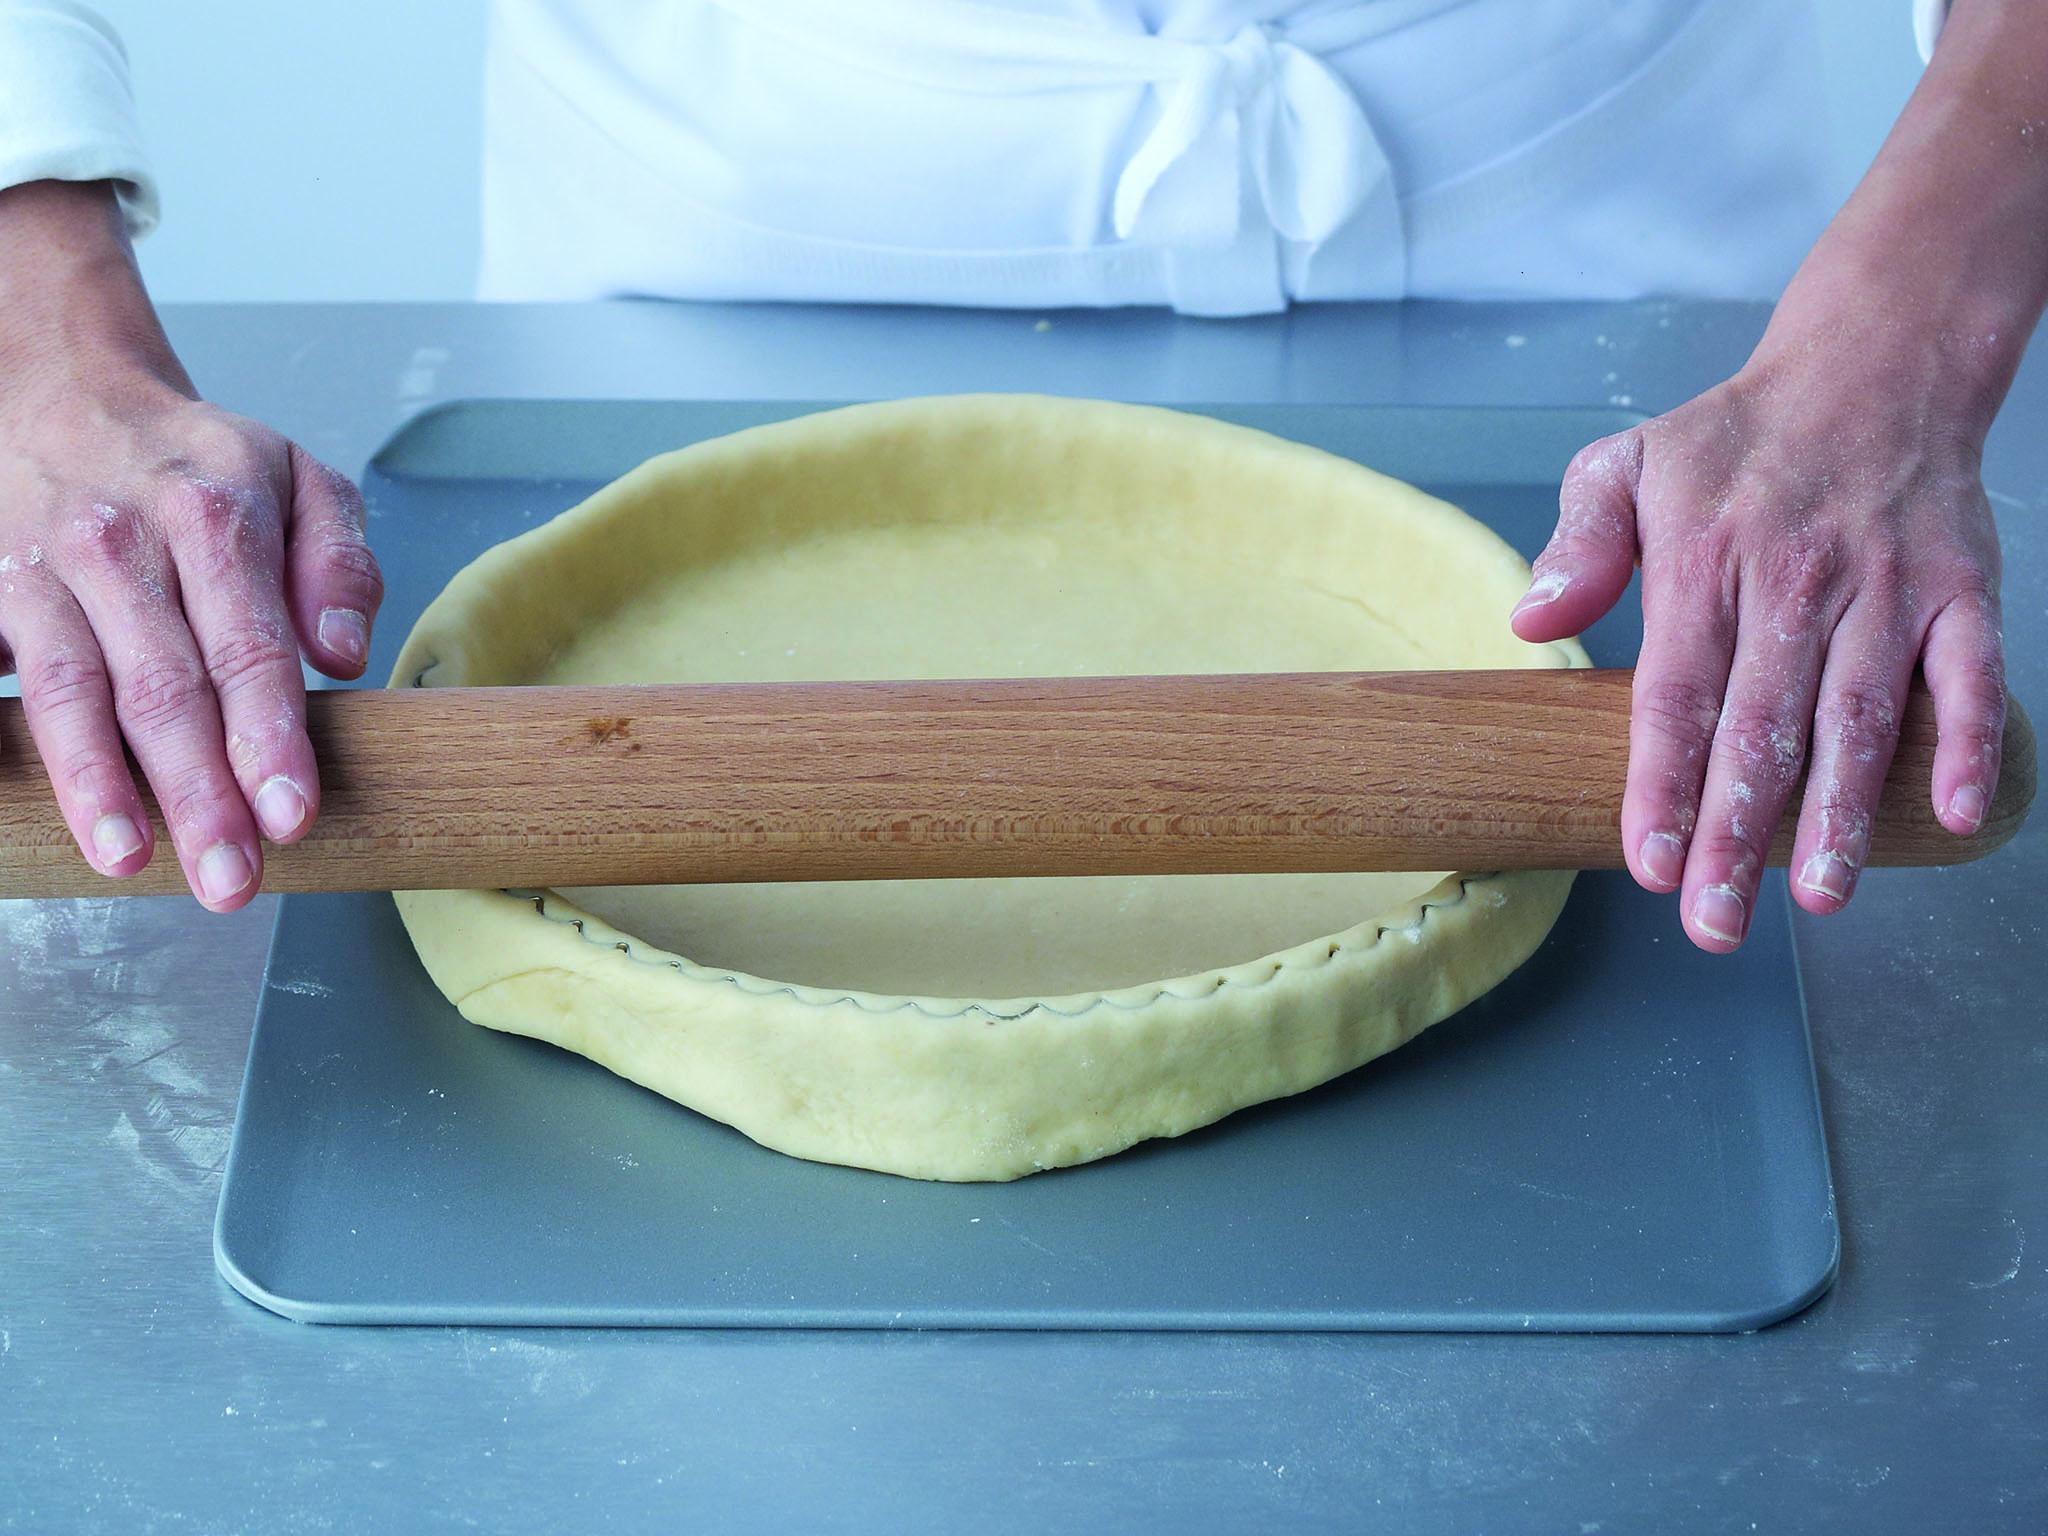
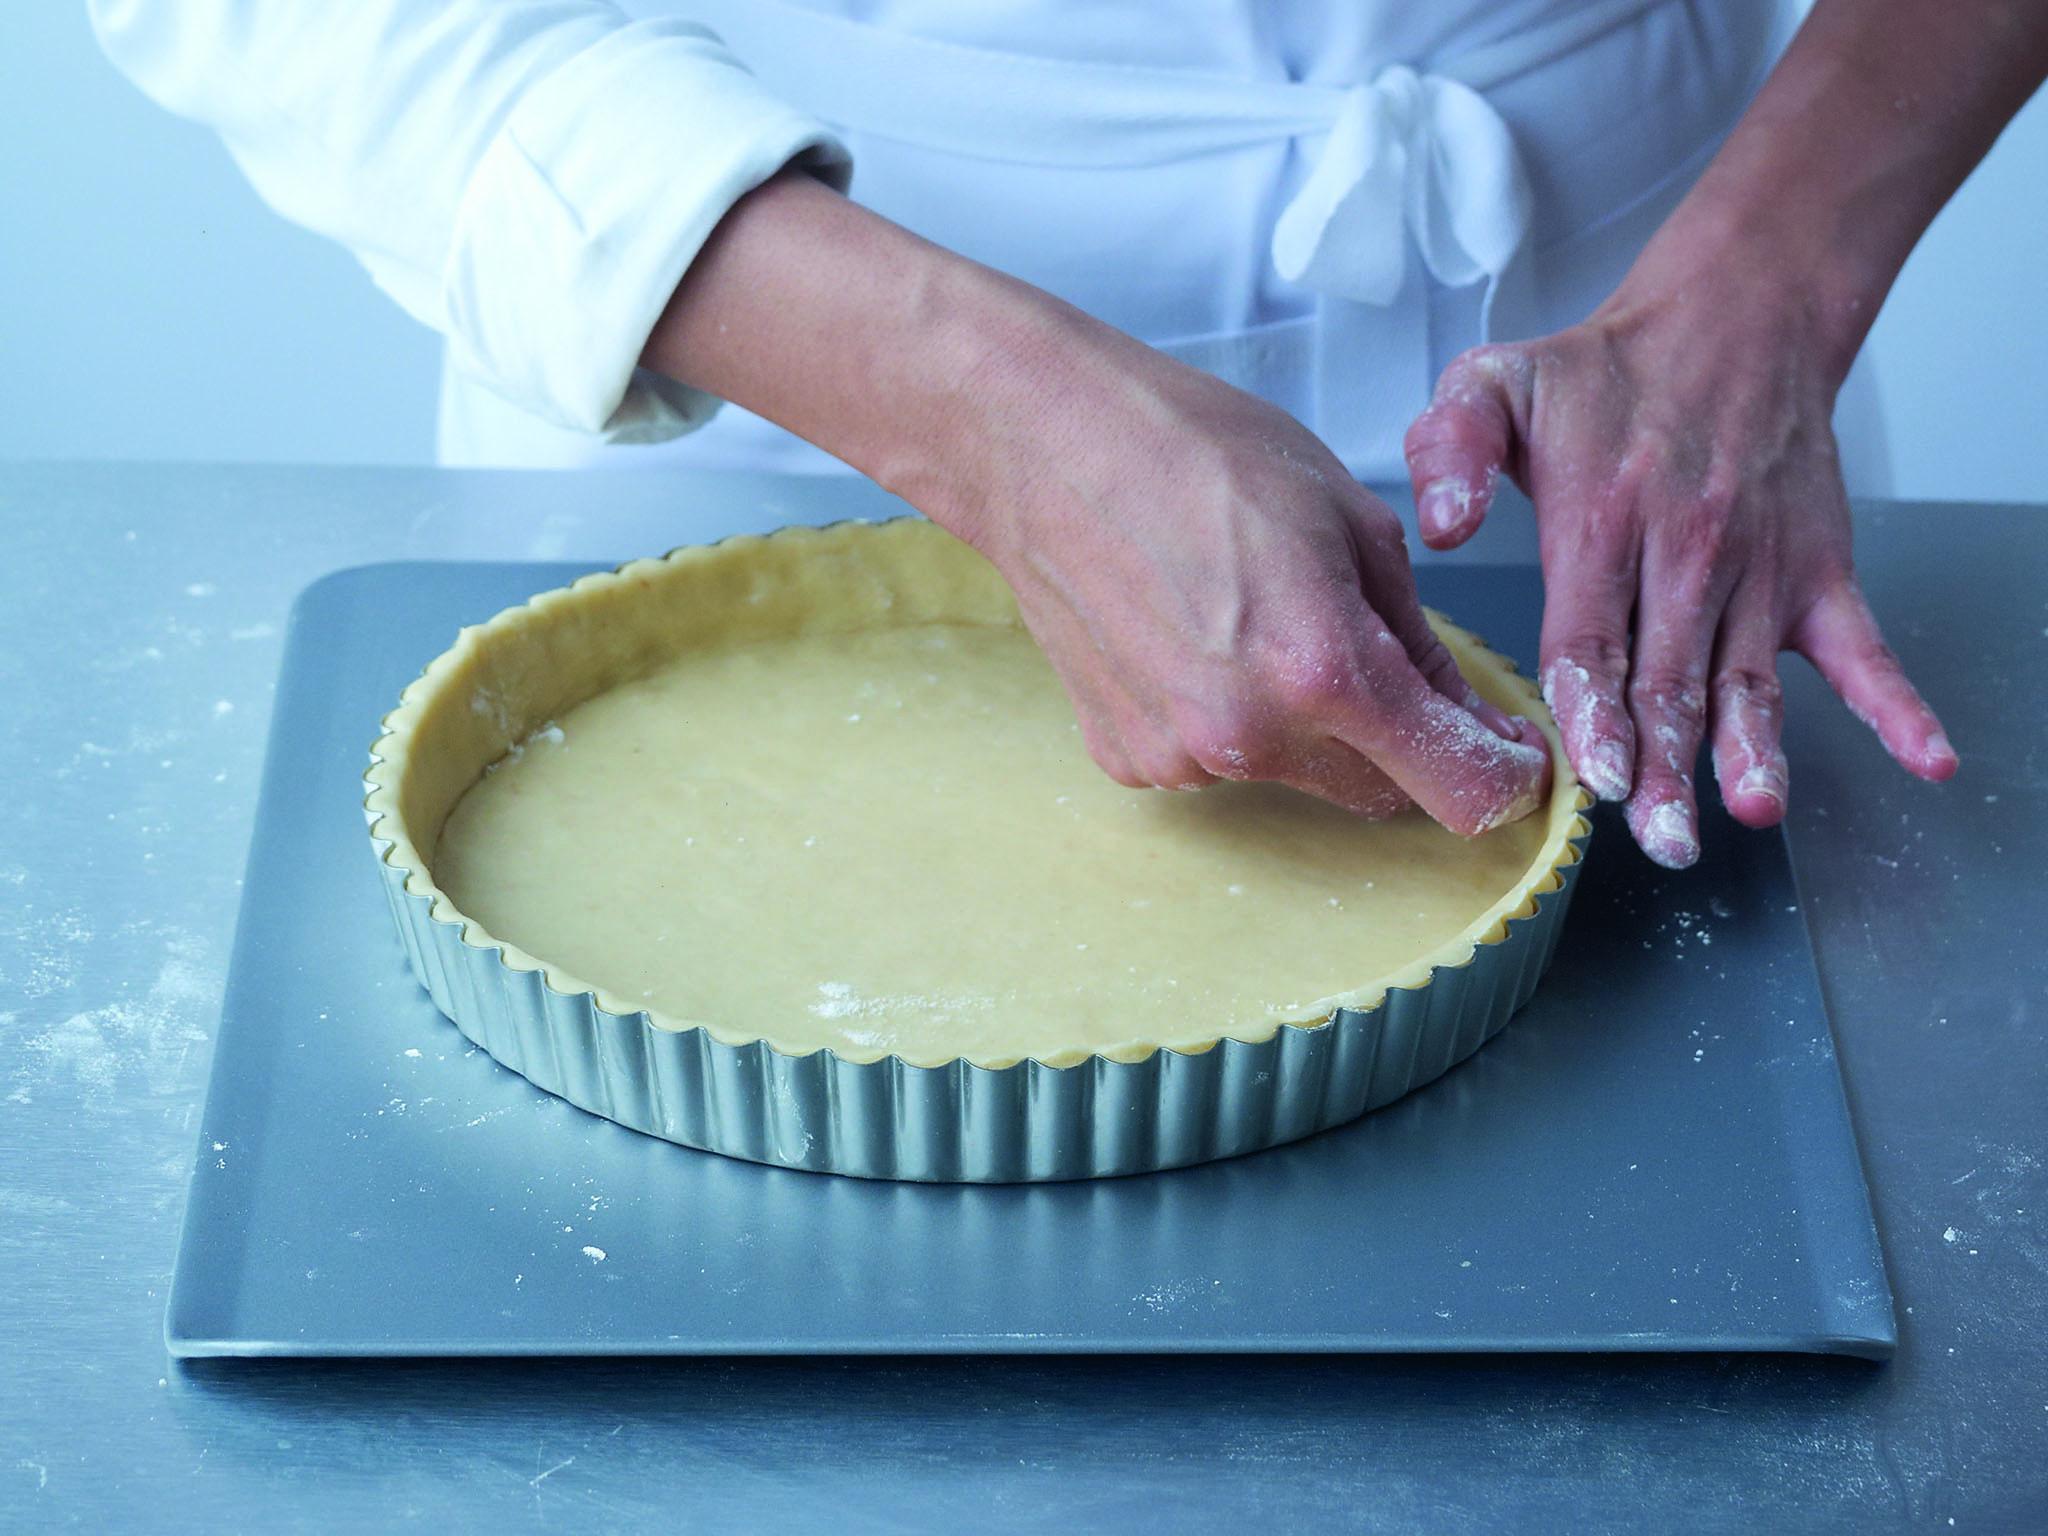
Lining a flan tin or ring
When making a pastry case, for ease of unmoulding we generally use a loose-based metal flan tin or flan ring (without a base) placed on a baking sheet. If you do not have either of these, use a solid metal tin, or if none of these is available, a ceramic flan dish is the next best thing. Most of the recipes in this chapter were made using a 24cm diameter flan ring, 2.5cm-2.8cm deep.

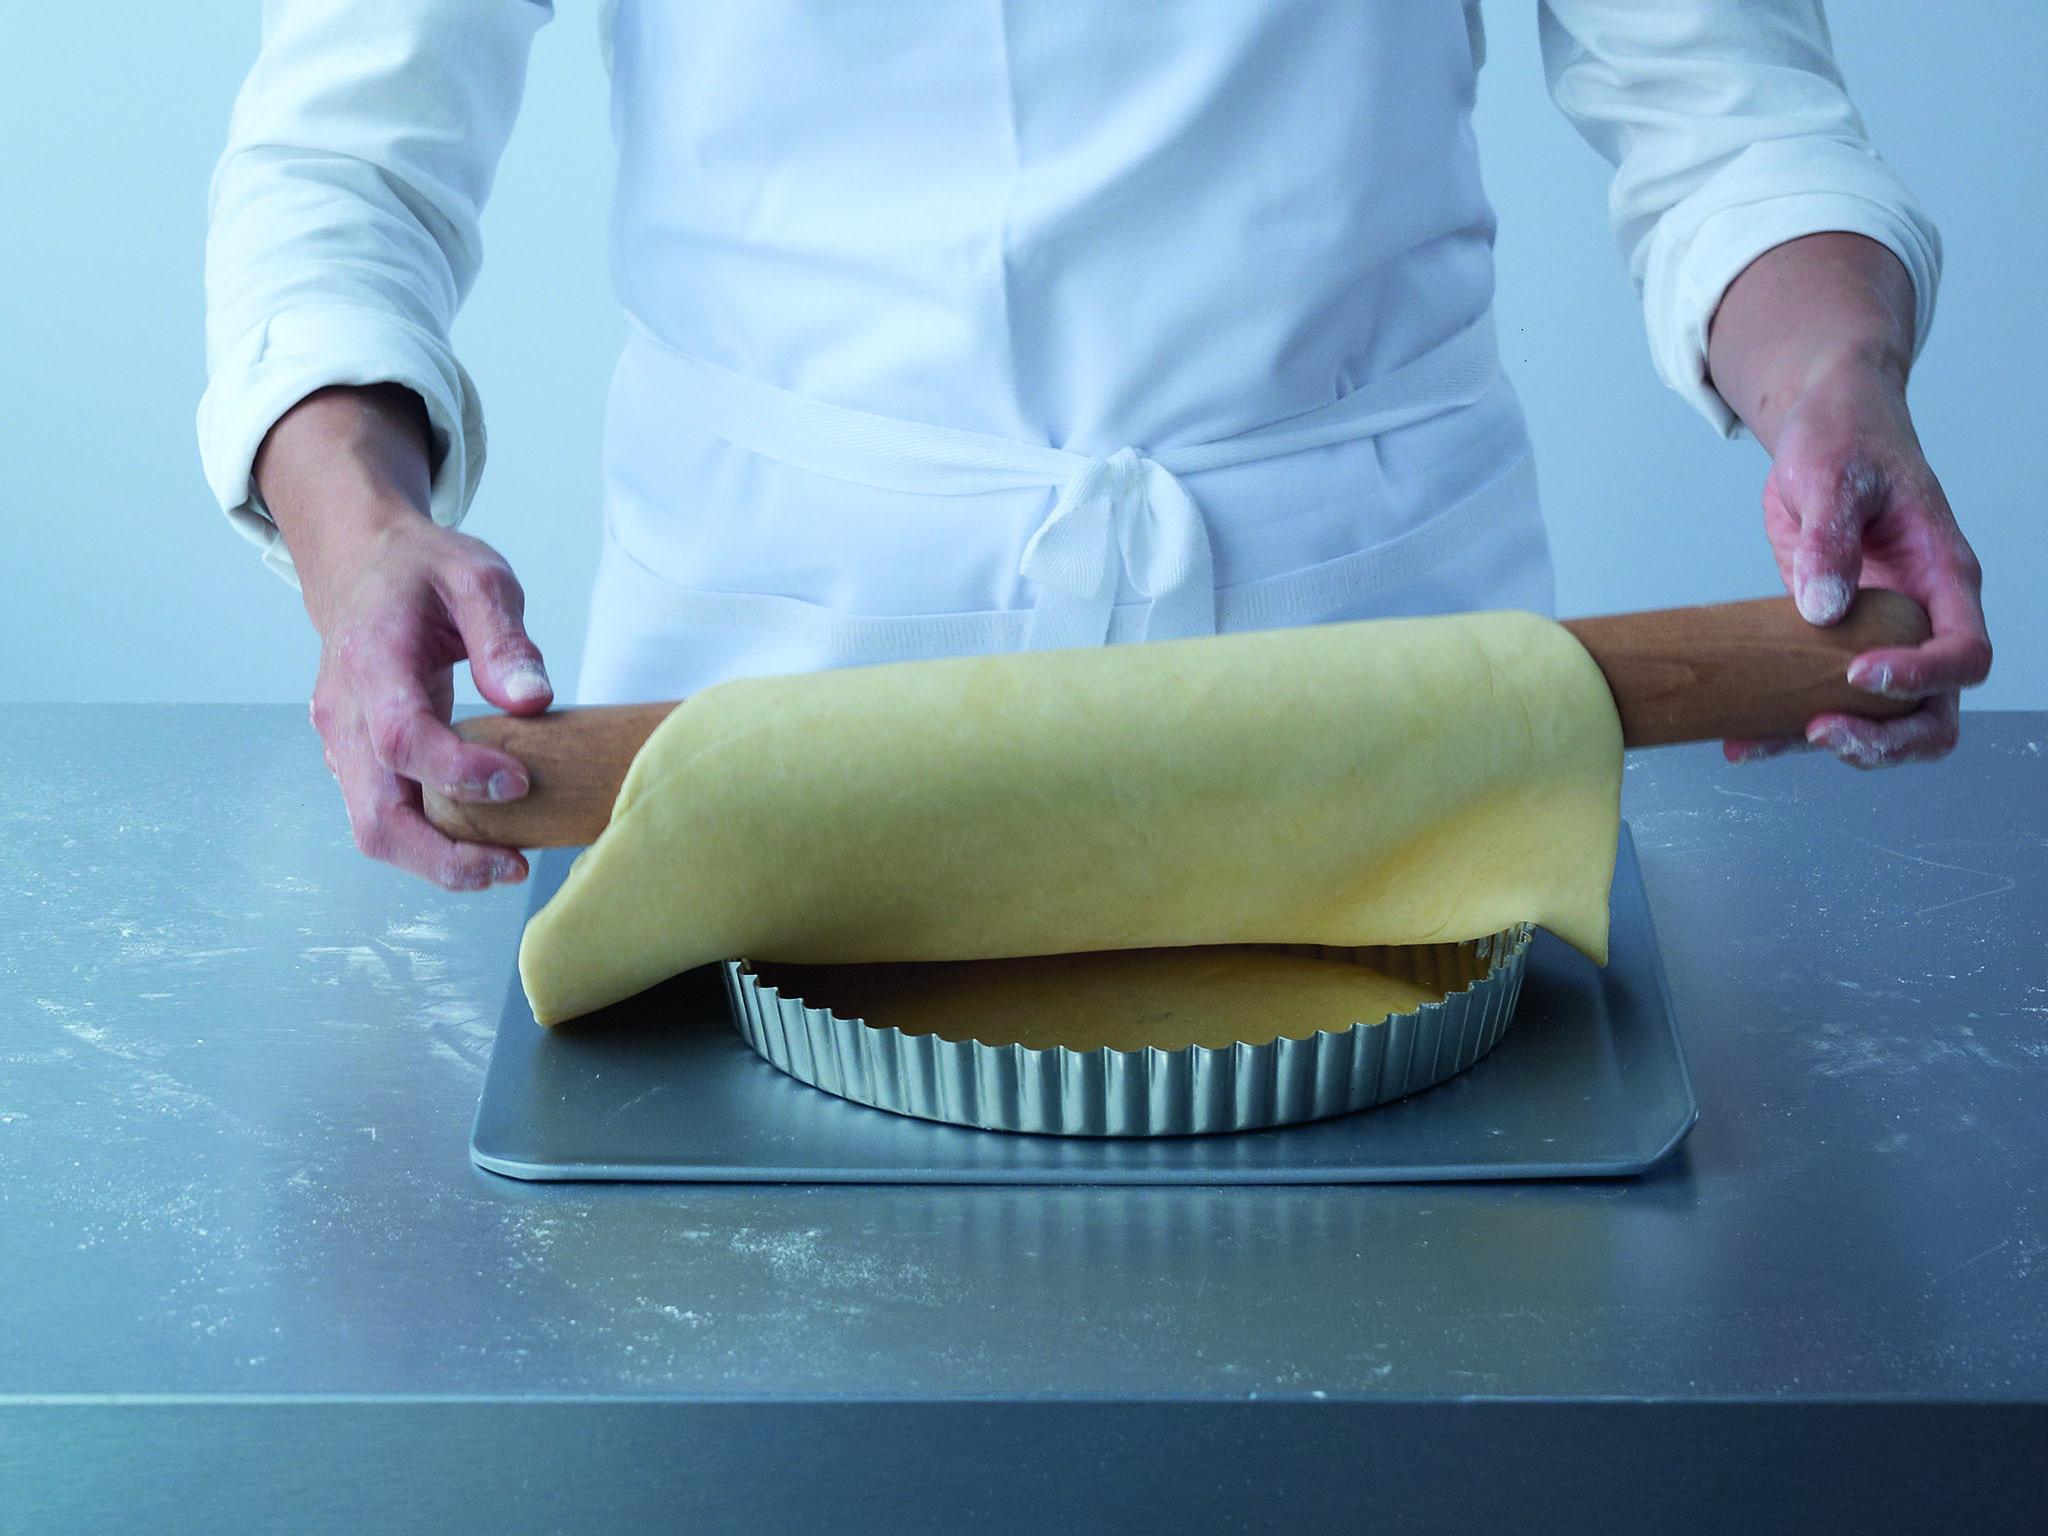
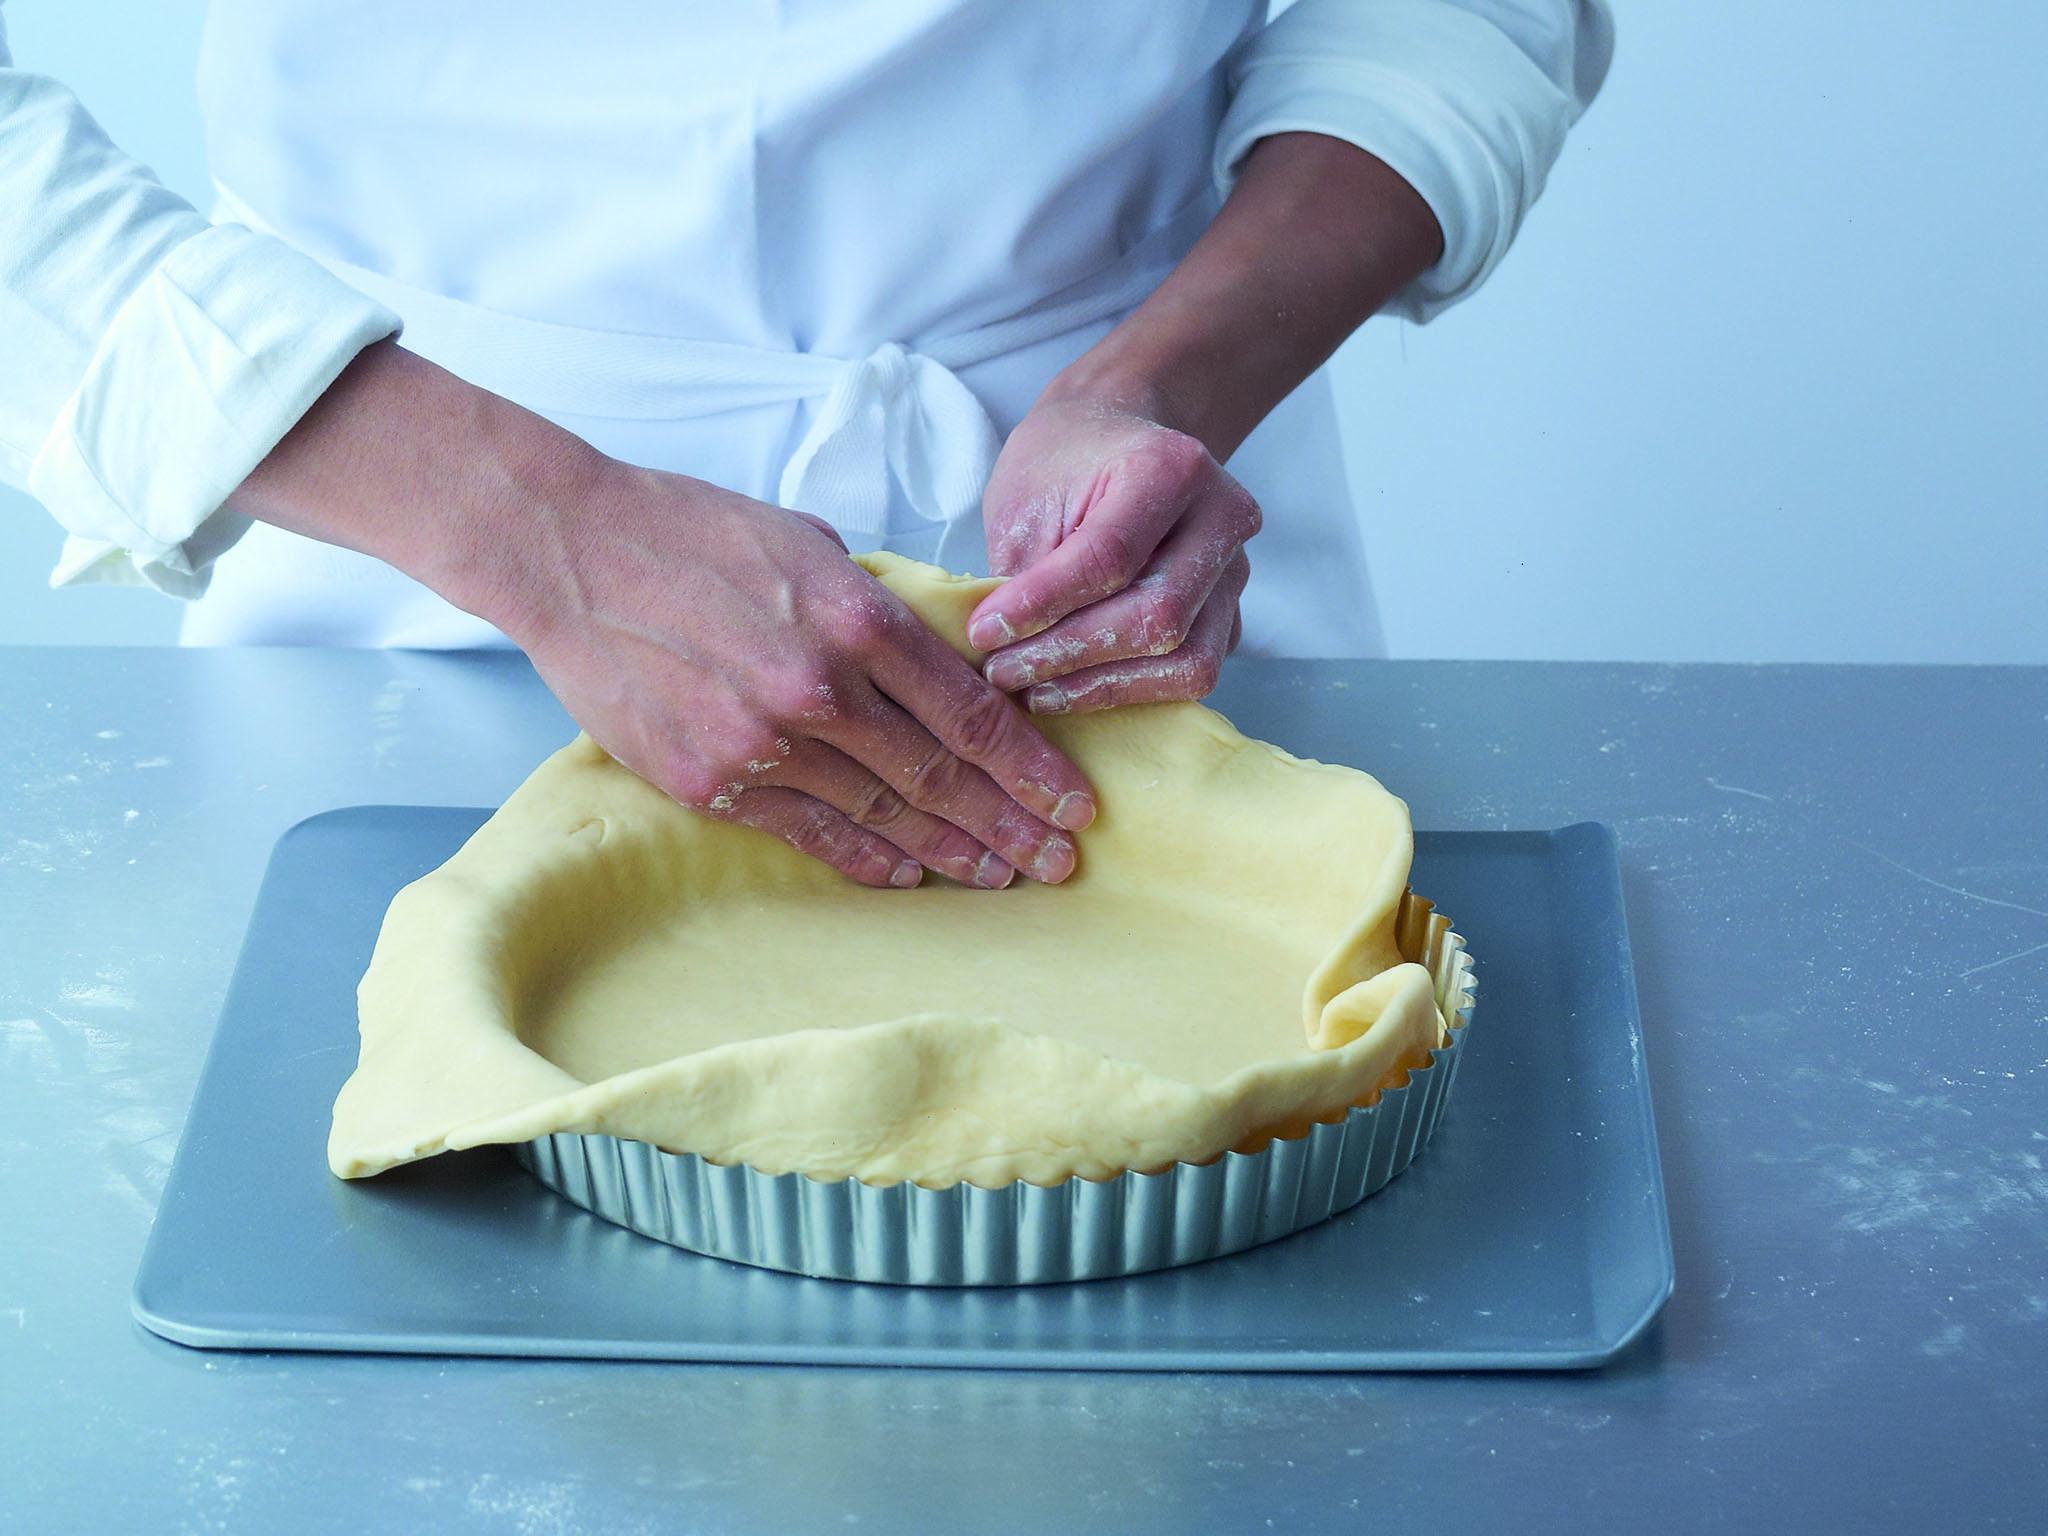
A note on lining…
Avoid stretching and pulling the pastry as you line the flan tin or ring. Note that it is important to get the pastry well into the corners, or it will fall into them as it bakes and cause uneven shrinkage around the top edge.
Baking pastry blind
When a pastry case is filled with a custard or liquid filling, it is difficult to get the pastry cooked through by the time the filling is set. Pre-baking or “baking blind” ensures that the pastry is cooked properly. Most, but not all, tarts call for this.
Before baking blind, chill the pastry case for at least 30 minutes, to firm the butter so that the pastry will hold its shape. Heat the oven to 200C / gas mark 6.
1. Make a cartouche of greaseproof paper, 8cm-10cm bigger than the tart tin. Scrunch it up, then unfold it and use to line the pastry case. Add a layer of dried beans or ceramic baking beans and fold the edge of the paper over the edge of the flan ring.
2. Bake for 15-20 minutes in the upper third of the oven until the sides are set. To check, remove from the oven and carefully pull the cartouche away from the pastry. If the pastry is holding up and looking less translucent and grey, remove the beans and gently tweak out the cartouche.
3. Return the pastry to a lower shelf of the oven for about 5 minutes, or until the base of the pastry looks dry and feels sandy to touch, but has not taken on any colour. Remove from the oven and allow to cool slightly before using.
A note on baking blind…
The dried (or special-purpose ceramic) beans help to support the sides and edges of the flan case and weigh down the base to prevent it from rising in the oven. Scrunching up the cartouche first, before unfolding it, helps to get it into the edges of the pastry case, ensuring the sides are well supported by the beans. If you are blind-baking individual tart cases, use small dried beans or rice.
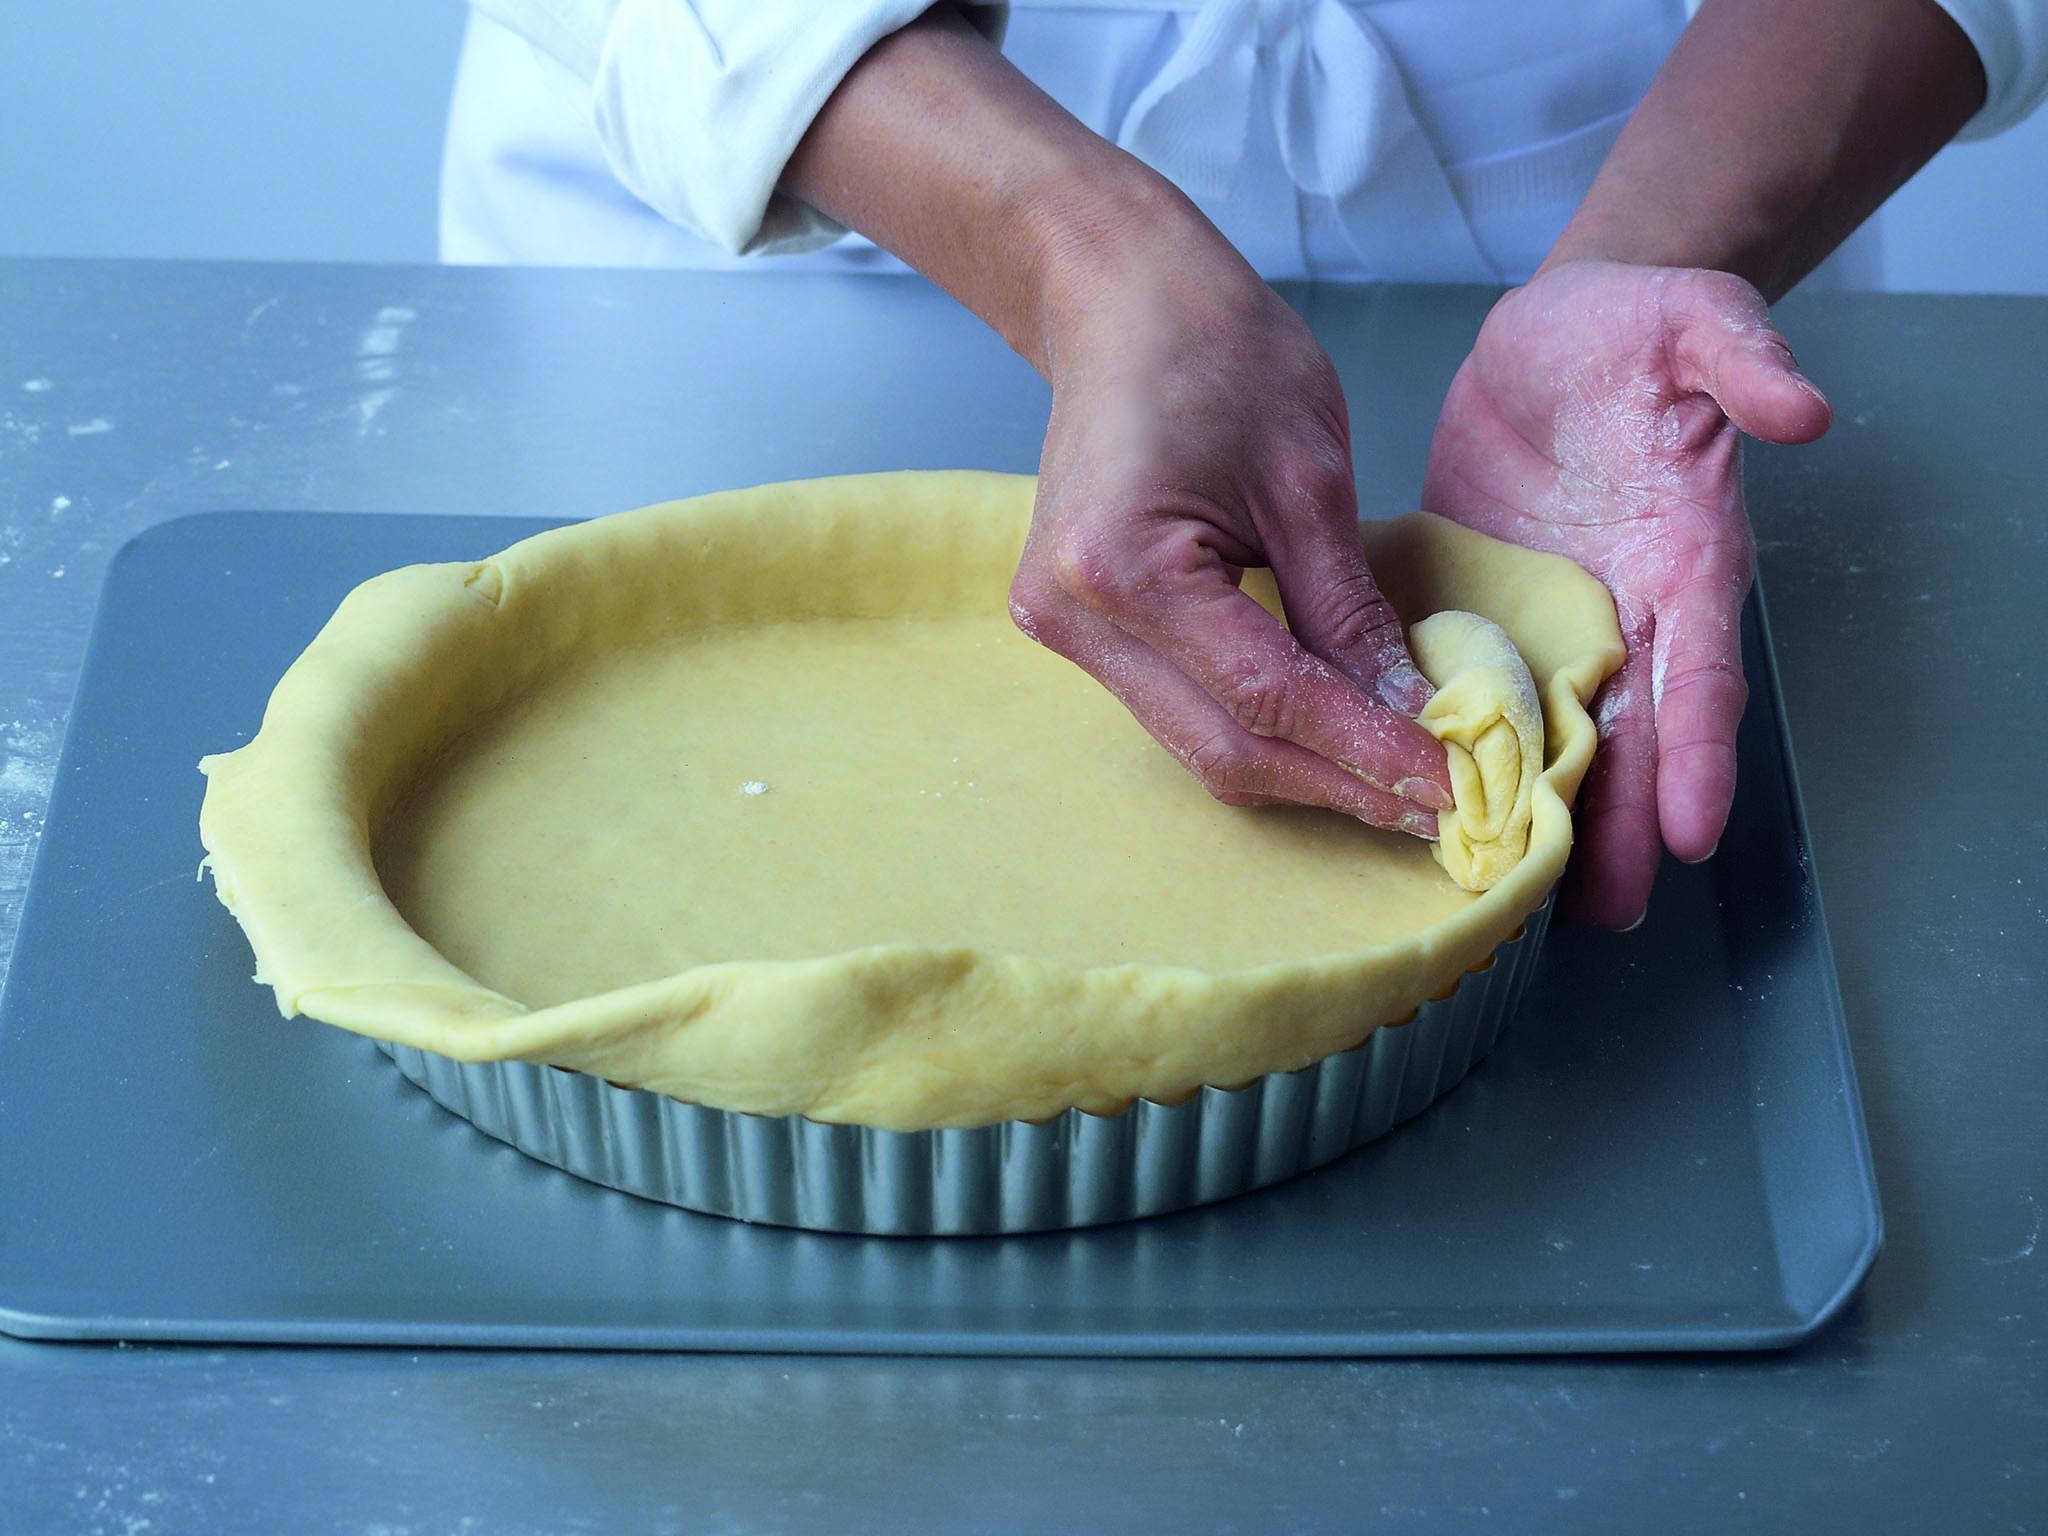
Repairing holes or cracks
If you are adding a liquid filling to a pastry case it must be watertight. After baking blind, check the pastry carefully for little holes at the edges or cracks up the sides, which can cause leakages. To repair these, soften a little of the leftover pastry in your fingers and plug the holes (as shown), or lay a strip of raw pastry over a crack, being very gentle with the pastry case. Return the repaired pastry to a lower shelf of the oven for 5–10 minutes to cook the raw pastry.
Using egg white
To provide a protective seal between the blind baked pastry and a wet filling, so the pastry won’t turn soggy, you can brush the pastry with lightly beaten egg white and return it to the oven for 3–4 minutes. This will also seal any very small holes.
‘Leiths How to Cook’ by Leiths School of Food and Wine is published by Quadrille, priced £30. Photography © Peter Cassidy
Join our commenting forum
Join thought-provoking conversations, follow other Independent readers and see their replies
Comments
Bookmark popover
Removed from bookmarks