Great British Bake Off: Swedish Princess Cake recipe
As seen on GBBO this week
Probably the most famous cake in Sweden, no birthday or celebration is complete without a princess cake.
The recipe was first printed in 1948 under the name of ‘Green Cake’ – in a book by Royal home economist (Jenny Akerström) who was teaching the three Swedish princesses (Margaretha, Märtha, and Astrid, daughters of Prince Carl (brother of King Gustaf V). The cake is said to eventually be known as Princess Cake because the princesses loved it so much.
Swedes love this cake so much, there is a whole week devoted to it. The fourth week in September is known as the week of the “Prinsesstårta” (in 2014, 20-27 Sep). During this week in Sweden, sales of Princess Cakes more than double – and all cakes are decorated with a little crown to celebrate.
Today, you can get really amazing Princess cakes at the bakery, but many commercial options are also available – from frozen to the ones you can assemble yourself at home in less than 20 minutes.
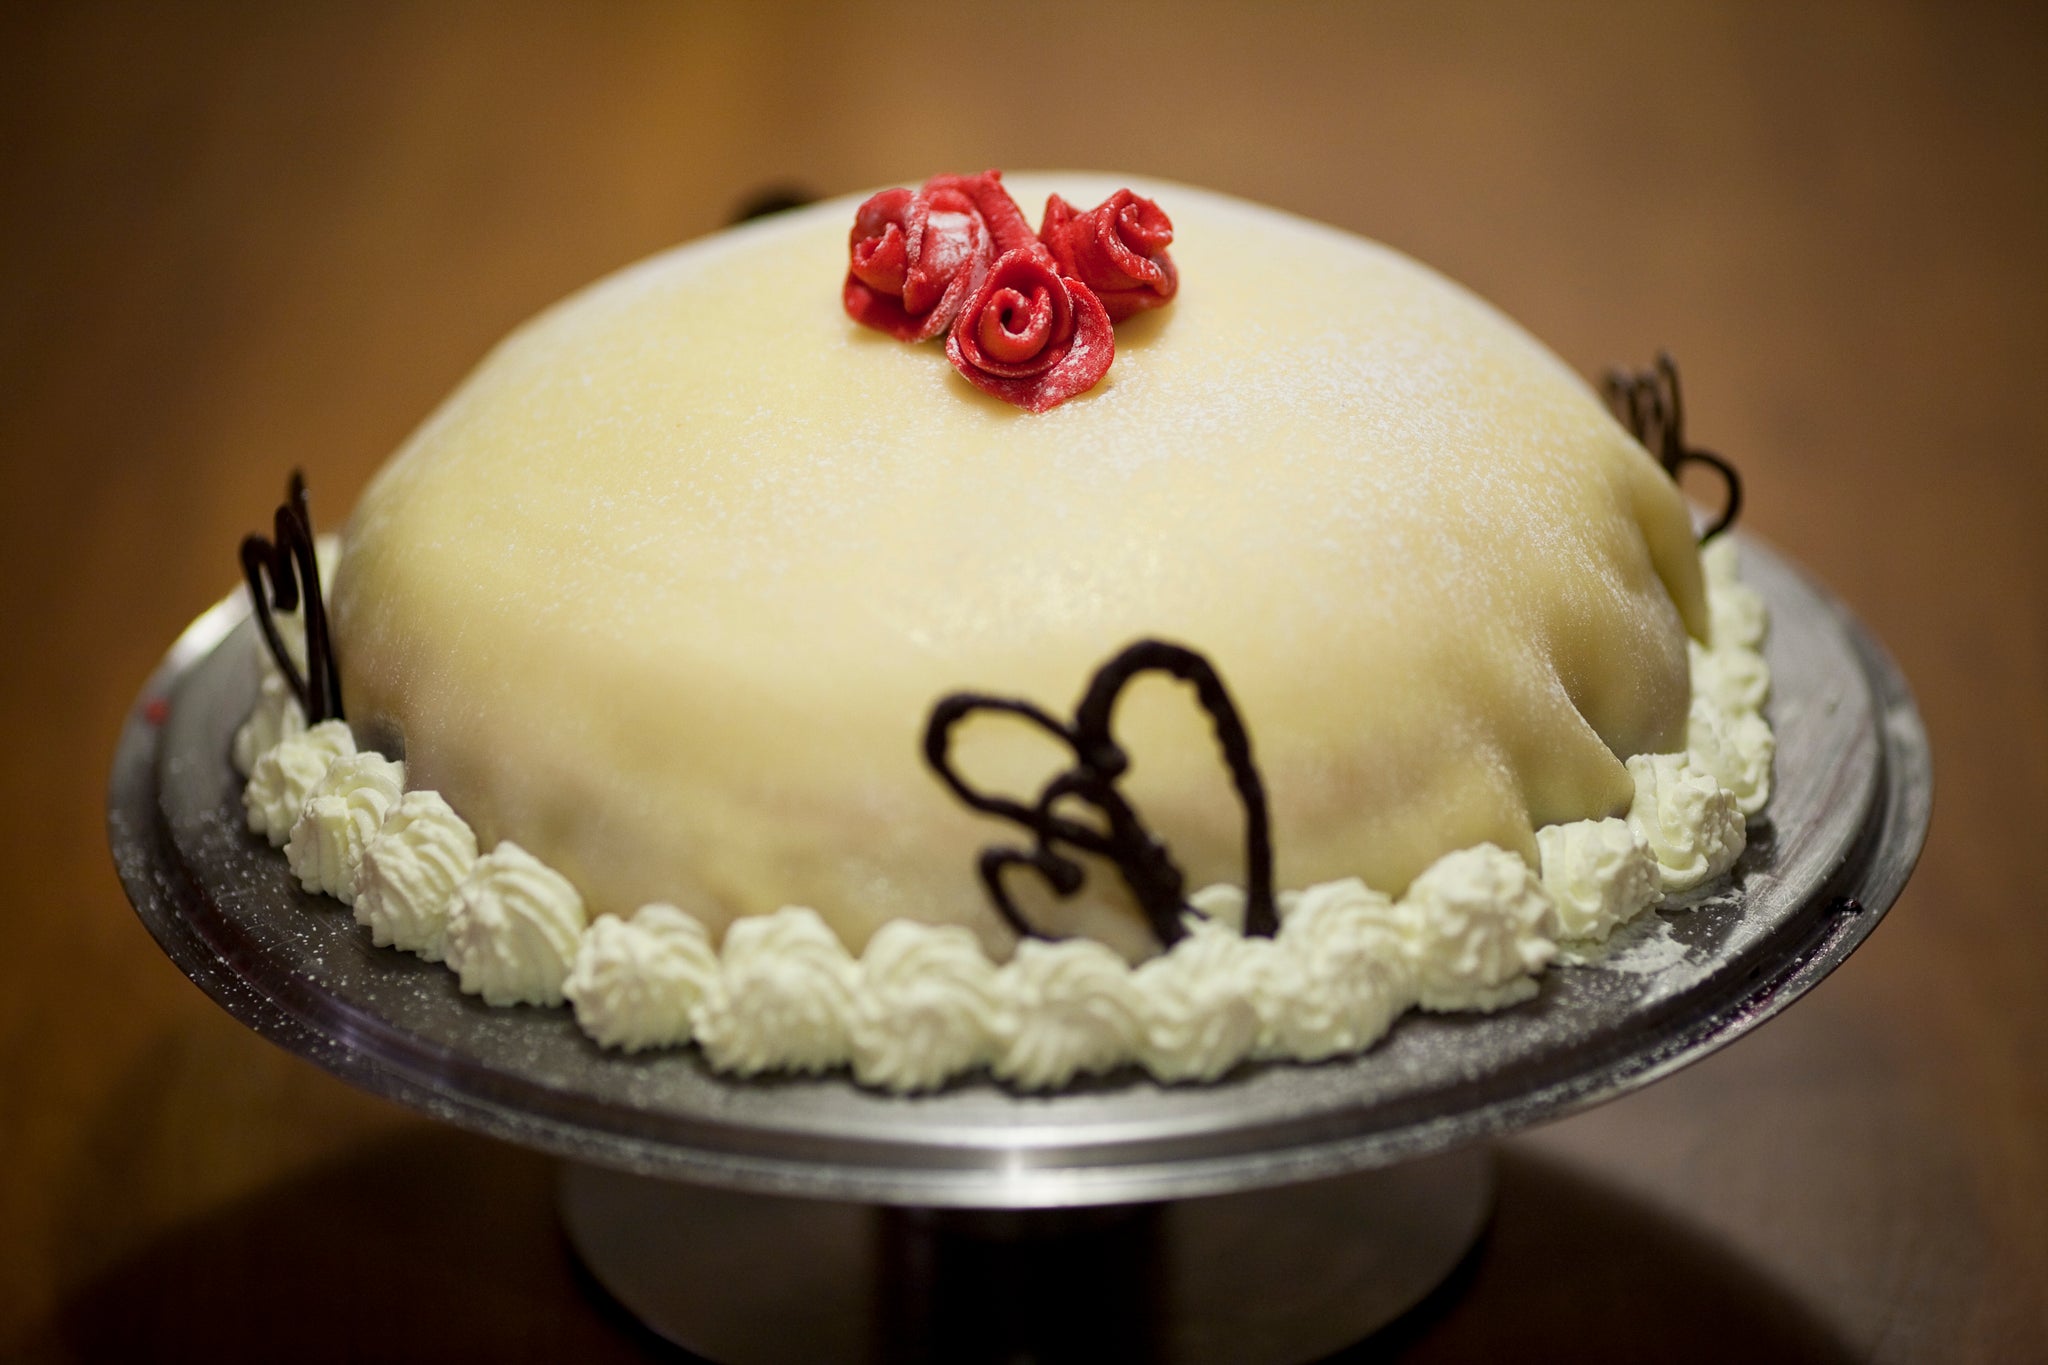
The layers of a Princess Cake are sponge, raspberry jam, crème patisserie – and whipped cream. All topped with the iconic green marzipan.
For home bakers, here's a recipe for a reasonably simple version of a princess cake.
Prinsesstårta (Princess Cake)
Ingredients
- 75g raspberry jam
For the vanilla patisserie cream
NOTE: Needs to be cooled before using in the cake or the cream will split.
- 1 vanilla pod
- 500ml whole milk
- 6 egg yolks
- 140g caster sugar
- 45g corn flour
For the cake layers
- 5 eggs
- 150g caster sugar
- 130g plain flour
- 1 tsp. vanilla sugar
For the whipped cream
- 700ml whipping cream
- 2tbs icing sugar
- 1tsp vanilla sugar
To garnish:
- 1 marzipan lid (available at Scandi Kitchen) - or 300g marzipan and green food colouring
- 1 tsp icing sugar
Marzipan Rose
- 40 g marzipan
- 1 drop red food colouring
- 1 drop green food colouring
Instructions
- Split the vanilla pod and scrape out the seeds and add to a saucepan with the milk. Bring to the boil. Take care not to burn and turn off heat as soon as boiling point is reached.
- Whisk egg yolk and sugar until it goes almost white, then turn off the whisk and add the corn flour. Turn the whisk back on medium and slowly add the hot milk to the bowl, whisking continuously.
- Pour the mixture back into the saucepan and bring back to the boil and cook for 1 minute to thicken. Turn off, sieve the mixture into a bowl, cling film and cool down completely in the fridge before using.
- Heat the oven to 200 degrees Celcius.
- Trace 3 identical circles onto baking paper – approximately 20-22 cm diameter. Place baking paper onto flat baking trays.
- Whisk egg and sugar until white and fluffy. The key here, is to whisk for a long time to incorporate as much air as possible as there are not raising agents in the mixture.
- Sift flour and vanilla sugar into the egg mixture and fold, very carefully, until completely incorporated. Preserve as much air as possible, so fold carefully but thoroughly.
- Carefully divide the batter between the three circles and ensure batter fills the circles all the way around, neatly.
- Bake in the oven until just golden brown and done – this will depend on your oven, but 5-6 minutes is usually fine.
- Remove from and leave to cool completely on a cooling rack. Very carefully remove the baking paper – if it sticks, wet the back of the paper a little bit and it should come off with more ease.
- On high speed, whisk all ingredients for the whipping cream until stiff peaks form. The cream needs to be quite firm to hold when decorating the cake – but take care not to over whip.
- Place the first layer cake on the plate you wish to serve on. Spread a nice layer of raspberry jam, follow by a 1cm thick layer of the patisserie cream. Add another cake layer and repeat over again and then add the final cake layer on top (You may have a bit of excess patisserie cream left over).
- On the top sponge layer, carefully add the whipped cream in a slightly flat “dome” shape – you will need to use a spatula here to get it quite smooth all over. You’re looking for around 3-4 cm “top” on the cake. Then carefully place the marzipan lid on top and over the edge of the cake, making sure the sides are completely covered and smooth.
Garnish:
- Add the marzipan lid.
- If you make your own marzipan lid, add the food colouring to the marzipan and roll it out into a round shape which you then put on the cake.
- Sift powdered sugar on top.
- Use a piping nozzle and any leftover whipped cream to pipe rosettes of cream around the edge to hide the bottom of the marzipan and any folds.
- To make an easy rose: add few drops of food colouring to the marzipan – add icing sugar if it gets too sticky. Roll out a 1 mm thick piece, 2 cm wide and around 10 cm long. Roll it up loosely, nip the bottom together, spread the leaves a bit and voila: A marzipan rose to the top of your cake.
- This cake greatly improves after a few hours in the fridge so all the flavours are soaked into the cake layers.
Bronte Aurell at Scandinavian Kitchen www.scandikitchen.co.uk
Join our commenting forum
Join thought-provoking conversations, follow other Independent readers and see their replies
Comments