Five epic recipes to help you survive another boring week
Make Monday taco night and the rest of the week will fall into place, says Emily Weinstein
I had originally planned to talk about burgers with you today.
But then Pati Jinich’s Sonoran carne asada tacos caught my eye. I can’t think of a better plan for Monday than making the components of her recipe – the steak, which is salted and quickly grilled; the fiesta refried beans, which are spread on a warm flour tortilla as a base for the beef; the salsa and the chilli verde guacamole for topping – and inviting your loved ones to feast. It’s worth it to prep the beans, salsa and guacamole, if you have the time. But this is still an amazing dinner – and a fast one – if you simplify or buy one (or more than one) of those components.
We also have a billion other recipes (that’s an approximate number) for your barbecue, picnic or potluck.
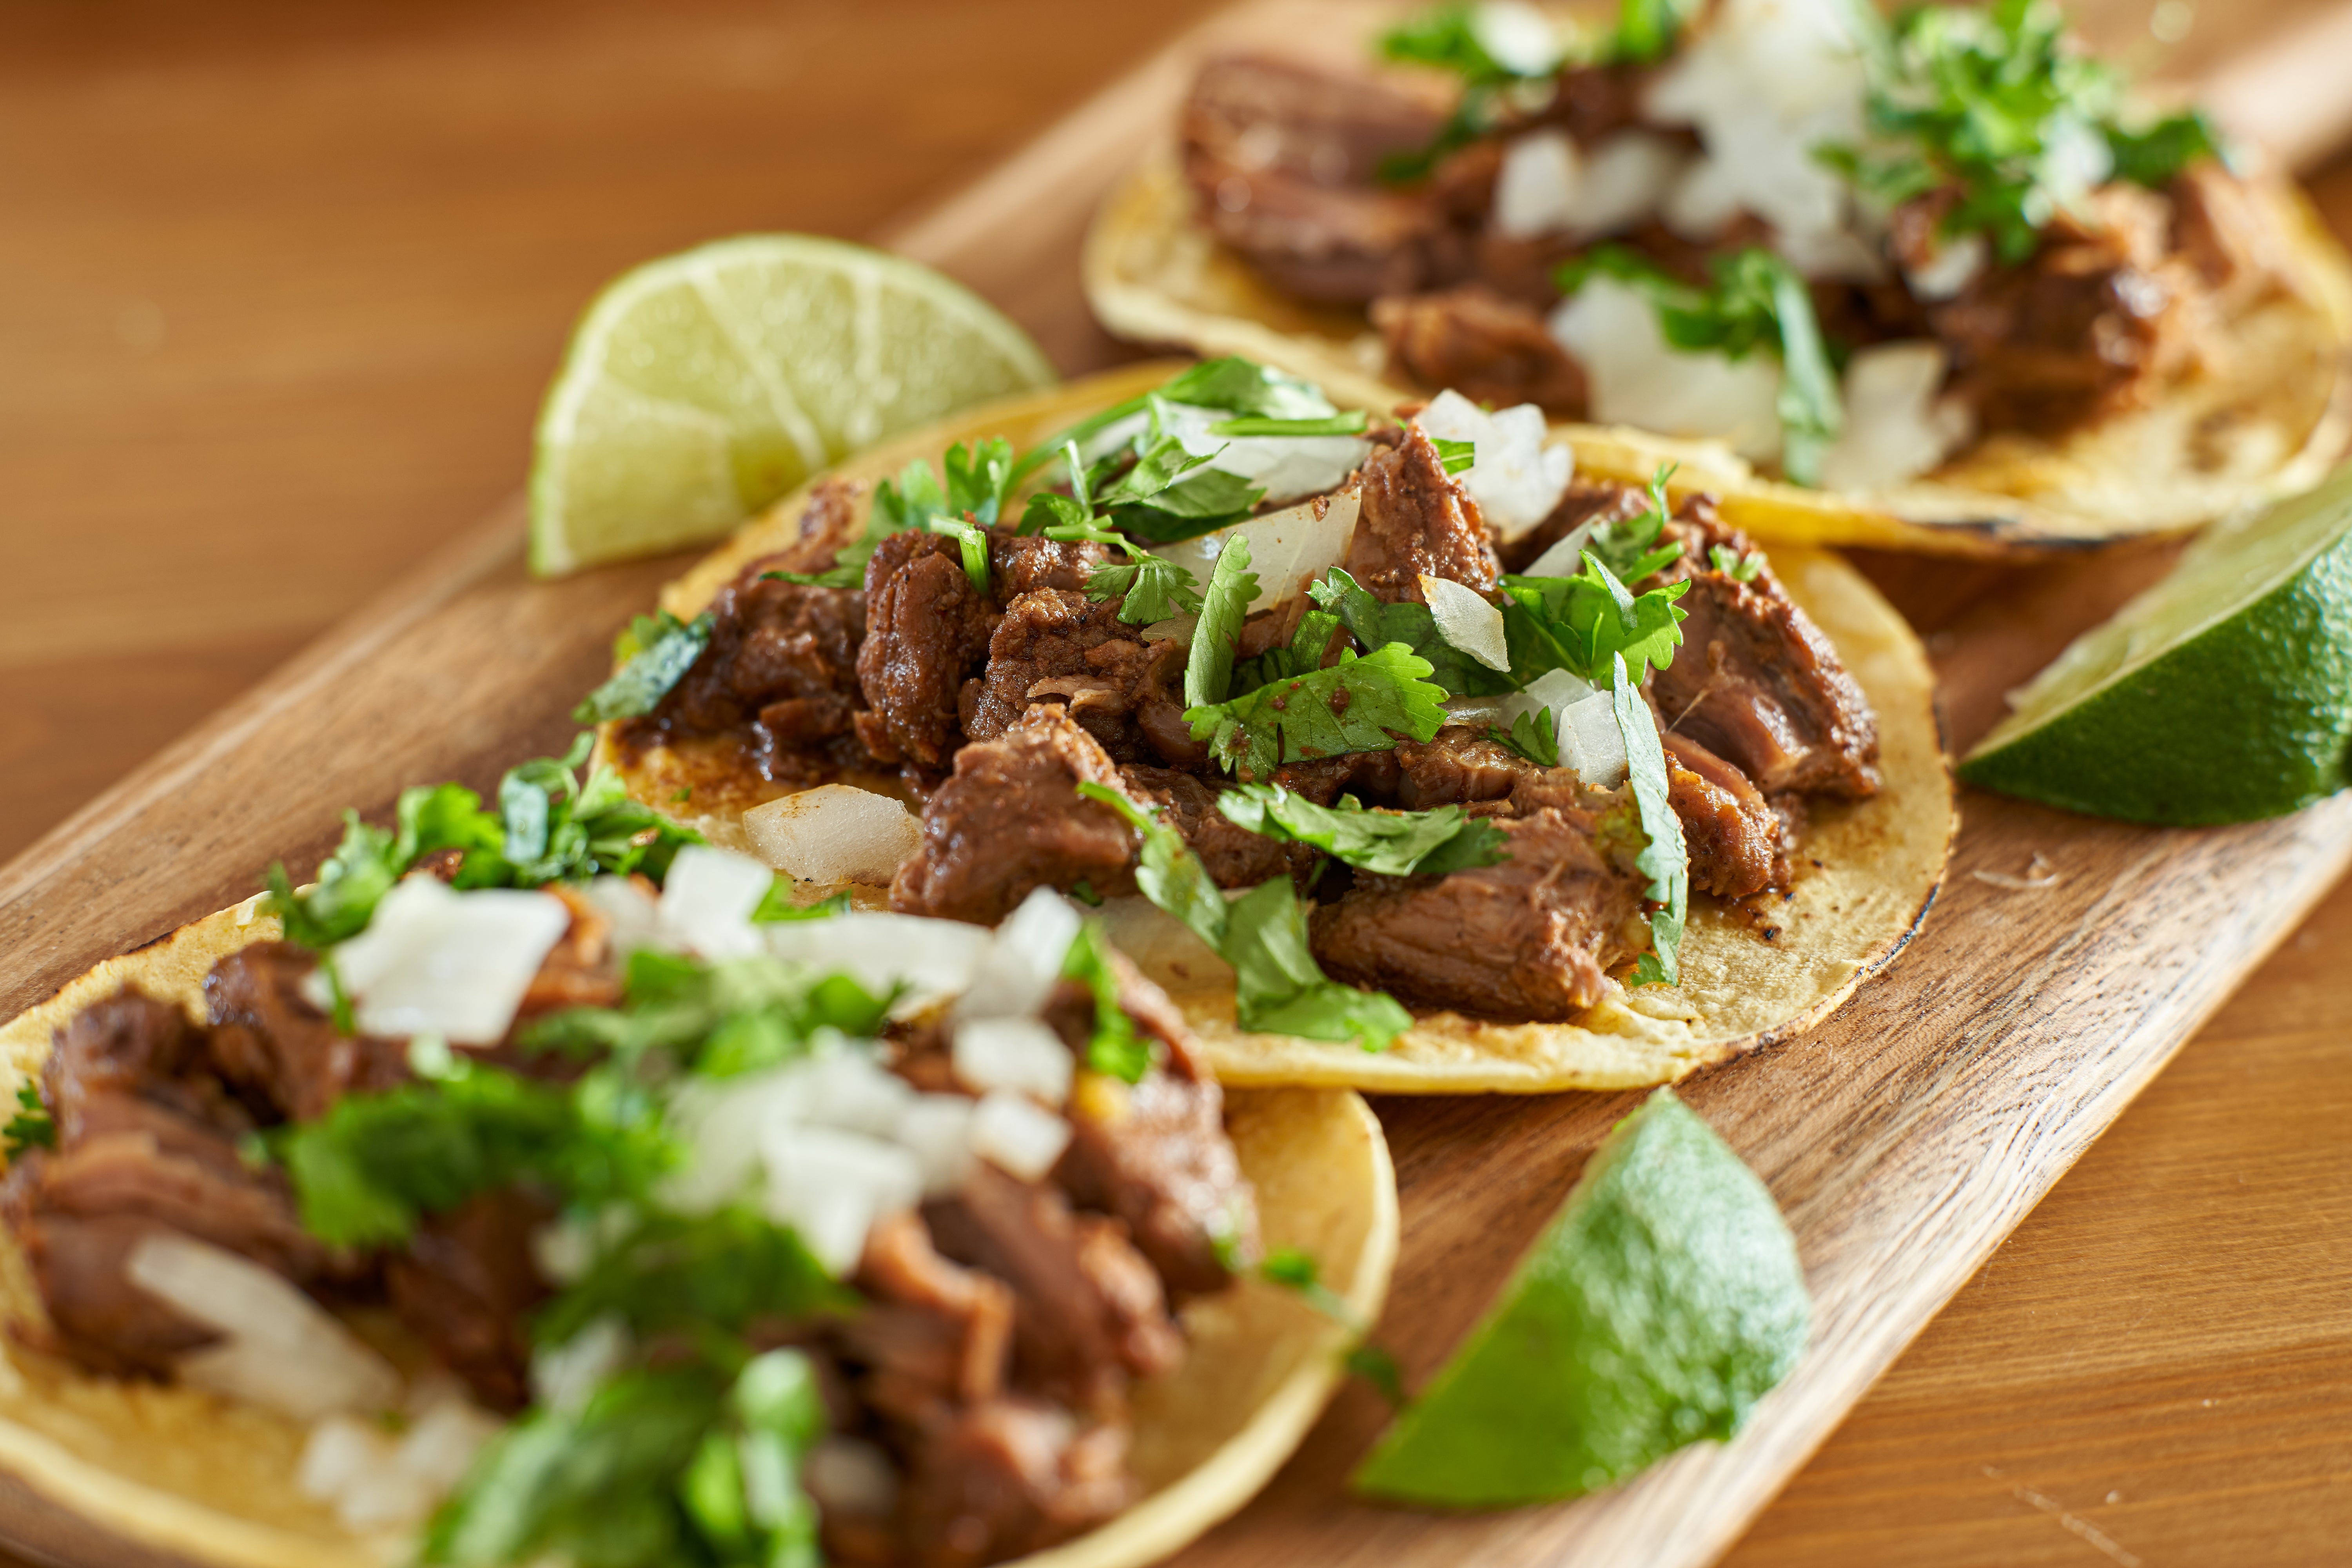
Sonoran carne asada tacos
By: Pati Jinich
If you’re trying to replicate the carne asada experience in Sonora, there are rules to follow: diezmillo (chuck roll) and palomilla or aguayón (top sirloin) are the traditional meats of choice. The first brings a deep beef flavour and a sturdy chew, while the second has a milder taste and a tender bite. Use one or the other, or a combination. Either way, they need to be sliced to 1½cm thickness, grilled over high heat, and seasoned with a generous amount of salt – and only salt – right as they are thrown on the grill. They should be flipped just once, when meat juices rise and start to bubble, allowed to rest covered, and then thinly sliced or diced into bite-size pieces. There is no carne asada just for the meat, though the meat turns out as tasty as can be, but it should end up in a taco that should have trouble closing (with its proper accompaniments of refried beans, guacamole and salsa) and should be eaten in good company.
Total time: 30 minutes
Serves: 6 to 8
Ingredients:
¼ large white onion, for cleaning the grill
Beef fat (cut from the meat, if fatty), tallow or vegetable oil, for greasing the grill
900g chuck roll, sliced into 1½cm steaks
900g top sirloin, sliced into 1½cm steaks
4 tsp sea salt, or to taste (about 1 tsp per 450g of meat)
Frijoles de fiesta (fiesta refried beans) (see recipe below)
Salsa tatemada norteña (fire-roasted salsa) (see recipe below)
Chile verde guacamole (see recipe below)
12 to 16 large (20cm) flour tortillas
Method:
1. Start a charcoal or gas grill, and get it very hot. For gas, set to high heat. For charcoal, grill is ready when coals are red but entirely covered with gray ash, and you can hold your hand about 12-15cm above the coals for only about 4 to 5 seconds before it becomes too hot.
2. Clean and season the grill: using a pair of tongs, rub a quarter of a white onion over the grill. Next, rub the beef fat over the grill to season it further (alternately, you can do this using tallow or vegetable oil).
3. Working in batches if needed to avoid crowding, place the meat over the hot grill. Season the meat generously with salt on top right before throwing it on the grill, salt-side up (alternatively, sprinkle the salt on top of the meat once it’s on the grill).
4. Grill for 4 to 5 minutes, until the bottom has seared, deep grill marks have developed, and the meat juices have started rising and bubbling over the top. Flip to the second side and grill for another 3 to 4 minutes for medium. Remove the meat and place in a lidded dish or container. Cover the cooked meat while you grill the remainder. Allow the meat to rest for at least 5 minutes.
5. One by one, take out the pieces of meat and cut into about 1½cm dice, placing them back in the same lidded dish and covering until all the meat has been chopped.
6. Before the meat is brought to the table, make sure the refried beans are hot. Set them on the table along with the salsa and guacamole, in separate bowls.
7. Reduce the heat of the grill to medium if using gas, or, if using charcoal, set the flour tortillas on a cooler part of the grill. Heat the flour tortillas about 1 minute or so per side, until puffed, lightly browned and completely heated through. Keep warm in a clean kitchen towel or tortilla warmer and bring to the table.
8. To assemble the tacos, a common practice is to grab a warm flour tortilla, spread some refried beans on the middle, add a generous amount of meat, then add salsa and guacamole on top to taste – but everyone can choose how they want to build or eat their tacos. (If the taco doesn’t easily close, your assembly was successful!)
Frijoles de fiesta (fiesta refried beans)
Serves: 6 to 8
Total time: About 2 hours
Ingredients:
450g dried pinto beans, rinsed (see note below)
½ large white onion
1 tbsp sea salt, plus more as needed
4 dried Colorado chillies (also known as California or New Mexico chillies), or guajillo chillies, or an alternative, stemmed and seeded
1 to 2 whole canned chipotles in adobo
3 tbsp vegetable oil or lard
225g asadero, quesadilla, or Oaxaca cheese (Gruyère, gouda or emmental are good substitutes), grated
30g crumbled Cotija (or parmesan), for garnish
Method:
1. Place pinto beans in a large pot and cover with 3⅓L water. Add the onion and set over high heat. Once it comes to a boil, reduce the heat to medium, skim off any foam that may have risen to the top, partly cover with a lid and cook for 1 hour.
2. Remove the lid, stir in salt, partly cover with the lid, and cook for another 15 to 30 more minutes, until beans are completely cooked through and tender and the liquid is tinted from the pinto beans.
3. Meanwhile, place the dried chillies in a small saucepan, cover with water and set over high heat. Once the liquid comes to a boil, reduce heat to medium and simmer, uncovered, for 10 minutes, until chillies have rehydrated, softened and plumped up.
4. Remove the lid on the beans, and, using a slotted spoon or a pair of tongs, discard the onion.
5. Working in batches if needed, add the cooked beans along with 500ml of their cooking liquid, the dried chillies, the chipotle chillies and the adobo sauce to a blender or food processor, and pulse until the mixture forms a coarse purée.
6. Heat the oil in a large, heavy casserole or saute pan set over medium. Once hot but not smoking, carefully add the bean purée, as it will strongly sizzle and splatter. Stir well, incorporating the hot oil into the bean mixture. Cook for 10 to 12 minutes, stirring often and scraping the bottom and sides of the pan as the refried beans continuously attempt to create a crust, until the mixture thickens.
7. Stir in the grated cheese, and continue to cook for another 10 to 15 minutes, stirring frequently and scraping the bottom and the sides, until the mixture thickens to a thick purée that holds its shape, and a clear trail can be traced in the bottom of the pan.
8. When ready to serve, scrape into a bowl and garnish with the crumbled Cotija. Beans will last up to 5 days in the refrigerator. Reheat them in a saucepan or skillet with a couple tablespoons of water over medium and mash as they warm up, since they have a tendency to thicken once chilled.
Tips: Starting with dried beans yields the most flavourful results, but you can substitute 3 (425g) tins of cooked beans to save time. If using tinned beans, start the recipe at step 3. If using tinned beans and they don’t have enough liquid for 2 cups, the dried chilli cooking water or water can be added.
Salsa tatemada norteña (fire-roasted salsa)
Makes: About 200g (6 servings)
Total time: 45 minutes
450g ripe Roma tomatoes
225g whole, fresh Anaheim chillies (2 to 3 large chillies), or equivalent; see note below
¼ peeled large white onion (about 90g)
1 tsp sea salt, plus more to taste
Method:
1. Start a charcoal or prepare a gas grill. Once hot, place the whole tomatoes, chillies and onion on the grill. Let the ingredients char for about 12 to 15 minutes, flipping every 3 to 4 minutes. Pull them off the grill once cooked: the tomatoes should be completely mushy, as their skins start to break and their juices start to come out. The chillies should be wilted, charred and wrinkled. The onion should be darkened and softened (alternatively, ingredients can be charred under the broiler on an aluminum foil-covered baking sheet, or directly on a preheated comal or a cast-iron pan set over medium heat).
2. Place charred chillies in a plastic bag, and close the bag well. Let chillies steam and sweat for 5 to 10 minutes. As soon as they have cooled enough to handle, remove them from the bag, slip off their skins, make a slit down the side of each and remove their seeds and stems. You could rinse the chillies under a thin stream of water to help remove the seeds or rinse them off by dipping them into a bowl of water (don’t remove or discard the skin, seeds or juices from the tomatoes and onion).
3. Set the charred tomatoes, onion and cleaned chillies on a chopping board, and finely chop. Place in a bowl, add salt, and mash and mix with a fork (alternatively, ingredients can be mashed in a molcajete). Taste for salt and add more, if needed.
4. Serve immediately, or cover and refrigerate for up to 5 days. The salsa can be eaten cold, though is best consumed lukewarm or hot. If desired, you can reheat it in a small saucepan until warmed.
Tips: Known as chilli verde in Sonora, Anaheim chillies are also referred to as Fresno, California or New Mexico chillies.
Chilli verde guacamole
Makes: About 200g (4 to 6 servings)
Total time: 30 minutes
Ingredients:
1 fresh Anaheim chilli
1 serrano chilli, finely chopped
3 tbsp finely chopped white onion
2 tbsp coarsely chopped coriander leaves and tender stems
1 tsp sea salt, plus more to taste
3 ripe avocados, halved and pitted, meat diced and mashed
Method:
1. Place the Anaheim chilli on a small baking tray covered with aluminum foil. Roast it under the broiler, flipping a couple times, until the chilli is wilted and its skin is completely charred and wrinkly, 9 to 12 minutes (alternatively, you can char the chilli directly on a hot comal or a cast-iron pan set over medium heat, or on a grill set to high).
2. Place the charred Anaheim chilli in a plastic bag and close it well. Let it steam and sweat for 5 to 10 minutes.
3. As the Anaheim chilli steams, add the serrano chilli, onion, cilantro and salt in a bowl or molcajete, and mash until combined. Add the avocado and continue to mix and mash until you form a chunky purée.
4. Once it is cool enough to handle, remove the Anaheim chilli from the bag, slip off the charred skin, make a slit down the side and remove the seeds and stem. You could rinse the chilli under a thin stream of water to help remove the seeds or rinse it off by dipping it into a bowl of water.
5. Finely chop the Anaheim chilli. Add it to the avocado mixture, and stir to combine. Season to taste with salt.
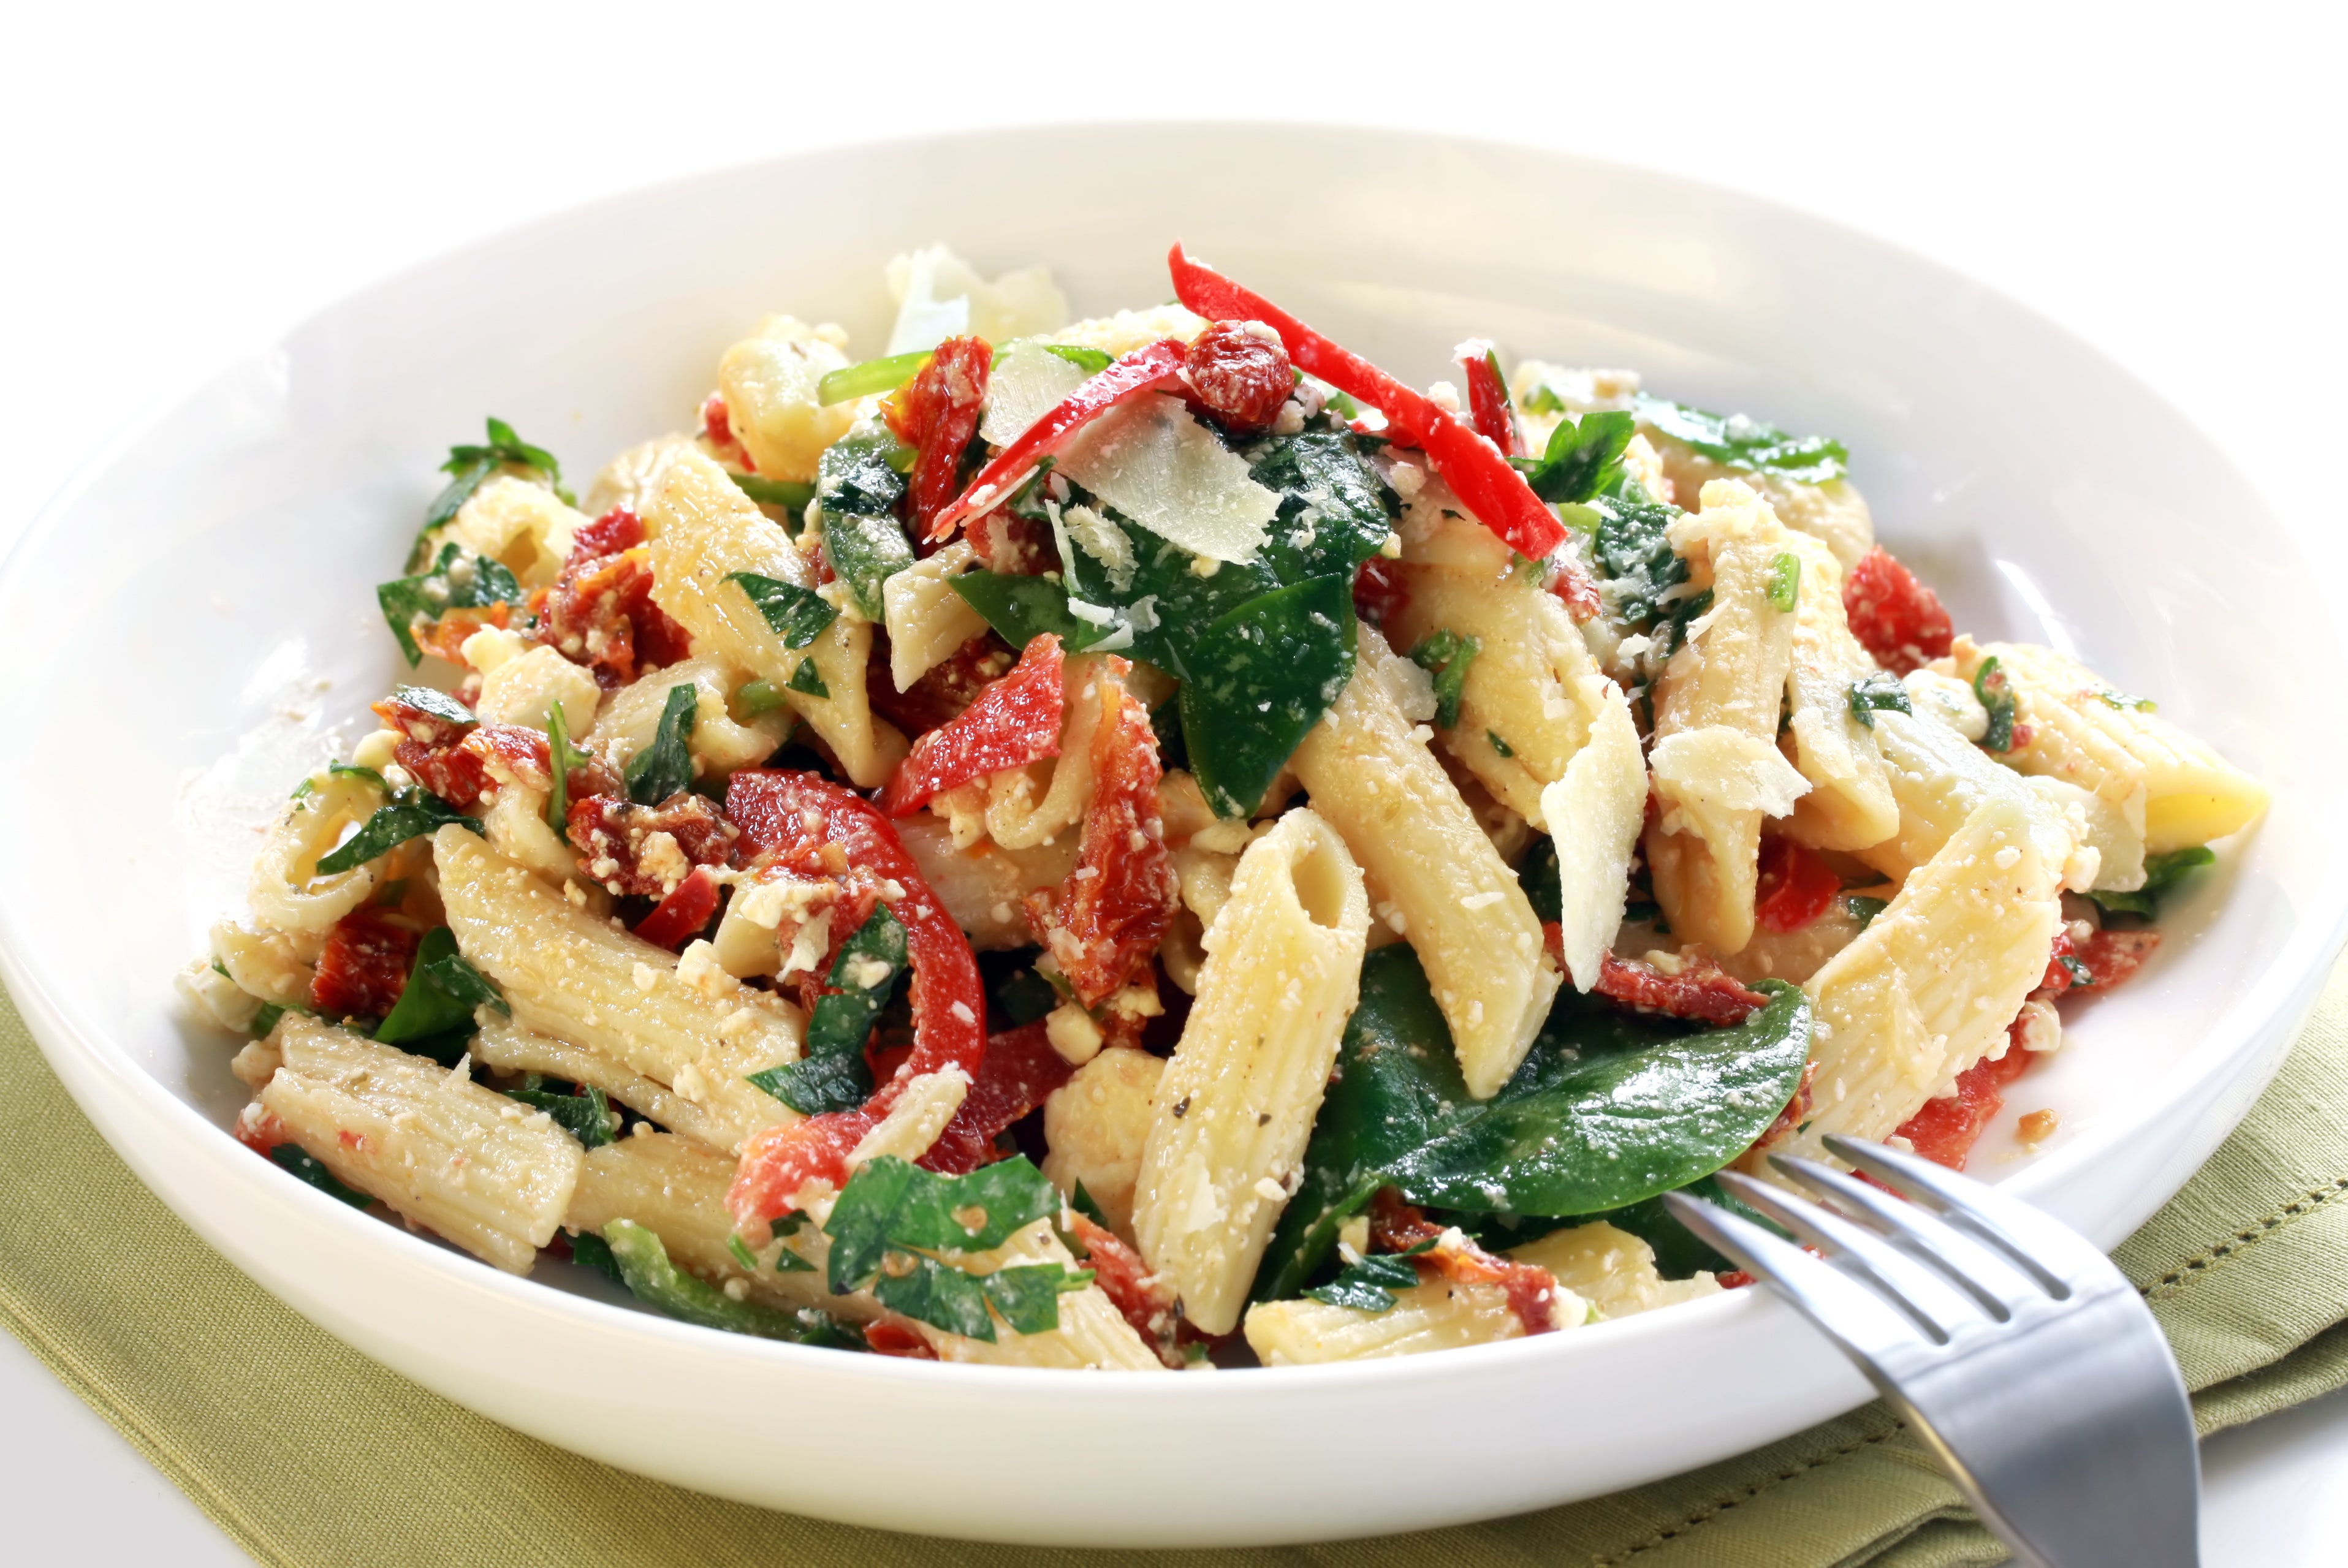
Double-tomato pasta salad
By: Ali Slagle
For full-spectrum tomato flavour, this pasta salad pairs fresh tomatoes with sun-dried tomatoes. The sun-dried tomato oil and the water that’s released from salted tomatoes serve as a built-in dressing. Nuts and herbs add crunch and freshness, but you should feel free to add more embellishments right before serving, like mozzarella or shaved parmesan, white beans or chickpeas, sardines or another tinned fish, or briny condiments like capers or olives.
Total time: 35 minutes, plus cooling
Serves: 4 to 6
Ingredients:
1 (200-225g) jar sun-dried tomatoes packed in oil
200g raw pine nuts, walnuts, hazelnuts or almonds, coarsely chopped
60ml extra-virgin olive oil
2 garlic cloves, finely grated
Salt
Freshly ground black pepper
450g long or twirly noodles, like linguine or fusilli
900g ripe tomatoes
Lemon juice or red wine vinegar, to taste
110g torn basil, mint, dill or rocket leaves, or a combination
Method:
1. Holding back the sun-dried tomatoes with your fingers, drain the oil from the jar into a large pot. Coarsely chop the sun-dried tomatoes and add them to the pot, along with the nuts and olive oil. Set over medium-low and cook, stirring often, until the nuts are toasted, 5 to 6 minutes. Scrape into a large bowl (reserve the pot), then stir in the garlic and ½ tsp each salt and pepper.
2. Fill the reserved pot with water (no need to wash) and bring to a boil. Season water with salt, add the pasta and cook until just past al dente (the pasta will not cook further in the sauce). Drain the pasta.
3. While the water is coming to a boil, coarsely chop the ripe tomatoes. Add to the sun-dried tomato mixture, season with 1 tsp salt and stir to combine (tomato mixture can be made up to 2 hours ahead).
4. Add the drained pasta to the tomato mixture and stir to combine. Let sit until room temperature, about 15 minutes or up to 2 hours. Pasta salad will keep up to 3 days if refrigerated.
5. When ready to eat, taste the pasta salad. If flavours are muted, add salt and lemon juice or red wine vinegar. If it’s too sweet, add black pepper and lemon juice or red wine vinegar. Stir in the greens and eat.
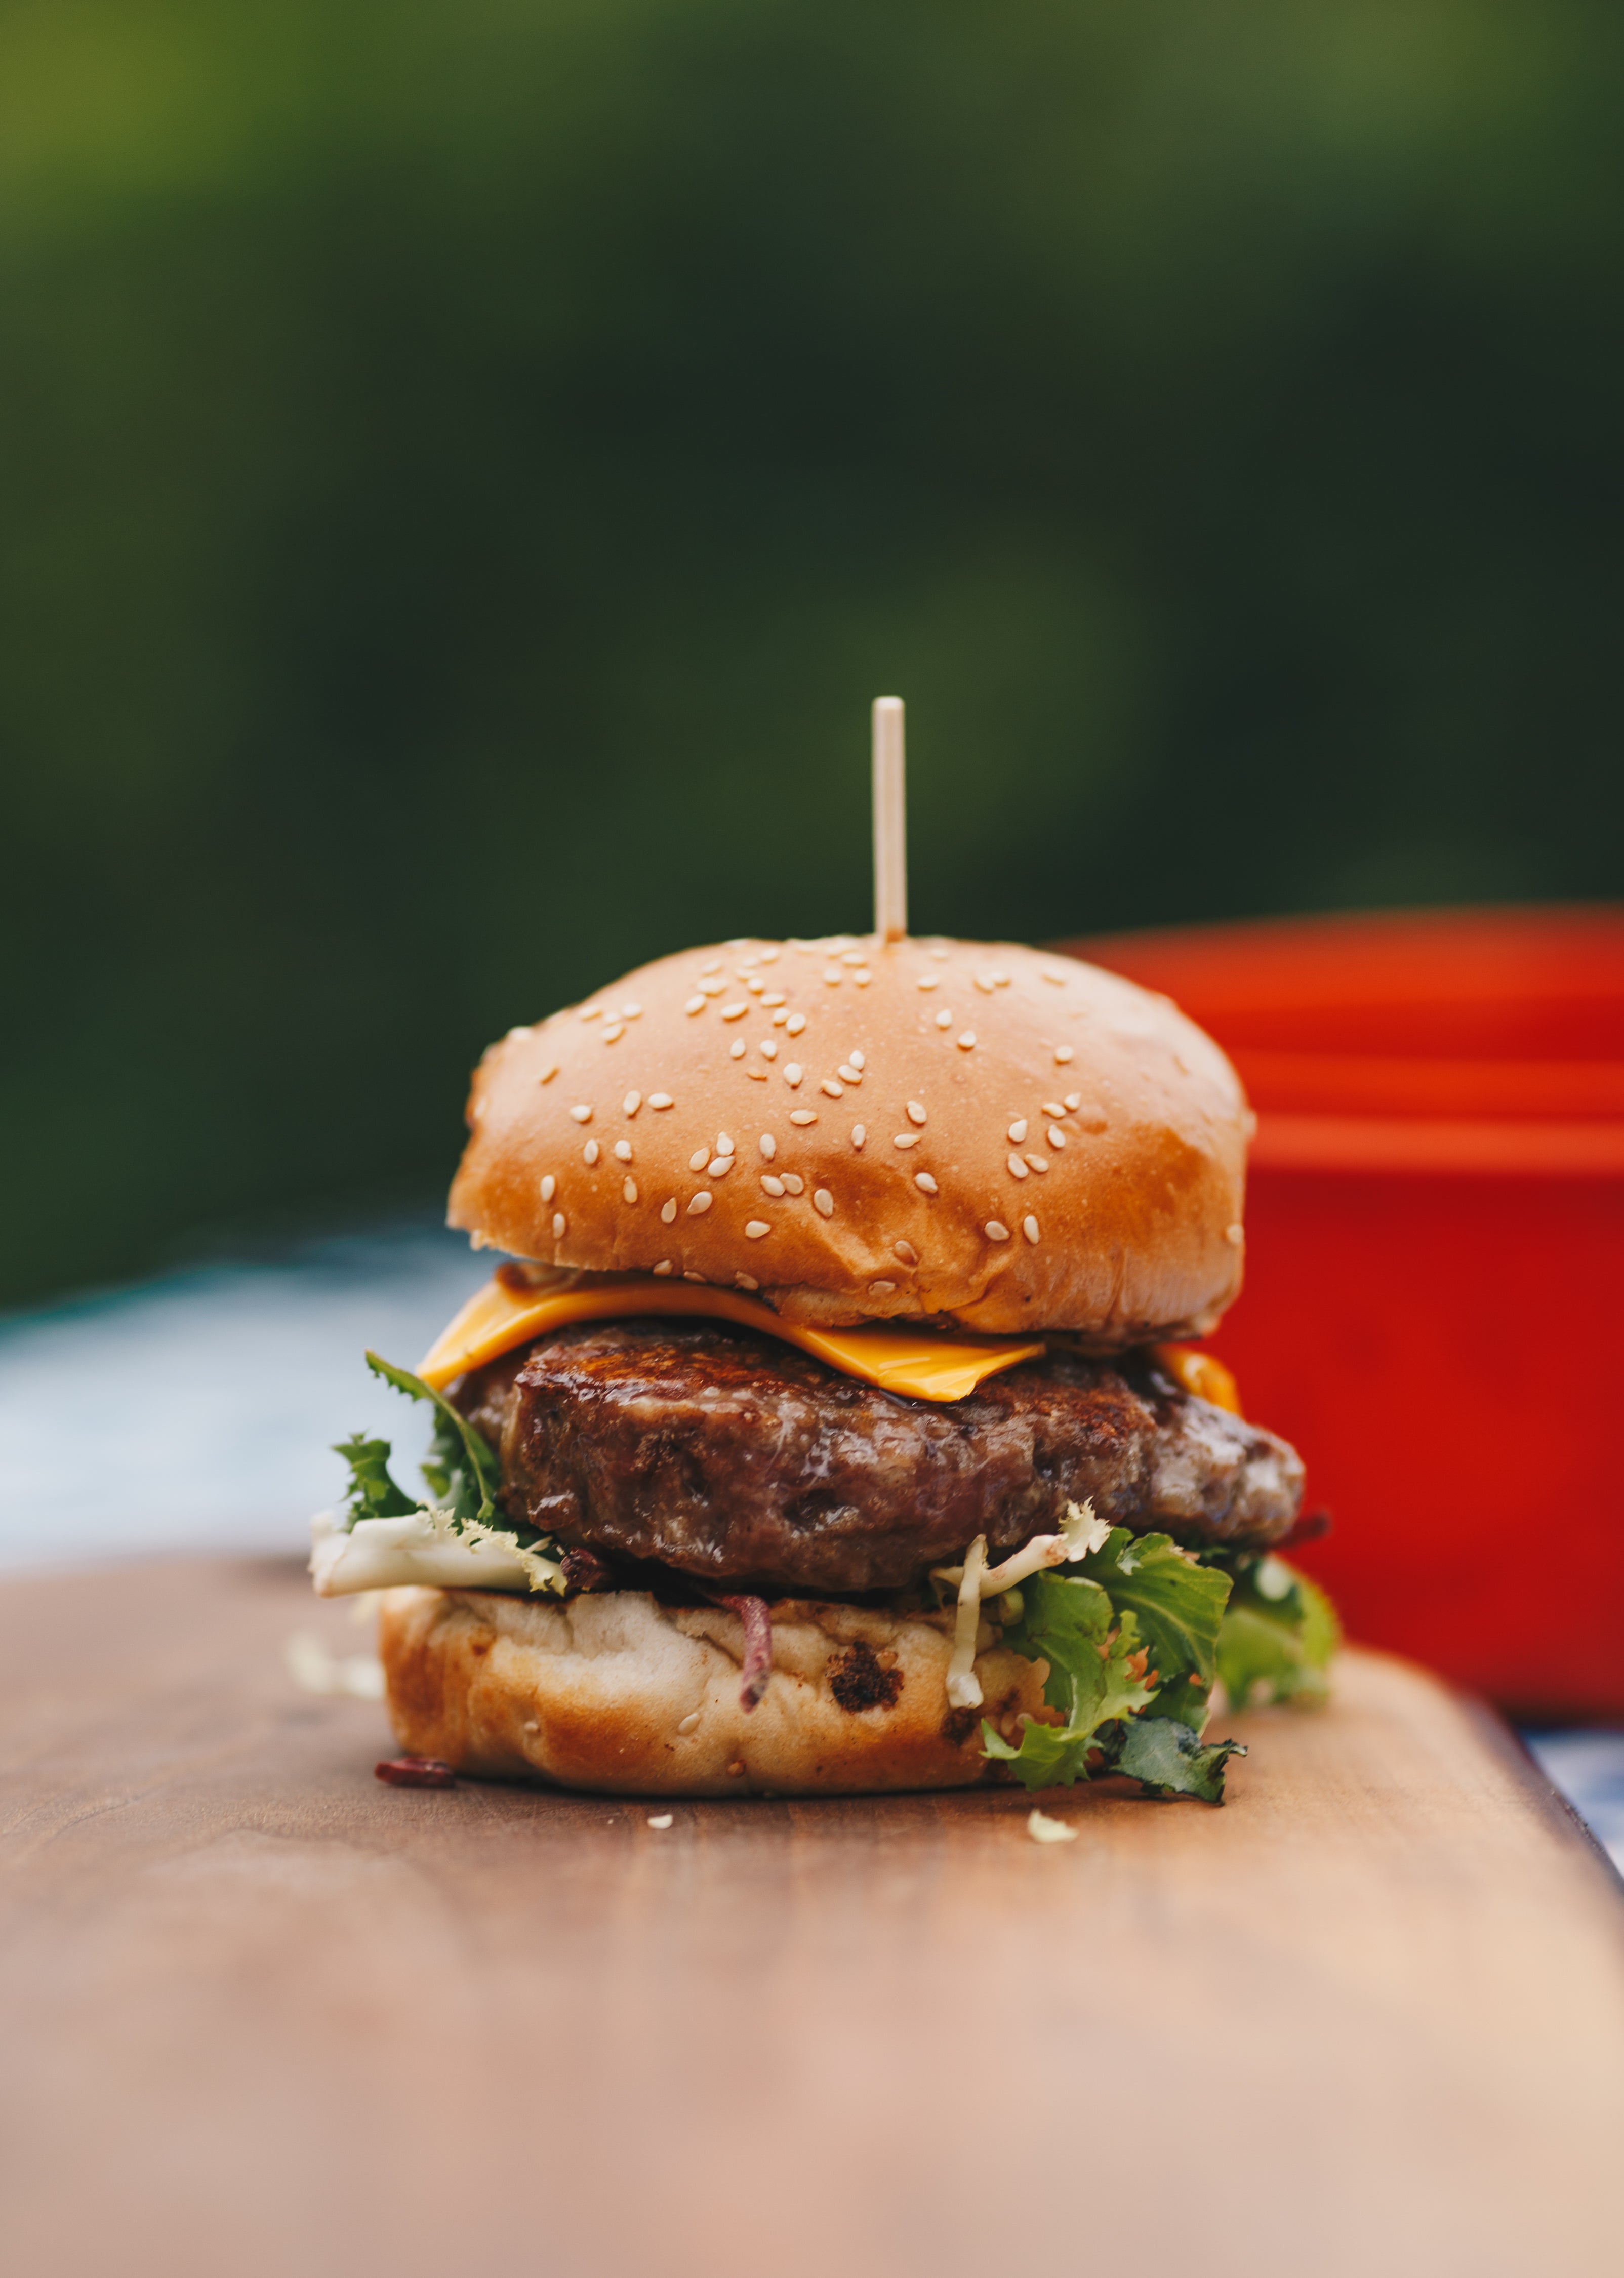
Thin but juicy chargrilled burgers
By: J Kenji López-Alt
The key to cooking a thin, modestly sized burger on the grill is to use the highest heat possible, and to cook the meat most of the way through on one side before flipping it and briefly cooking the second side. This technique allows you to get a nice dark crust on that first side without the risk of overcooking. To form thin patties that hold together on the grill, massage the beef mince briefly – which is a cardinal sin with many other styles of burgers, but a necessity here for cohesion. This allows you to flatten the patty out extra-thin and wide to account for shrinking as the meat cooks.
Total time: 15 minutes, plus heating the grill
Makes: 4 burgers
Ingredients:
340-450g beef mince (at least 15 per cent fat), or vegan beef mince alternative
Salt and freshly ground black pepper
4 soft burger buns, toasted in butter
Toppings (such as shredded iceberg, sliced onion, tomato and pickles) and condiments (mayonnaise, ketchup or mustard), as desired
4 slices American cheese or other sliced cheese of your choice (optional)
Method:
1. Divide the beef: line a 33-by-45cm rimmed baking tray with parchment paper. Divide the beef mince into 4 even balls. Working with one ball at a time, massage the meat gently in your hands until it is cohesive and tacky, about 15 seconds. Next, using clean hands, roll each into a smooth ball about the size of a golf ball. Place the balls on the baking tray, one ball in the centre of each quadrant.
2. Form the patties: lay a second sheet of parchment on top, then place a second rimmed baking tray on top of the first. Press down very firmly on the baking tray, pressing directly over each patty in turn, to spread each ball into a thin patty that is wide enough that it will extend at least a full inch around your burger buns on all sides (if using a vegan beef alternative, form a patty that is just large enough to extend ½-1½cm beyond the edges of the buns, as vegan beef alternatives do not shrink as much during cooking). Refrigerate the patties until ready to cook.
3. Heat the grill: if cooking with charcoal (the preferred method, as charcoal gets hotter than gas), ignite a full chimney of coals. When the coals are mostly covered with grey ash, spread them out evenly under one side of the grill and allow the grill to heat with the lid off for 5 minutes. If cooking with gas, set the hottest burners to high heat, cover and let the grill heat for at least 15 minutes.
4. Season the burgers: when ready to cook, gently peel the top sheet of parchment off the burgers and season them generously with salt and pepper. Replace the top parchment, flip the parchment sheets with the burgers in between them over entirely, then peel off the other piece of parchment, which will now be on top. Season burgers generously with salt and pepper on the second side.
5. These burgers will cook very quickly, so prepare your buns with toppings and condiments as desired (placing any vegetables on the bottom bun makes the burger more stable and allows them to absorb juices that may drip from the patties).
6. Cook the patties: using your hands or a spatula, carefully lay the patties on the grill over the hottest part of the flame. If using charcoal, leave the lid open. If using gas, keep the lid closed as much as possible. Let cook, undisturbed, until the patties are well charred and juices start to pool on their top surfaces, about 1 minute.
7. Carefully flip the patties (there will most likely be flare-ups; this is OK). Add a slice of cheese, if using, to each, and continue to cook until the meat is just barely cooked through, about 15 seconds.
8. Transfer the patties to the buns, add any extra toppings or or condiments as desired, close, and serve immediately.
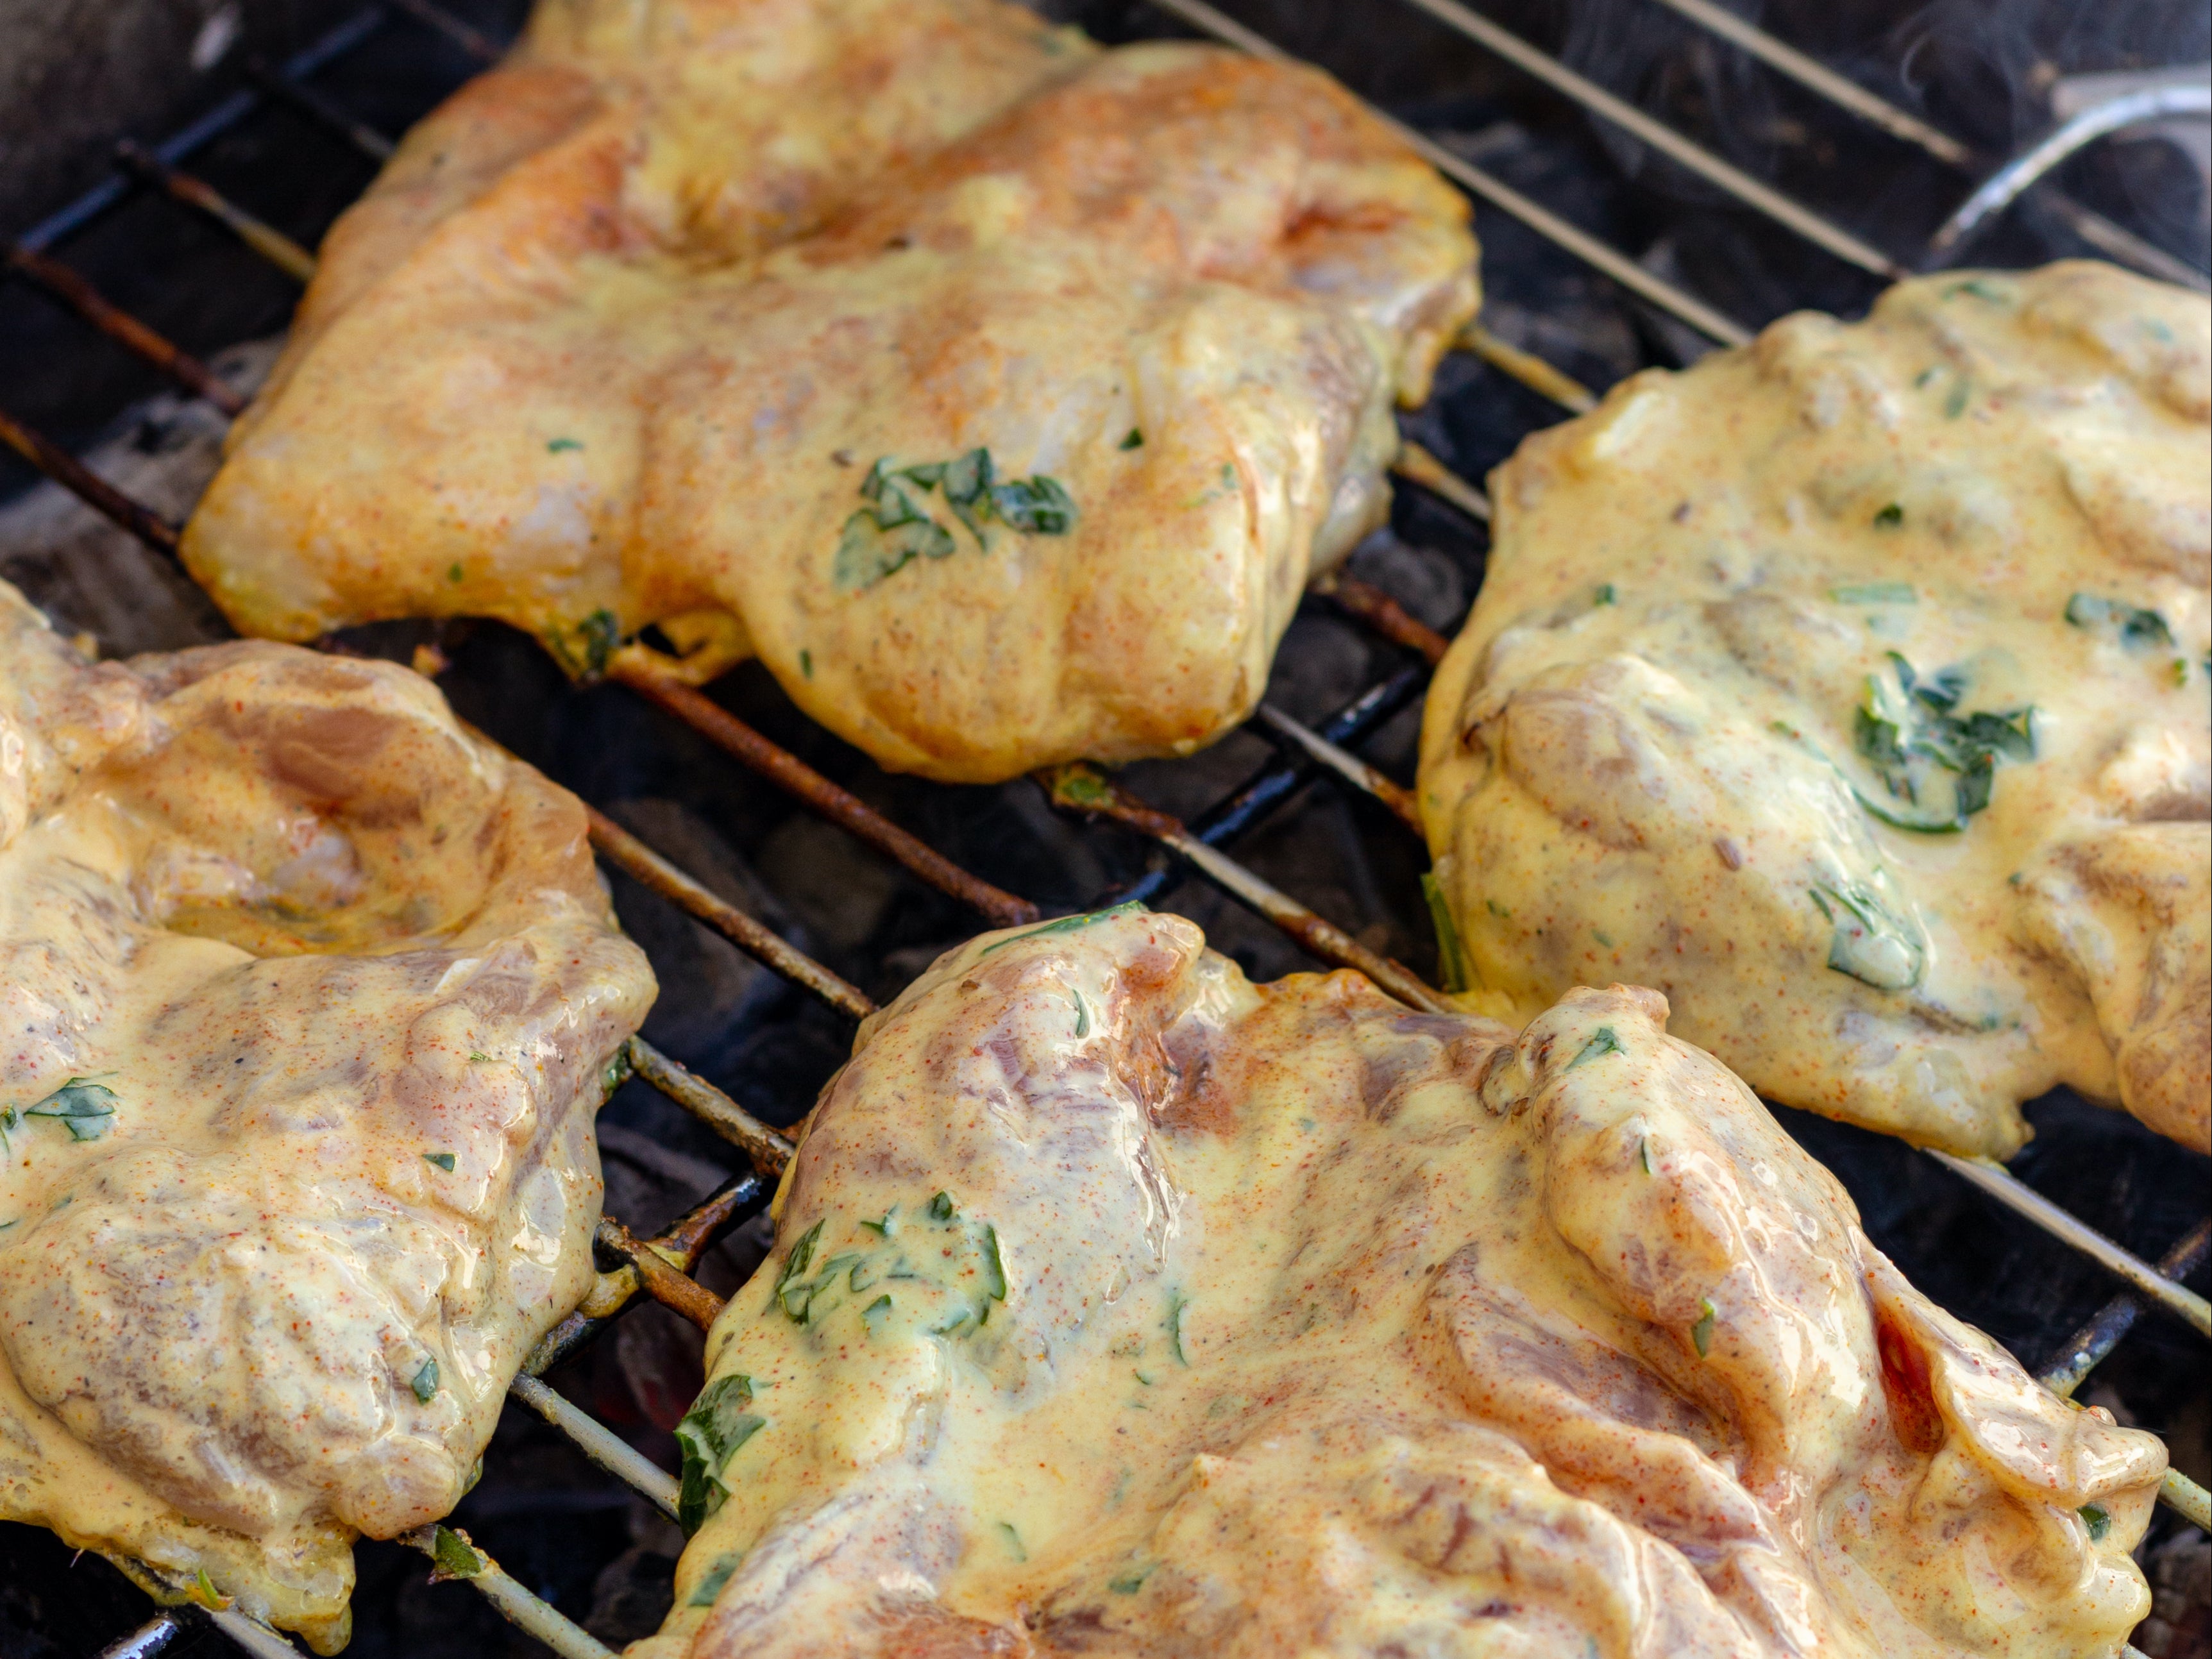
Grilled chicken with yoghurt marinade
By: Lidey Heuck
Boneless skinless chicken thighs are a reliable choice when it comes to grilling chicken. They’re thinner than breasts, so they cook more evenly, and the higher fat content makes them difficult to overcook. In this recipe inspired by Turkish chicken kebabs, a yoghurt and herb marinade makes them supremely tender and helps them brown beautifully on the grill. While some citrus-heavy marinades begin to break down chicken after just a few hours, this marinade uses only the zest, saving the juice for a quick squeeze before serving. The result is incredibly tender chicken you can prep up to a day in advance. Oregano and thyme work well together here, but feel free to play around with herbs and use what you have on hand, or substitute dried herbs in a pinch.
Total time: 20 minutes, plus at least 3 hours’ marinating
Serves: 4
Ingredients:
130g plain whole-milk yoghurt
2 garlic cloves, grated
1 tbsp chopped fresh oregano (or 1 tsp dried oregano)
1½ tsp minced fresh thyme (or ½ tsp dried thyme)
1 tbsp olive oil, plus more for the grill or pan
1 tsp salt, plus more for serving
¼ tsp black pepper, plus more for serving
1 lemon
900g boneless skinless chicken thighs
Chopped fresh parsley, for serving (optional)
Method:
1. In a large bowl, combine the yoghurt, garlic, oregano, thyme, olive oil, salt and pepper. Zest the lemon over the bowl, reserving the rest of the lemon for serving. Whisk until smooth.
2. Add the chicken thighs, toss to coat, then cover and refrigerate for at least 3 hours, or up to 24. Remove chicken from the refrigerator 30 minutes before cooking.
3. If using a grill, clean and oil the grates. Set the grill to medium-high or heat a grill pan slicked with olive oil on the stovetop over medium-high. Grill the chicken for 6 to 8 minutes on each side (depending on the thickness of the thighs), covering the grill halfway through if necessary to retain heat, until cooked through.
4. Transfer the chicken thighs to a platter and squeeze half the lemon over them. Sprinkle with salt, pepper and parsley, and serve with lemon wedges on the side if desired.
Cold noodle salad with spicy peanut sauce
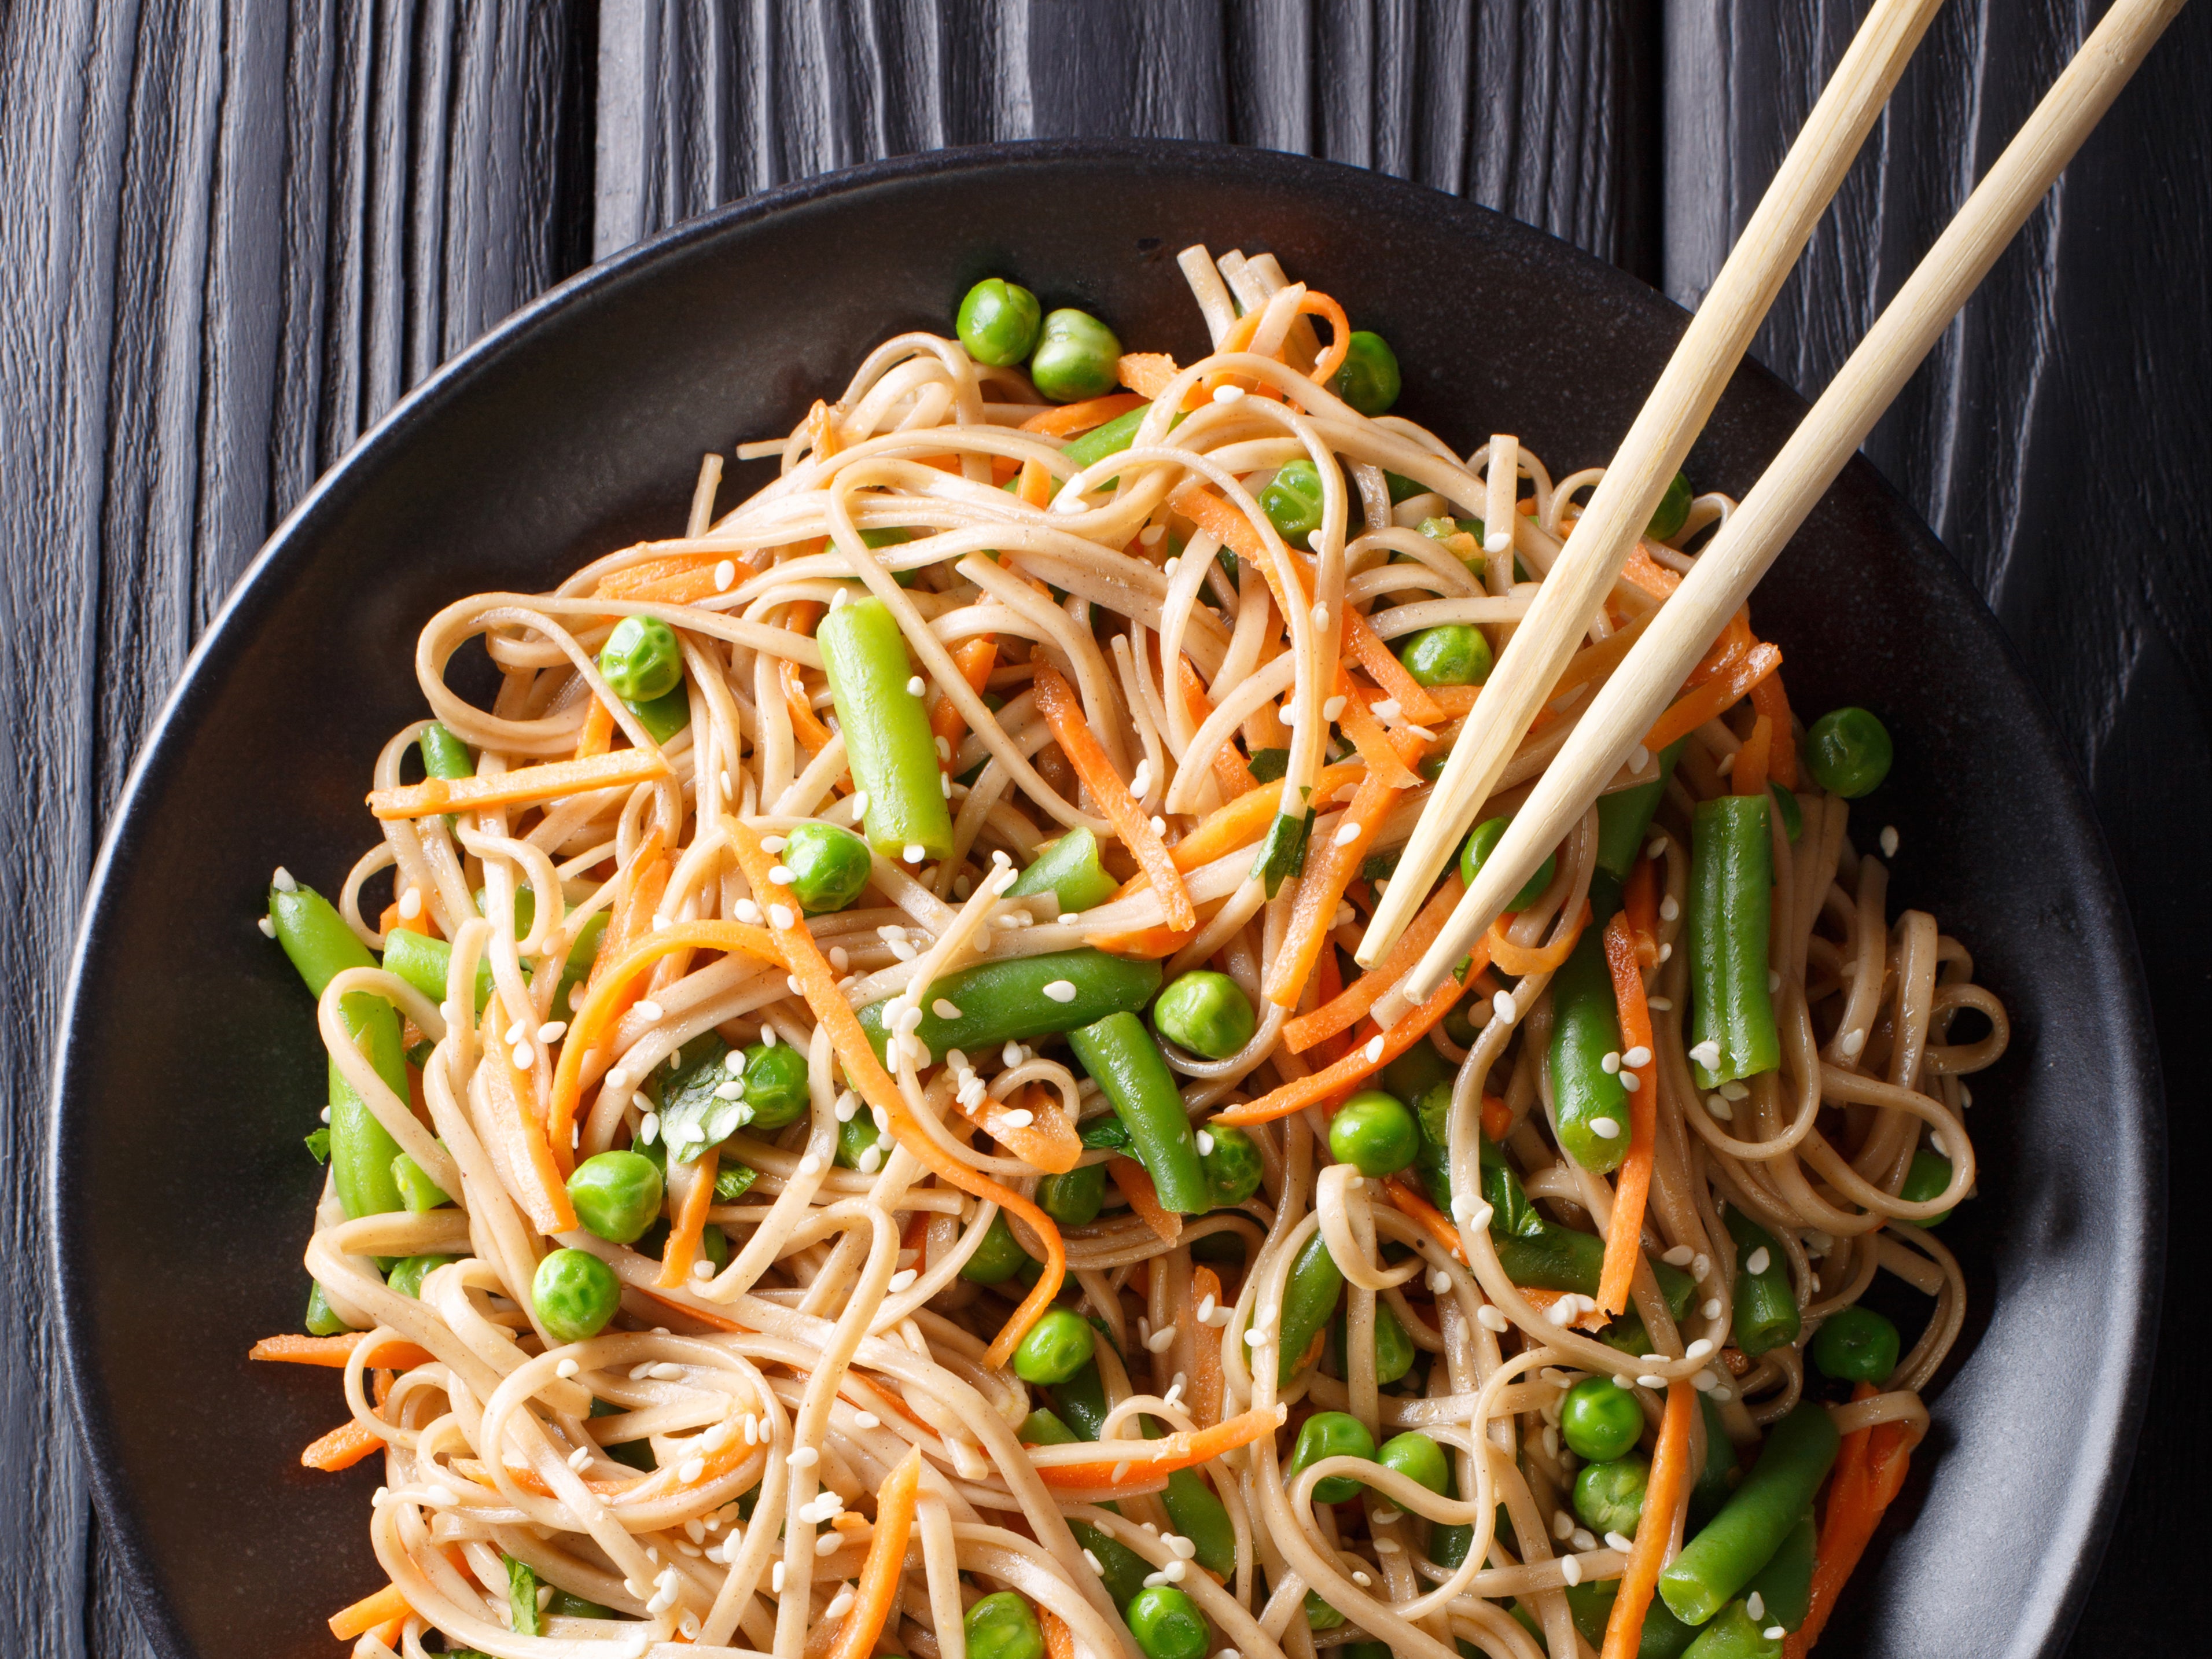
By: Hetty McKinnon
Soba, Japanese buckwheat noodles, are ideal for salads because they taste particularly great when served cold. Crunchy vegetables are highlighted here, adding lots of crisp, fresh texture. Substitute with any raw vegetables you have on hand, such as cabbage, carrot, fennel, asparagus, broccoli or cauliflower. The spicy peanut sauce is very adaptable: if you don’t want to use peanut butter, you can use any nut or seed butter, like cashew, almond, sunflower or even tahini. Both the soba and the peanut sauce can be prepared ahead of time and stored in the fridge overnight, but wait to combine them until you are ready to eat for the best texture and consistency. The peanut sauce thickens as it sits, so add a tablespoon or two of water to loosen it up, if necessary.
Total time: 20 minutes
Serves: 4
Ingredients:
For the salad:
Salt
300g soba noodles
1 medium courgette or cucumber (about 170g)
5 radishes (about 120g)
1 bell pepper (any colour)
1 tbsp sesame oil
70g roasted salted peanuts, roughly chopped
2 spring onions, trimmed and finely chopped
Handful of coriander leaves
1 lime, cut into wedges for serving
For the spicy peanut sauce:
70g smooth peanut butter (not natural)
60ml soy sauce
2 tbsp maple syrup
2 tbsp lime juice (from 1 lime)
1 tbsp sesame oil
2 tsp chilli oil or hot sauce, plus more to taste
1 garlic clove, grated
Method:
1. Bring a pot of salted water to the boil. Add the soba, stir to prevent sticking, and cook according to package instructions until just tender. Rinse under cold water until the noodles are completely cold.
2. Meanwhile, make the sauce: in a medium bowl, combine the peanut butter, soy sauce, maple syrup, lime juice, sesame oil, chilli oil or hot sauce, and garlic. Add 60-120ml water, 1 tbsp at a time, and whisk until the sauce is a pourable consistency. Taste and add more chilli oil or hot sauce as desired; set aside.
3. Cut the courgette or cucumber and radishes into ⅓cm thick slices, then cut into thin matchsticks. Slice the peppers into ⅓cm pieces. Place them all in a large bowl.
4. Loosen the soba noodles by running them under some water, then allow to drain again. Add them to the vegetables, add the remaining 1 tbsp sesame oil and toss to combine.
5. When you are ready to serve, drizzle with spicy peanut sauce and top with peanuts, scallions and cilantro. Serve immediately, with lime wedges alongside.
© The New York Times
Join our commenting forum
Join thought-provoking conversations, follow other Independent readers and see their replies
Comments
Bookmark popover
Removed from bookmarks